Overview
The Azure Data Lake Gen2 integration process involves the following steps:

Who Can Create?
Only users with the Organization Admin or Owner roles are authorized to create integrations. Learn more
1. Register an App in Microsoft Azure
- Open Microsoft Azure and search for the App registrations in the search bar.
- Click App registrations.
- Click +New registration and enter a name for your application.
- Note the Application (client) ID and the Directory (tenant) ID from the Application overview page, which are required for the integration.
2. Create a Client Secret
- Once you create an application, on the left-side panel navigate to Certificates & secrets.
- Click +New client secret to create a new secret for the application.
- Enter a description for the client secret.
- Select a timeframe from the list when the integration expires (the recommended setting is the longest period).
- Click Add. A confirmation message is displayed, and the client secret is added to the application.
Copy the secret value and store it for later use, because you cannot access it again. The secret value is required in the Integration phase.
3. Create a Storage Account
Open Microsoft Azure and search for the Storage accounts in the search bar.
Select a Storage account or create a new account if you do not have one.
When you create Storage Account under the Advanced tab, go to Data Lake Storage Gen2 and mark Enable hierarchical namespace.
See Create a Storage account for more information on creating a storage account in Azure.
4. Create a Container
- Open Microsoft Azure and search & select Storage accounts in the search bar.
- Select the desired Storage account from the list.
- Select Containers from the left portal menu.
- Choose the desired Container from the list, or see Create a container to create a container.
5. Add an IAM Role Assignments to the Container
- Select the chosen container, the one you will integrate with Dataloop. Refer to the previous section to view the instructions to identify or create a container.
- From the left portal menu, select Access Control (IAM).
- Click Add.
- Select Add role assignment.
- Search and select Storage Data Contributor from the Role list, and click Next.
- Under Members section, make sure Assign access to” is set to User, group, or service principals.
- Under Members section, click on Select members.
- On the search bar enter your registration app’s name which you created earlier, choose it and click Select.
- Click Review+sign.
6. Create the Azure Client Secret Integration
Who Can Create?
Only users with the Organization Admin or Owner roles are authorized to create integrations. Learn more
Log in to the Dataloop platform.
From the left-side panel, select Integrations.
Click Create Integration -> Create Storage Integration. A pop-up window is displayed.
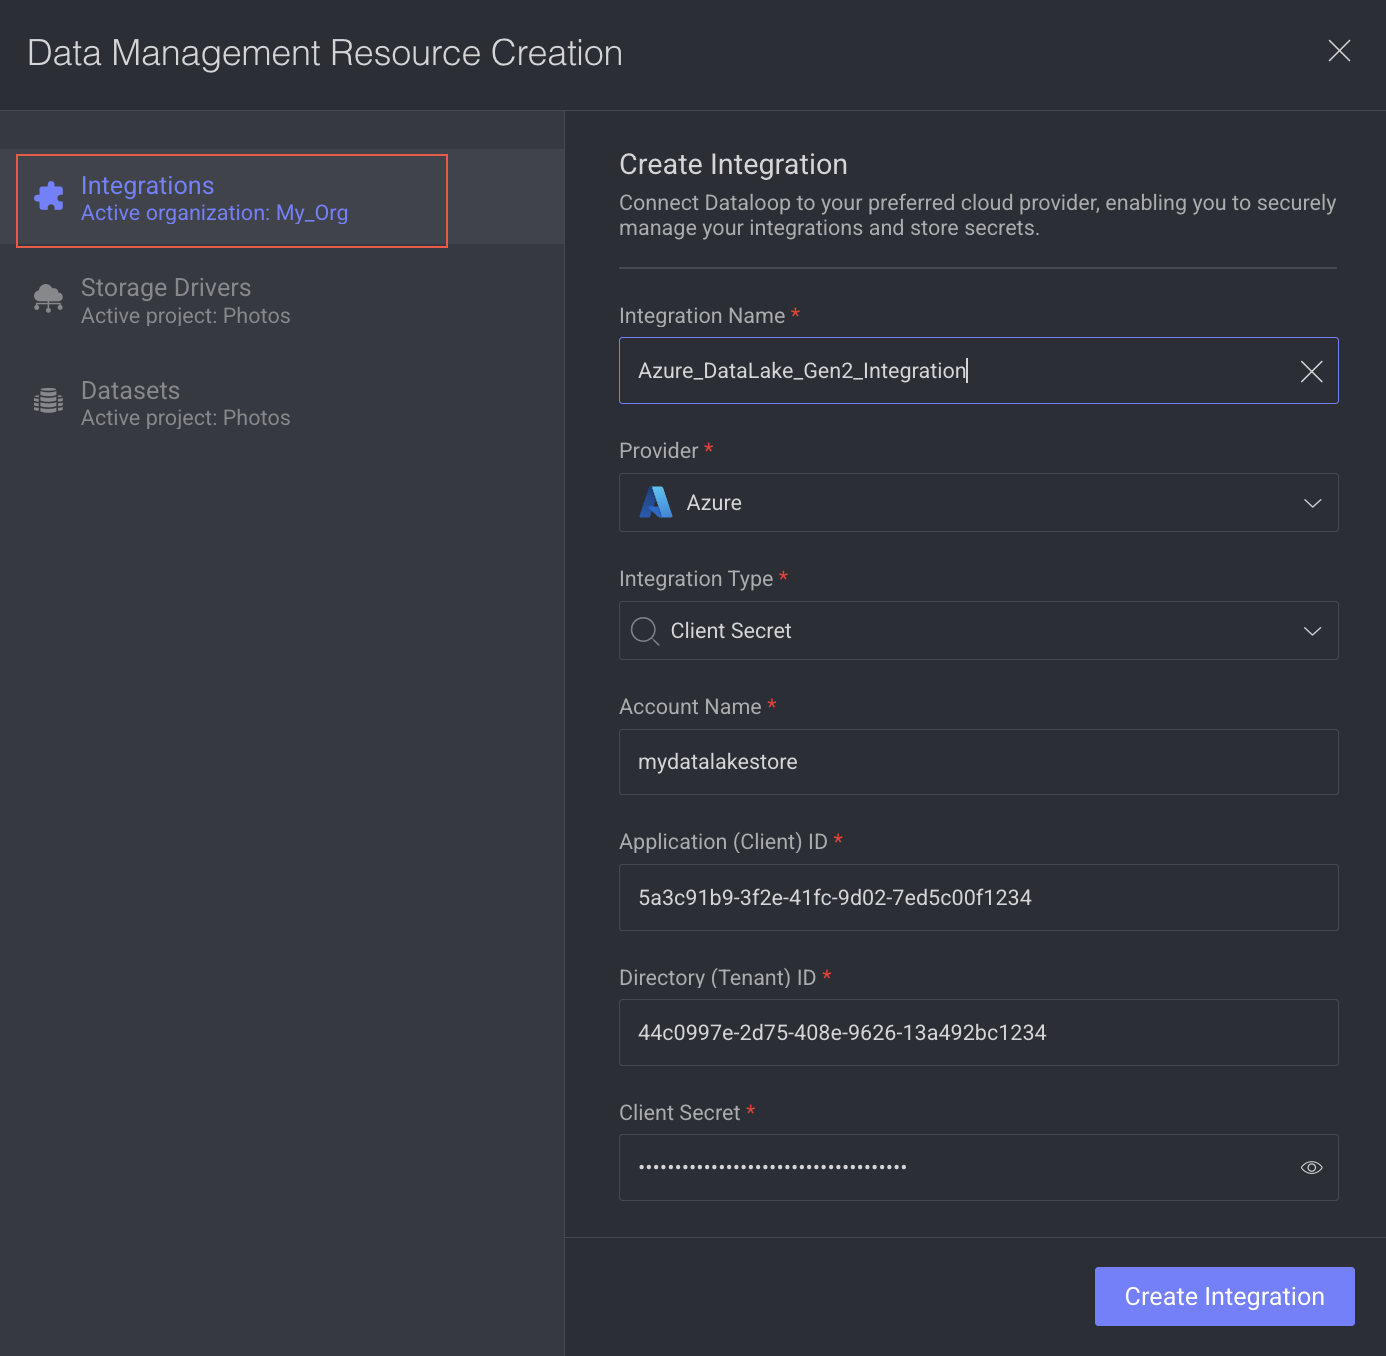
Integration Name: Enter a Name for the integration.
Provider: Select Azure from the list.
Integration Type: Select the Client Secret from the list.
Account Name: Enter your storage account Name where the container is located.
Application (Client) ID: Enter the registration app client ID that you noted while registering an application earlier.
Directory (Tenant) ID: Enter the registration app tenant ID that you noted while registering the application earlier.
Client Secret: Enter the client secret’s value that you noted while creating the new client secret.
Click Create Integration. A confirmation message is displayed.
7. Create an Azure Data Lake Gen2 Storage Driver
To create, see the Create an Azure Data Lake Gen2 Storage Driver topic.