Item Classification

To classify a file item with a label:
- Start the assignment by going into the respective annotation studio for the file item.
- Select the Classification tool (it is auto-selected if it's the only annotation tool in the recipe).
- Select and click a class/label from the labels list (label picker) to create classification annotations.
- The newly created annotation can be seen:
A. In the annotation list.
B. For Image items - as a label chip at the top of the image.
Item Classification Features
Auto Next Item
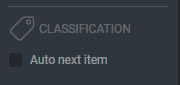
When the task requires only a single class per image, enabling the Auto next item feature will automatically load the next item as soon as a class is selected, to save time.
Auto Complete
Enabling “Autocomplete” (shown only after ‘auto next item’ is checked) will automatically set an image item to ‘Completed’ status when moving to the next item.
Text Classification
The Classification tool enables applying a label class to an entire text document.
- Click on the classification tool.
- Click the label(s) from the label list to create a classification annotation of the text. The newly created annotation can be seen in the annotation list on the right side of the screen and as a label above the text.
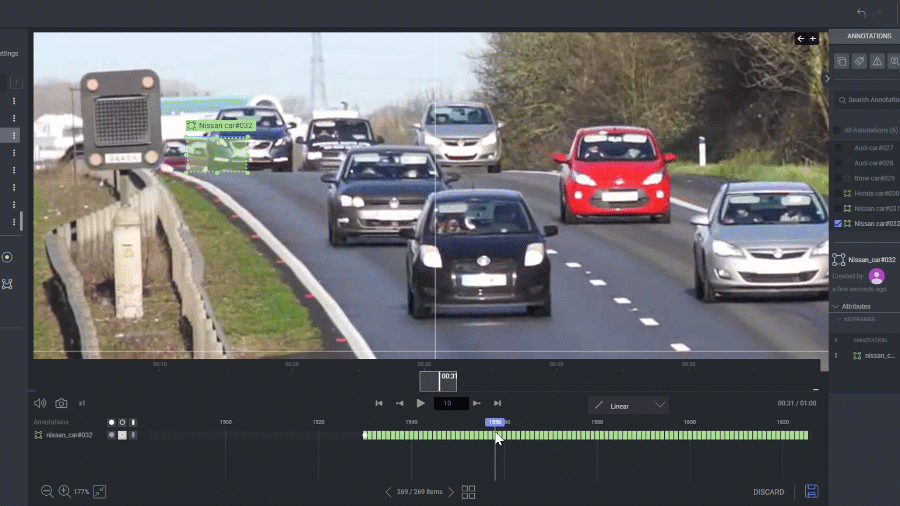
Video Scene Classification
Classifying a video scene is similar to how images are classified, with the main difference being that a scene has Start and End times.
- To classify scenes in a video, navigate to the first frame and click on the label. The annotation will be created with the START keyframe and last until the very last frame of the video.
- Continue skipping frames until you reach the end of the scene and set the frame as the end time to conclude the annotation. See how to set the end time here.
- Alternatively, if you want to use that label again, you can simply hide it for any number of frames and unhide it once you need it again. Learn more about hidden frames here.
- Available on image and video items.
The Classification tool enables labeling/annotating an entire image or scene (in the case of a video file). For example, classification can be used to classify product images under categories, subcategories, and characteristics, such as men’s clothes, polo shirts, etc.
The Dataloop system has several important features designed to increase the productivity of classification annotation tasks.
Bulk Classification
Rapid and highly efficient item (image/video) classification can be done in bulk from the Task or assignment browser. To work in bulk classification:
-
A manager should enable Bulk classification mode from the recipe settings.
-
Double-click an assignment, and it will redirect to the assignment browser and not the annotation-studio.
-
Select the items [CTRL (Cmd for Mac)+Mouse click] you want to classify.
-
Click on the classification icon.
-
Select a class from the labels list, and approve the action by one of the 2 options.
- Classify - Simply adds the class to the item, but do not change its status
- Classify & Set Status - Adds the classification and opens a drop-down to select which status to add to the item (for example, COMPLETED by default, unless custom statuses were added to the task).
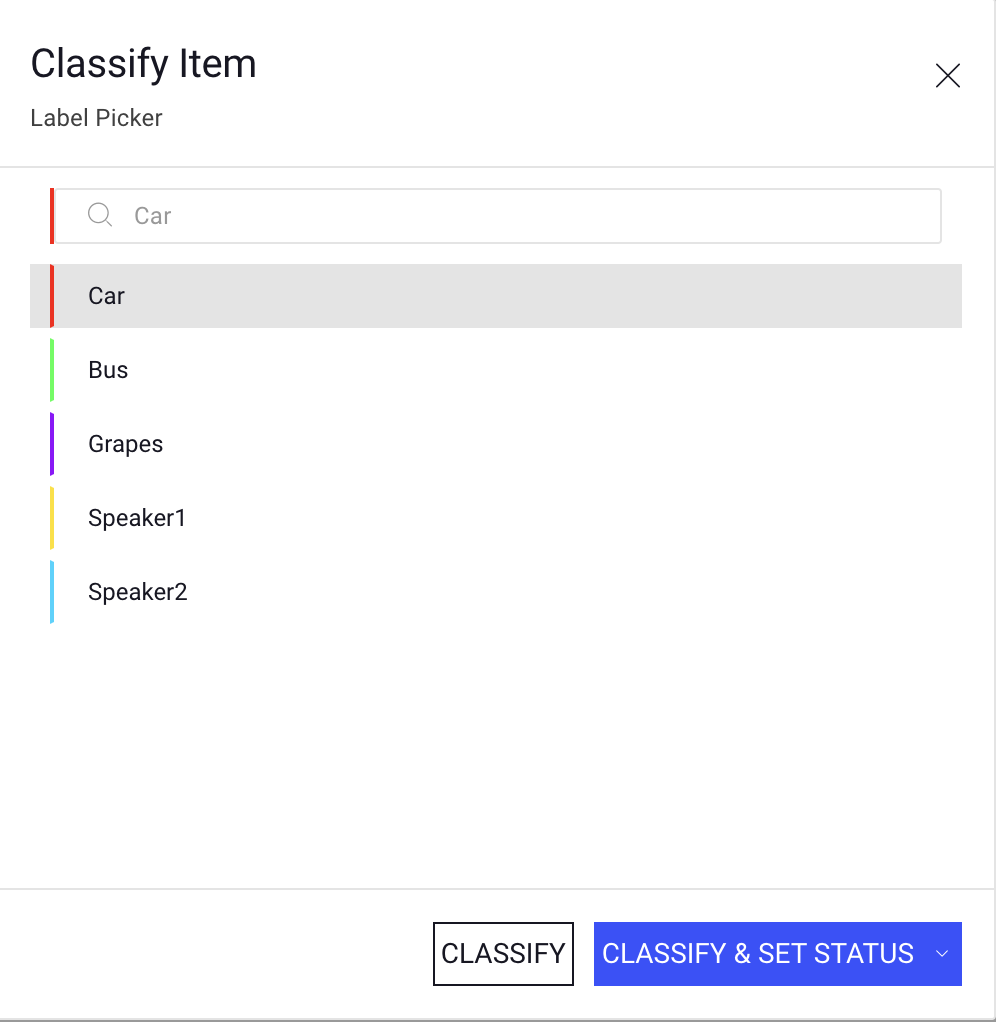
Bulk classification requires that all items are allocated to an assignment, and therefore it is disabled when the task is a Pulling based task, where items are pulled by assignees during work, and not in advance. Use only Allocation tasks for bulk classification work.