Bounding box
- 25 Feb 2025
- Print
- DarkLight
- PDF
Bounding box
- Updated On 25 Feb 2025
- Print
- DarkLight
- PDF
Article summary
Did you find this summary helpful?
Thank you for your feedback
Overview
A Bounding Box Annotation Tool is a software feature used in image and video analysis to define and label regions of interest within the visual content. It involves drawing rectangular boxes around objects or areas within an image to mark their boundaries.
Create a bounding box annotation

Go into the annotation studio.
Select the Box tool.
Draw the box on the canvas.
- 1-Click method – click and hold the mouse button on the point where you would like the top-left corner of the bounding box to be; drag the mouse to the bottom-right corner of the box; release the mouse button.
- 2-Click method – click once on the point where you would like the top-left corner of the bounding box to be; then click again in the bottom-right corner of the box.
Drawing a box inside a box - While toggled ON, the bounding-box tool allows to either drag & drop existing boxes when clicking on them, or draw new box annotation when clicking anywhere else. Drawing a box inside an existing box annotation is available when holding down the SHIFT key and using the mouse to draw the new box.
Use Pixel Measurement to create accurate bounding boxes measured by pixel size.
This feature can be enabled or disabled by toggling ON/OFF the Pixel Measurement toggle in the Annotation Settings.
Editing bounding boxes
- The Box tool must be selected in order to edit bounding boxes.
- Click on the box you would like to edit to have it selected.
- Click and hold on the box and drag the cursor to move the box on the canvas.
- Click and hold any of the 8 points on the box's border and drag to resize the box.
- Hold SHIFT+Arrow-key to make fine position adjustments to the box location.
Box to polygon & box to semantic tools
Automatically convert a bounding box into a tight contour polygon around an object or a semantic layer.
Select a bounding box and activate box-to-polygon or box-to-semantic from the 3-dot action button above the annotations list.
OCR
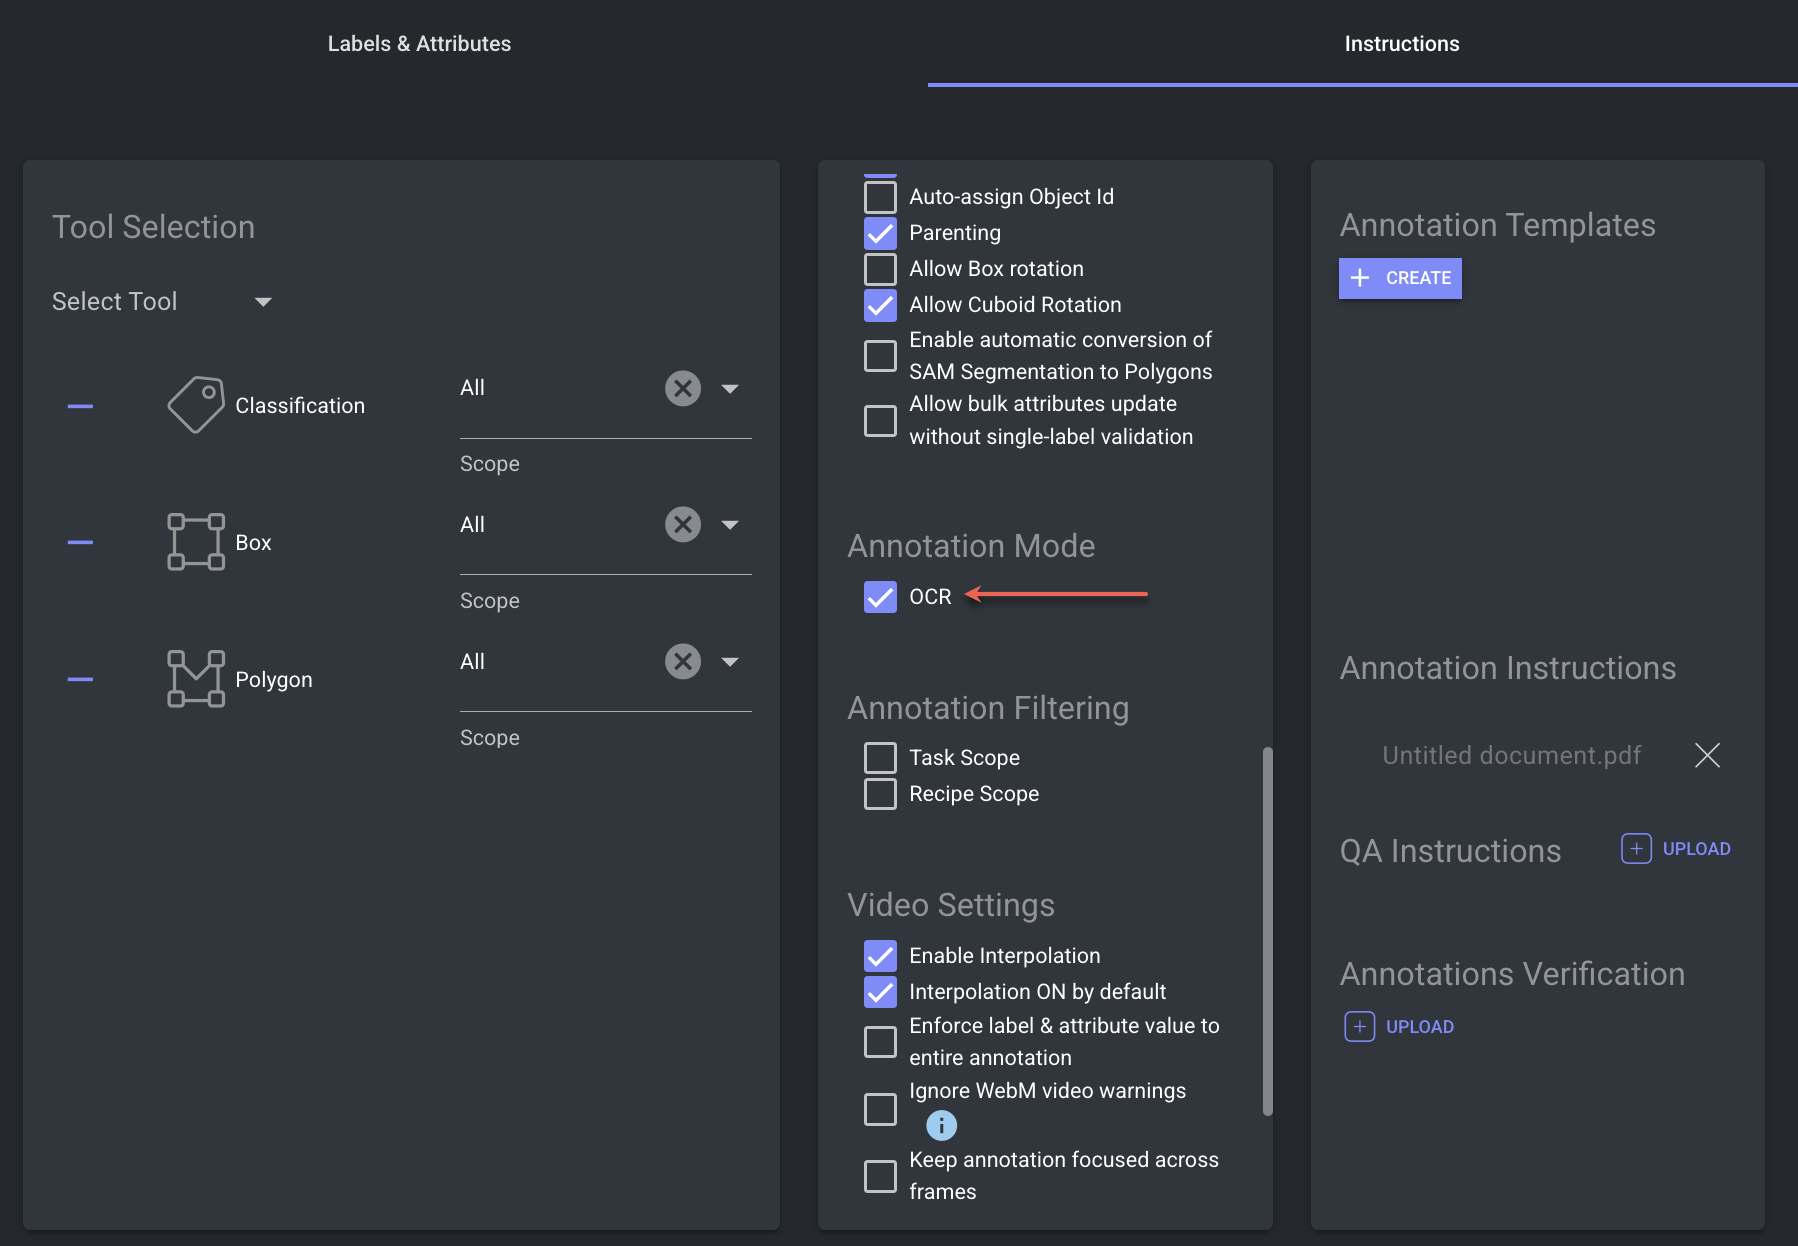
Dataloop’s OCR (Optical Character Recognition) feature allows users to extract and annotate text from images using bounding boxes or polygons. Ideal for document processing, license plate recognition, and similar tasks, this feature enables annotators to manually input detected text, which is then linked to a "text" label. Once enabled in the recipe, it streamlines text-based data collection, enhancing AI model training and automation.
OCR mode must be enabled in the recipe [instructions]. Annotation manager and above can enable the OCR feature. Once enabled, a new label called text will be added to the label list.
Use the OCR feature
Select the Text Label: Choose the appropriate text label from the label picker.
Draw a Bounding Box: Outline the text in the image by drawing a bounding box. A text entry dialog will appear, requiring annotators to input the recognized text (OCR text). This step cannot be skipped.
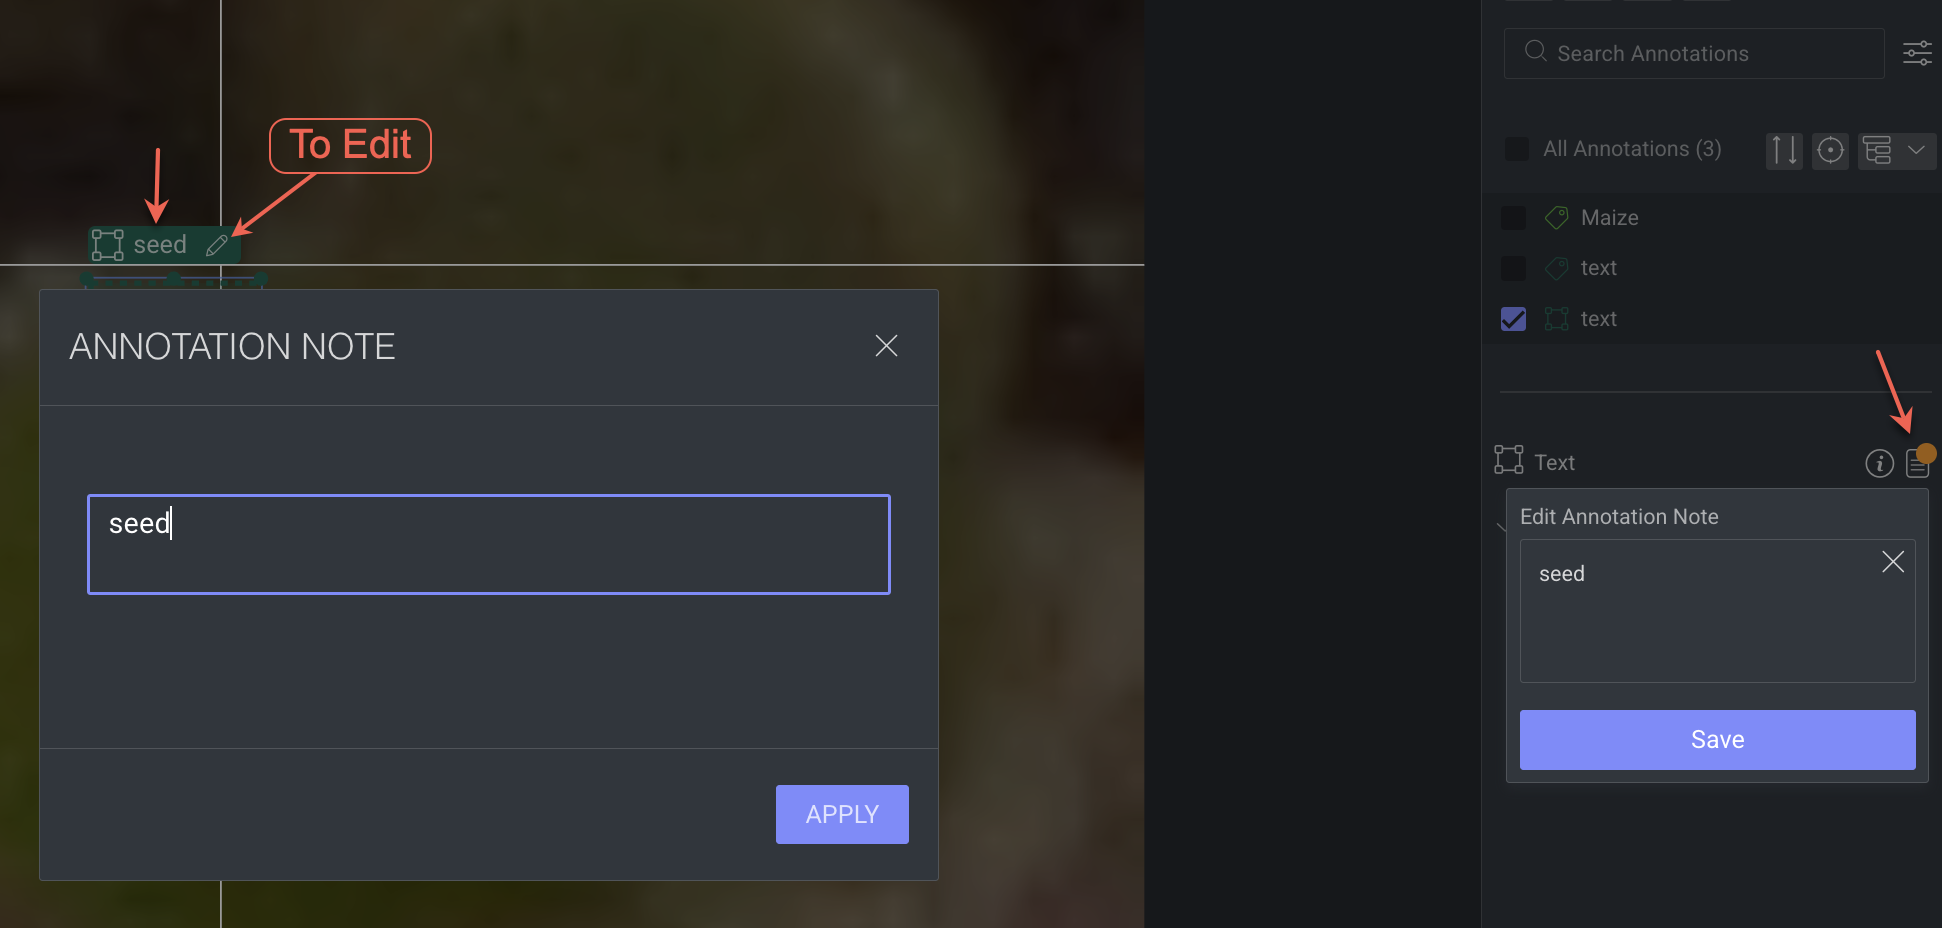
Enter and Confirm the Text: Type the recognized text into the dialog and click Confirm. The annotation label will automatically update to match the entered text, which is saved as an annotation note on the right-side panel.
Editing the Text: To modify the entered text, select the annotation and click on the annotation note.
Box rotation
Box rotation mode allows the annotator to rotate the box in any direction. When enabling this option, the box annotation information includes the rotation angle.
- Box-rotation mode must first be enabled from recipe settings. Check the option Allow box rotation in Annotation Controls section.
- Box rotation is applicable to image only, and not supported for video annotation.