- 28 Nov 2024
- Print
- DarkLight
- PDF
Issues
- Updated On 28 Nov 2024
- Print
- DarkLight
- PDF
Overview
The issues tab in the Labeling page provides you with a list of issues with annotations. The issues are categorized as follows:
- My Issues: There are issues with annotations created by the current user that are pending correction.
- Project Issues: All issues created by users in the project.
While reviewing Project Issues, users can use additional filters as the following:
- Filter by Project Issues or My Issues: Select between Project Issues and My Issues. As a result, the relevant data will be displayed in tabular format. Note that the number of issues is displayed as per the user filter update.
- Filter by All Users: This filter enables you to view a list of users with their matching issues. Select from the drop-down list between ‘all users’ and a specific user’s email. As a result, the relevant data will be displayed in a tabular structure, including the following columns:
- Assignee column: Lists the assignment user or assignee.
- Task column: Lists the task with its relevant open issue. Note that this column can be sorted.
- Filter by All Tasks: This filter enables you to view tasks with their matching issues. Since this filter is a multi-select one, select between ‘all tasks’ and specific tasks.
- Filter by Issue Type: This filter enables you to view tasks based on the issue types, such as issue and note.
Who Can View Issues?
Each role has its own unique viewing option, as follows:
- Annotation manager: This role includes My Issues by default. Once Project Issues filter is selected, it displays all issues in the project subjected to the filter tasks by ORG project setting.
- Annotator: Annotator can view only My Issues options.
- Developer and Project Manager: This role includes** Project Issues** and All Users by default.
Main Sections of Issues Tab
The Issue tab can be broken down into the following sections (marked on the screenshot), as outlined below:
Section 1: Create Task and Refresh Buttons
- Create Task: To create a Labeling or a QA task, click on the Create Task button. For more information, see the Annotation and QA tasks article.
- Create Labeling Workflow: To create an Annotation or a QA task using the pipeline, click on the dropdown arrow -> Create Labeling Workflow option.
- Refresh button: To refresh the list of tasks, assignments, or issues, click on the Refresh button.
Section 2: Search and Filters
The Issues tab enables you to search and filter the tasks, assignments, or issues. You have the flexibility to choose multiple filter criteria.
Search
The Issue tab enables you to enter the following search criteria to search tasks, assignments, and issues in the Search field:
- Tasks: To search for a task, utilize the following criteria:
- Task Name: This displays tasks with the matching task name.
- Task ID: It lists the tasks based on their unique task ID. You can either use the Copy Task ID icon next to the Task Name or use the URL to get the Task ID.
- Dataset name: This displays tasks with the matching dataset name.
- Assignments: To search an assignment, utilize the following criteria:
- Assignment Name: This displays the assignment with the matching name.
- Task ID: This lists assignments based on the task ID of the assignment. You can either use the Copy Task ID icon next to the Task Name or use the URL to get the Task ID.
- Issues: To search an issue, use the Annotation Name. This displays the issues based on the annotation name.
After entering the search criteria, you can begin the search by either pressing the Enter (or Return) key or by clicking outside the Search field.
Filter
The Issues tab enables you to use the following filter criteria to filter issues, when you click on the Select filters:
Criteria | Description |
---|---|
Open Issues | This displays the list of items with annotations that have open issues. |
For Review | This displays the list of items with annotations that have issues corrected for review. |
Filter Using the Username: Select the Assignment's Username from the Select user dropdown list to filter the assignments and issues. After you select the filter criteria, the system initiates the search function.
Clear Filters: To clear the search or filter criteria, click on the Clear Filters button.
Section 3: List of Issues
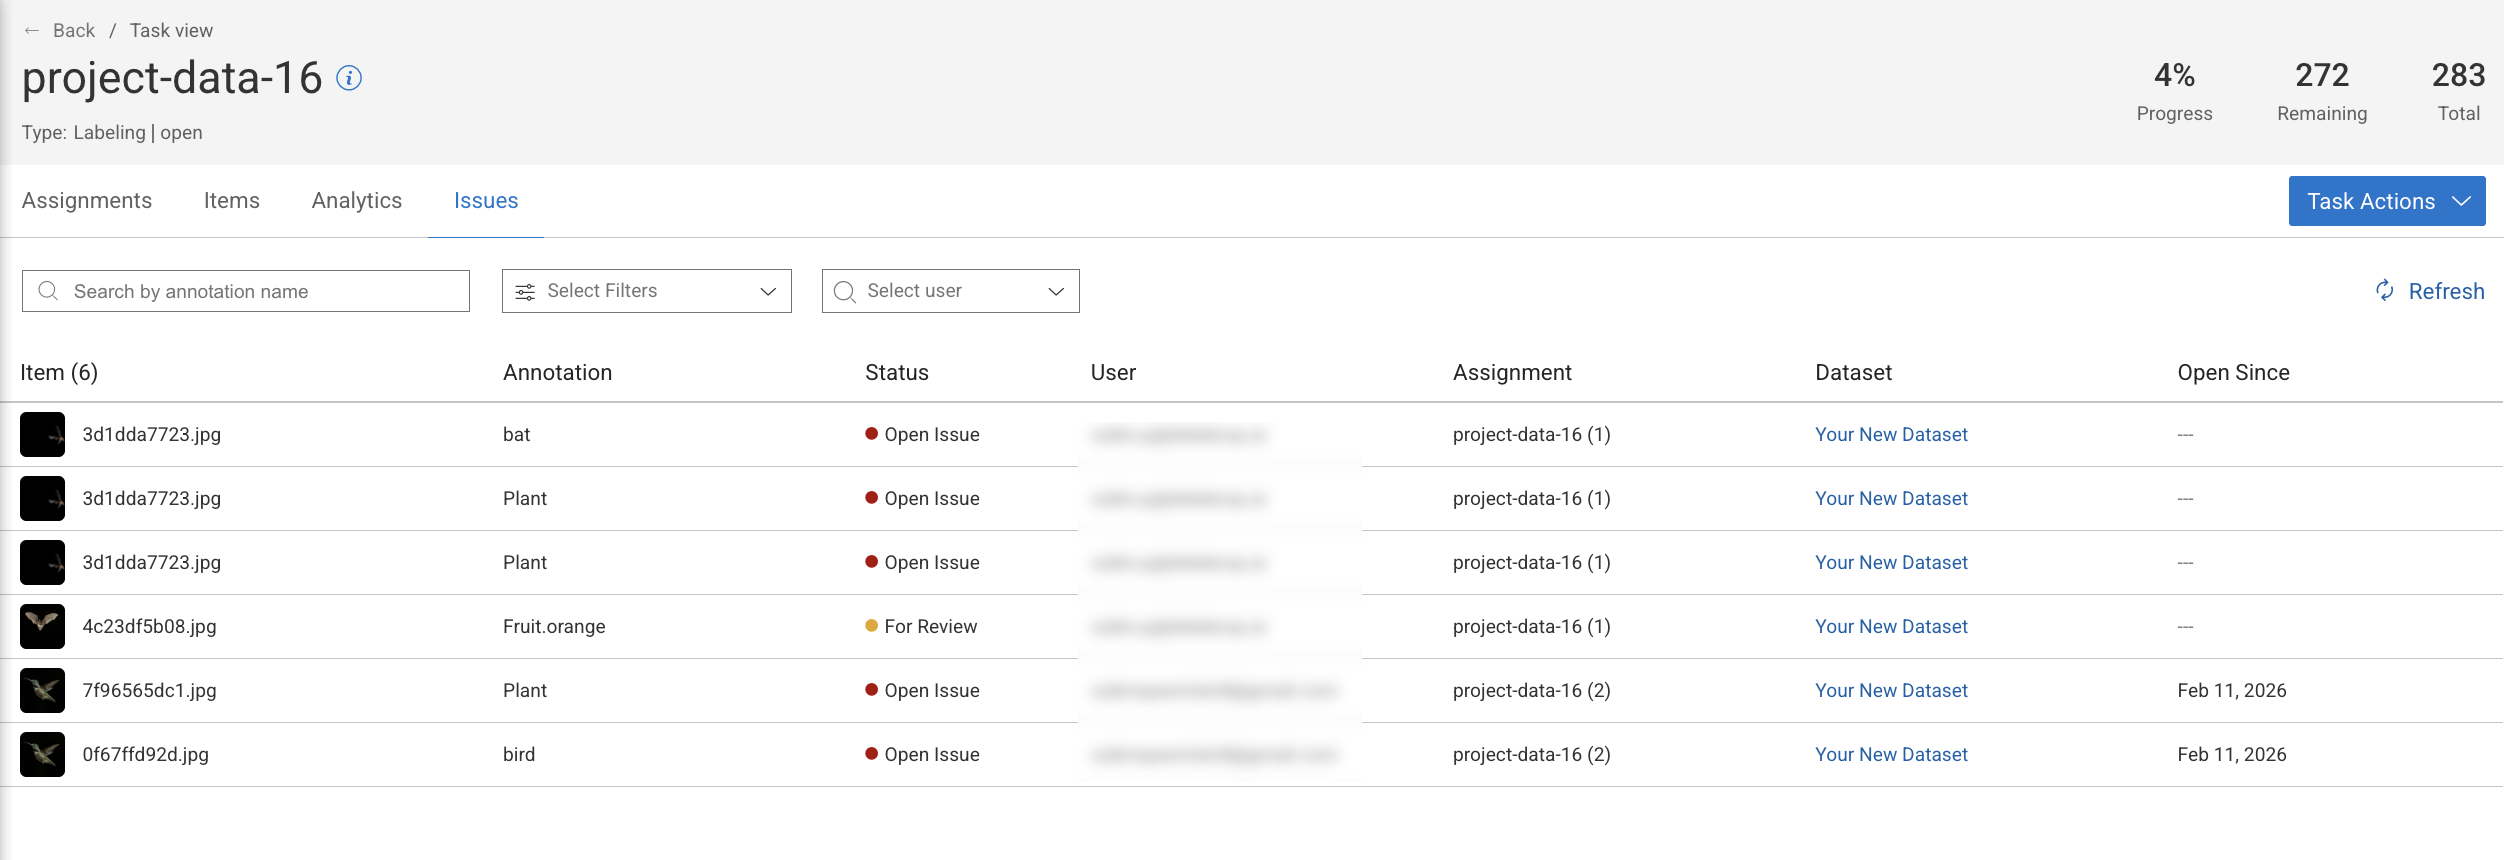
The Issues tab presents a table listing items with annotation issues, and it provides details for each item in the respective columns.
- Item: This displays the thumbnail view of the item.
- Annotation: This displays the label name used to annotate the item.
- Assignment: This displays the name of the item's assignment.
- Dataset: This displays the name of the dataset.
- Status: This displays the current status of the issue.
- Open Since: This displays the creation date of the issue.
Also,
- Click on the More Details to view the details including, File Name, Item ID, Dataset ID, etc.
- Clicking on the Annotation label, Assignment Name, and Dataset takes you to the respective page.
- Double-clicking on the issue takes you to the respective type of annotation studio of the item.
Section 4: View the Number of Tasks, Assignments, Issues, and Reviews
The Labeling Tasks page provides you the number of Tasks, Assignments, Issues, and Reviews available. You can view the following information on the top-right side of the Labeling Tasks page.
When to Create an Issue?
During a QA task, the QA tester, often the annotation manager, reviews the completed annotations for accuracy and quality. If issues are identified in specific annotations, the tester documents these problems by opening issues within the platform, ensuring that the concerns are tracked and addressed for resolution.
To create an issue,
- In the Annotation Studio, during the QA review of an annotation task, hover over the annotation in the annotation list.
- Click on the Open Issue (caution) icon. A red caution icon will appear on the annotation. This icon will also be displayed in the task list under a separate column..
- To add a note to the issue, see the Create a Note article.