- 21 Apr 2025
- Print
- DarkLight
- PDF
Manage Your Assignments
- Updated On 21 Apr 2025
- Print
- DarkLight
- PDF
Search and filters
The Assignment tab enables you to search and filter the assignments. You have the flexibility to choose multiple filter criteria.
Search
The Assignment tab enables you to enter the following search criteria to search assignments in the Search field. To search an assignment, utilize the following criteria:
* Assignment Name: This displays the assignment with the matching name.
* Task ID: This lists assignments based on the task ID of the assignment. You can either use the Copy Task ID icon next to the Task Name or use the URL to get the Task ID.
After entering the search criteria, you can begin the search by either pressing the Enter (or Return) key or by clicking outside the Search field.
Filter
The Assignment tab enables you to use the following filter criteria to filter assignments, when you click on the Select filters the following filter criteria will be listed:
Filter Type | Criteria | Description |
---|---|---|
Task Type | Labeling | This displays the assignments of those are Labeling-type tasks. |
Task Type | Review (QA) | This displays the assignments that are QA-type tasks. |
Priority | High | This displays the assignments with a high priority. |
Priority | Medium | This displays the assignments with a medium priority. |
Priority | Low | This displays the assignments with a low priority. |
Priority | N/A | This displays the assignments with no priority. |
Annotation Status | Open Issues | This displays the assignments with annotations that have open issues. |
Annotation Status | For Review | This displays the assignments with annotations that have issues corrected for review. |
- Select the Assignment's Username from the Select user dropdown list to filter the assignments and issues. After you select the filter criteria, the system initiates the search function.
- Clear Filters: To clear the search or filter criteria, click on the Clear Filters button.
Assignment actions
When you click on an assignment, the Assignment Actions action button is available on the right-side panel of the labeling tasks page, and the following list of actions displayed:

- Clear Batch: This allows you to clear the assignment batch of the tasks which are pulling tasks.
- Load Batch: This allows you to load the assignment batch of the tasks which are pulling tasks.
- Open Assignment Browser: This allows you to open and view the assignment browser page.
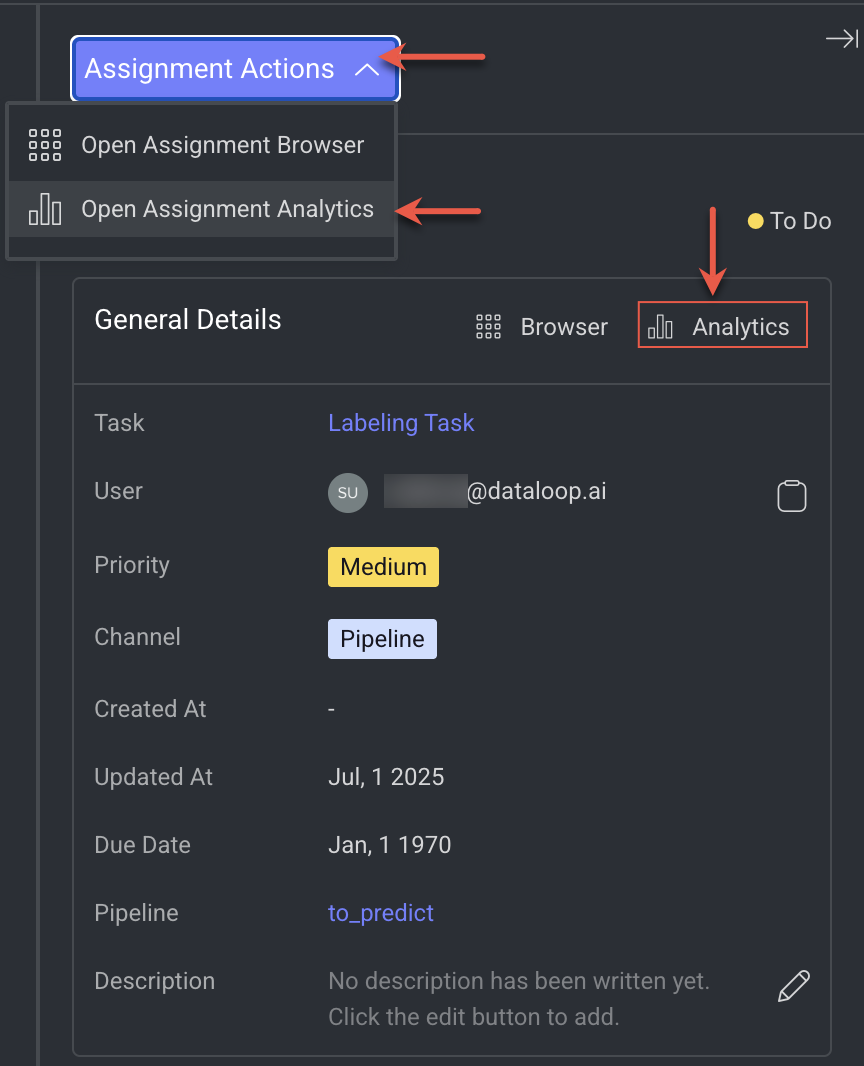
- Open Assignment Analytics: This allows you to open and view the Analytics page of the assignment. For more information, see the Analytics article.
- Reassign: This allows you to reassign the task to a new user.
Reassign tasks
To reassign a task, follow the instructions. Ensure you have the Annotation Manager role.
- Open the Labeling -> Tasks page from the left portal menu.
- Identify the task and click on the Ellipsis icon.
- Click Edit task. The edit task page is displayed.
- Select the Assignments section.
- Identify the user to whom you need to reassign and click Reassign.
- Search for or identify the user from the list and click Select Assignee.
- Click Apply Reassignment.
- Click Save Changes.
Reassign assignments
- Open the Labeling -> Tasks page from the left portal menu.
- Double-click on the task and click on the Ellipsis icon.
- Click Reassign. A Reassign Assignment page is displayed.
- Search for or use the filter to view available users.
- Identify the user and click Select Assignee.
- Click Apply Reassignment.
- Click Save Changes.
Redistribute tasks or assignments of a task
To remove a specific assignment and have its items distributed among active assignees. For example, if an assignee leaves the project:
You can now redistribute items based on the Metadata or DQL query by using Redistribution Settings.
To redistribute a task
- Open the Labeling -> Tasks page from the left portal menu.
- Click on the Ellipsis icon and select Edit task.
- Select the Assignments section from the list.
- Identify the user to be redistributed and click Redistribute. A Redistribute Assignment page is displayed.
- Select Available Users from the list and add them to the Assigned Users list, if needed.
- Click Redistribution Settings.
- Edit the following options and click Save Changes:
- Auto Distribution
- Only redistribute items with no annotations: This option is to keep the work already started in the original assignment and let the assignee complete it.
- Redistribution Context: Redistribute items with a specific Metadata Key/Value or with a DQL Query. It redistributes items to the assignees based on the specific context of their workload.
- Metadata Key/Value:
- Data type: String or Number
- Key and Value
- DQL Query
- Metadata Key/Value:
- Click Apply Redistribution.
- Click Save Changes.
To redistribute a specific assignment of a task
- Open the Workflows > Tasks page from the left portal menu.
- Double-click on the task and click on the Ellipsis icon.
- Click Redistribute.
- Refer to the To redistribute a task section and follow steps 5 onward.
Edit the workload of pipeline distribution tasks
You have the ability to adjust the workload distribution of incoming pipeline items in distribution-type tasks generated by the pipeline ('My Task' node).

- Editing the allocation of incoming pipeline items will affect only future workload, with no impact on the current assignments.
- To avoid future workload to inactive users, you can make the workload percentage to 0 by selecting manual distribution.
- You cannot remove existing users from the list.
- Open the Labeling > Tasks page from the left portal menu.
- Find the pipeline task and click on the 3-dots.
- Select Edit Task from the list.
- Select the 5. Assignments section from the left-side menu.
- Click on the Edit next to the % Items Workload column.
- Select available users and add them into the Assigned Users list.
- Click Confirm Workload.
Add contributors to distribution type - qualification tasks
- Open the Labeling > Tasks page from the left portal menu.
- Find the pipeline task and click on the 3-dots.
- Select Edit Task from the list.
- Select the 5. Assignments section from the left-side menu.
- Select available users and add them into the Assigned Users list.
- Click Apply Reassignment.