In the Dataloop platform, the Modalities feature enables users to establish connections between the main item (where the relation is initiated) and other associated items.
There are three types of modalities:
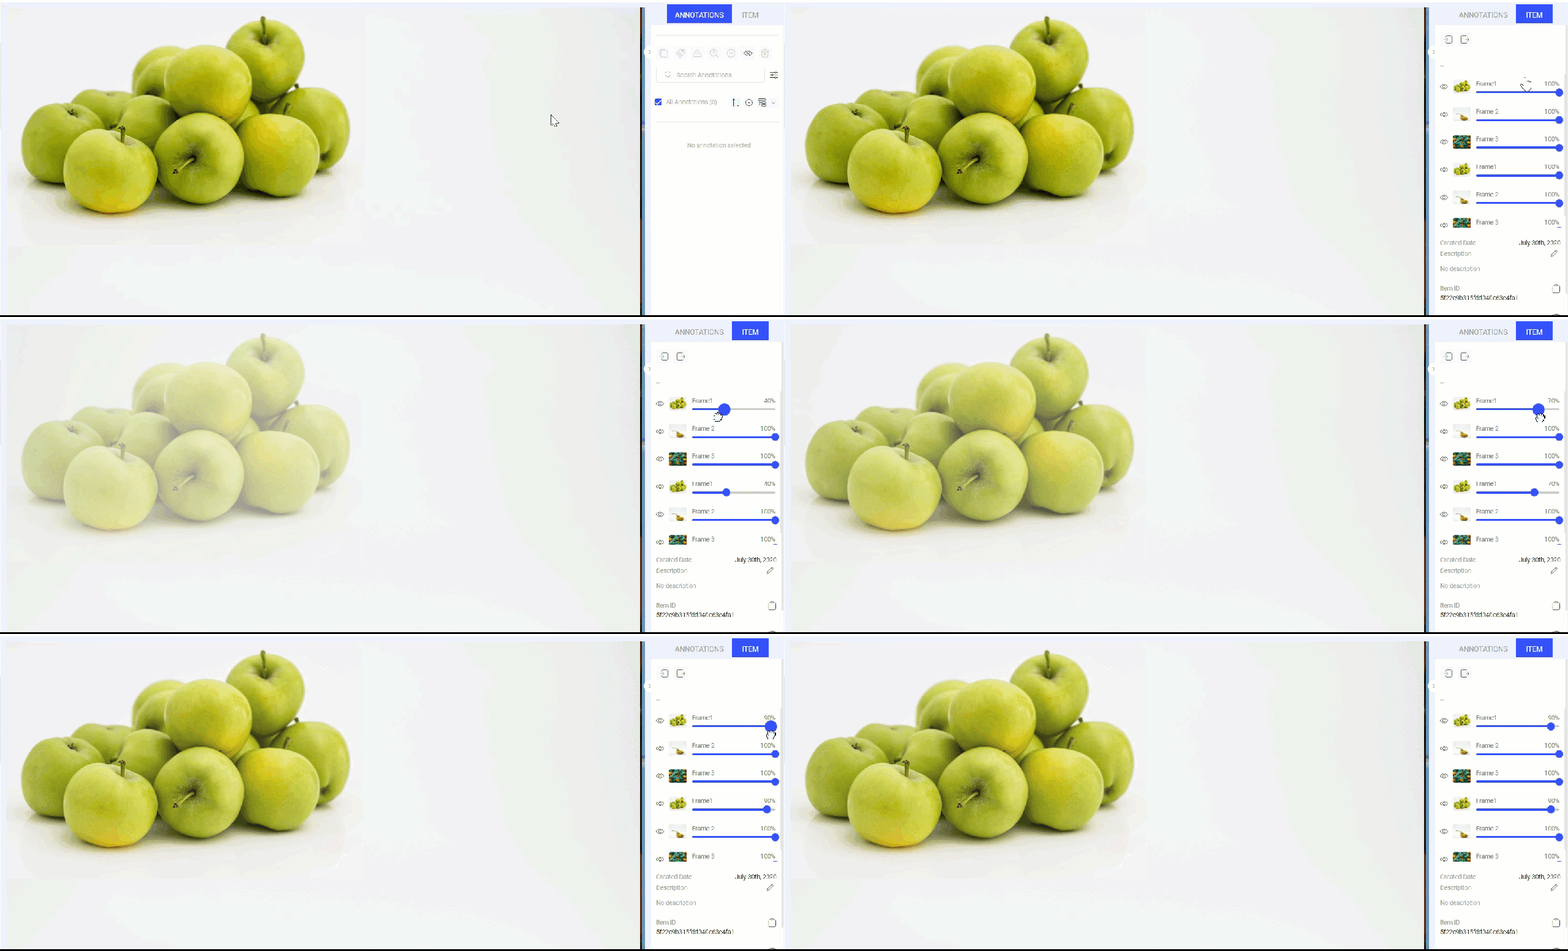
- Overlay: In the image annotation studio, Modalities defined within the main item are superimposed on top of each other. Users have the option to adjust the opacity level for each layer or toggle their visibility entirely. These modalities usually consist of images captured by different sensors but with the same content, such as day and night sensors. When a source image is loaded, the items designated as modalities load simultaneously.
- Replace: In an annotation studio, opening the main item will instead open the item defined as the replace-modality. This feature is commonly used when converting between formats. The main item in the unsupported format is used for data and annotation management in its context, while annotation work is carried out on a replaced modality in a supported format.
- Preview: The Preview modality allows for the presentation of reference items associated with the main item. This is often employed in scenarios like classifying retail-related photos, where the related items are product photos captured from various angles.
The Reference Item Viewer is integrated into your project as an application within the annotation studio, allowing you to display reference items. For comprehensive installation and setup guidance, read here.
Setting Up Modalities
Modalities are configured at the image level, as part of the image system metadata. This is done by including referenced images from the same dataset and assigning a custom name, which is also displayed in the annotation studio.
Typically, Modalities are established through the use of the SDK, allowing for bulk editing of system metadata for multiple items at once.
To add the modalities JSON structure to an item's metadata in the Dataloop platform, follow these steps:
- Open an item's metadata editor by clicking on the Edit icon of the Item Metadata field. You can do this either from the right-side panel in the dataset browser or from the Item tab of the annotation-studio.
- Add the following sample modalities JSON Structure outside the system:
"modalities": [
    {
        "type": "overlay", //the type of the modality-overlay
        "ref": "5ddfe6f22ef2cf70fd2b1a12", //The item id of the referenced image
        "name": "Frame1" //The name you provide for the modality, to appear in the UI
    },
    {
        "type": "overlay",
        "ref": "5dc412c9f071104f66339661",
        "mimetype": "text",
        "name": "Frame 2"
    }
]
Make the required attributes changes, including ref, name, and mimetype. For items that are not images, add their mimetype to the modality information.
For example,
- Text files:
"mimetype": "text" - Image files:
"mimetype": "image/jpg","mimetype": "image/png","mimetype": "image/tiff","mimetype": "image/bmp", etc. - Audio files:
"mimetype": "audio/mp3","mimetype": "audio/wav", etc. - Video files:
"mimetype": "video/mp4","mimetype": "video/webm", etc. - Cloud points files:
"mimetype": "application/pcd" - Reference files:
"mimetype": "application/json","application/text","application/pdf", etc.
- Click on the Save icon.
Working with Modalities
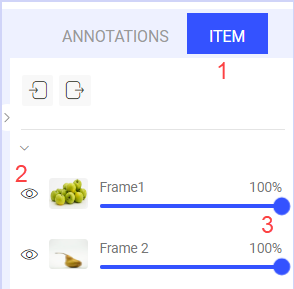
When you open an item containing overlay modality layers specified in its metadata, all associated items are simultaneously displayed and superimposed in the annotation studio.
-
Navigate to the Item tab in the annotation studio, where the modalities module is located.
-
To control the visibility of each layer, click on the visibility icon.
-
You can fine-tune the desired view by utilizing the slider to adjust the opacity level.

The visibility settings and opacity levels for layers are retained across items, ensuring that when working on a project with data sourced from the same sensors, you typically only need to adjust them once in a while.
