This article provides a detailed guide on managing pipelines within the Dataloop platform. It covers essential aspects such as add secrets, reset a pipeline, etc.
Filtering Data Between Nodes
Hover over a connection between nodes and click the + sign to add a filter. Adding a filter means that only data assets (i.e., items or annotations) that comply with the filter condition will be passed onto the next pipeline node.
Filters can be selected from previously selected filters (saved in the Dataset browser) or written directly into the DQL editor.
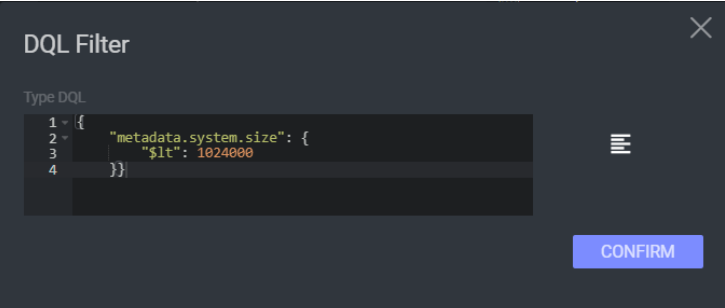
For example, the following filter will only pass items whose "size" attribute in the "system" in the "metadata" is less than 1MB:
Important
Notice that unlike the DQL editor in the Dataset Browser, in the pipeline DQL editor you do not need to include the attributes you filter by within a "filter" property.
The DQL property JOIN is not supported in the pipeline DQL filter.
Remove a filter by hovering over a connection and clicking the X icon (this will sever the connection between the output/input points, and you will need to reconnect the nodes). Alternatively, you remove the filter by setting the filter to an empty JSON { }.
Reset Pipelines
Resetting a pipeline clears all counters, as well as any pending items and cycles, without deleting existing logs or executions.
Go to the Pipelines from the left-side navigation panel.
Identify the Pipeline and click on the Pipeline Name. The pipeline page is displayed.
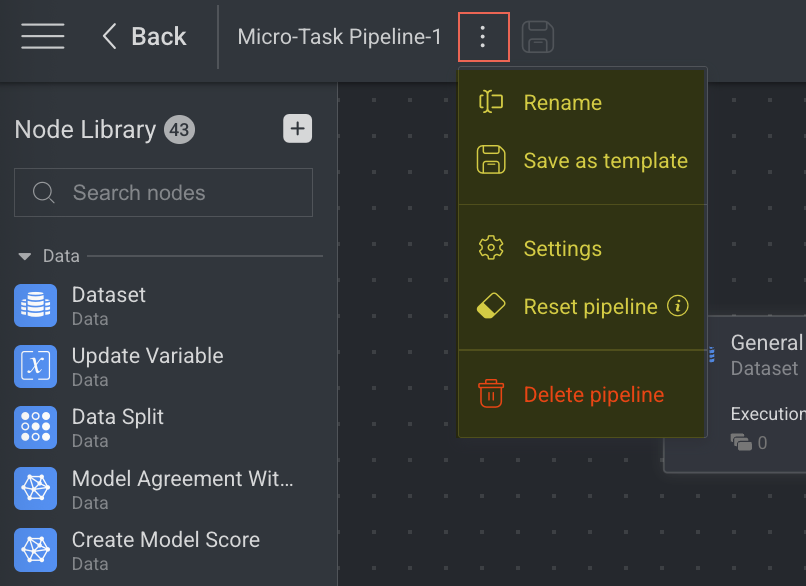
Click on the ⋮ three dots and select Reset pipeline from the list. A successful message is displayed.
Add Secrets to a Pipeline
Users can configure storage integrations with popular cloud storage services and set up private-registry integrations for more secure and efficient container management. The available types are Key-Value, AWS S3, Google Cloud Storage, Azure Blob, and Google Container Registry.
Go to the Pipelines from the left-side navigation panel.
Identify the Pipeline and click on the ⋮ three dots icon.
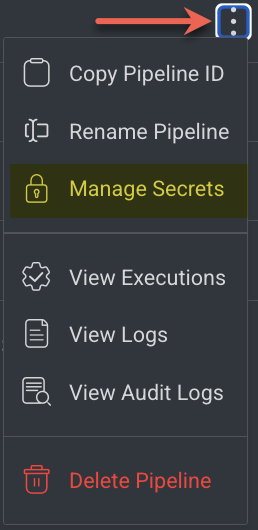
Click Manage Secrets from the list.
Select an existing secrets and integrations from the list, or
Click the + icon. The New Integration popup is displayed.
Enter a unique name for your secret.
Enter the secret value that you created at the Data Governance > Secrets page.
Click Create.
Click Confirm.
For more information about Dataloop secret, see the Secrets.
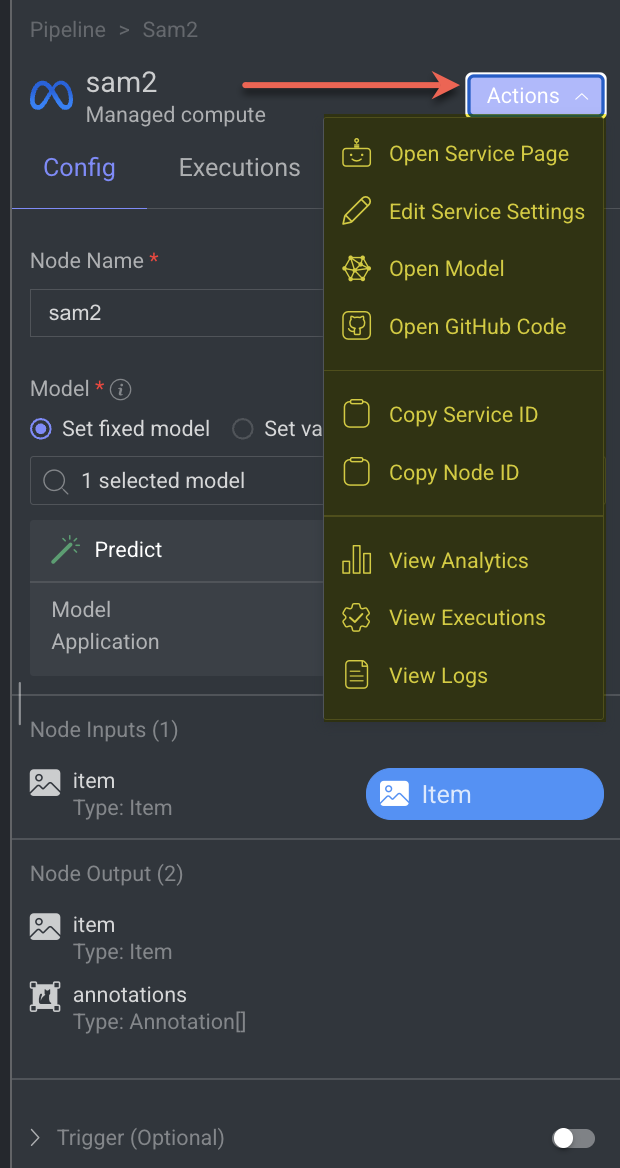
Node Actions
Once you select a node and clicking on the Actions feature in the right-side panel allows you to carry out various tasks that are specific to the function you have selected. The list of actions displayed on each Node are according to the Node's Type.
Add New Model Nodes
Dataloop allows the installations for AI/ML models by allowing them to be hosted and executed on:
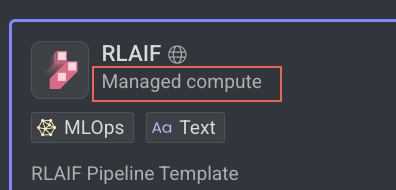
Dataloop's Managed Compute (internal infrastructure): The Models run on the Dataloop's Compute.
External Compute Providers (e.g., OpenAI, Azure, GCP, IBM, NVIDIA) via API Service Integration: The Models run on external provider's compute, which requires secret credentials to complete the installation.

Open the Pipelines page.
Click on the pipeline from the list. The pipeline page is displayed.
In the Node Library on the left-side panel, click on the ➕ icon. The Add Pipeline Nodes page of the Marketplace is displayed.

In the Models tab, select the required node from the list. By default, the model nodes are sorted by Installation Status.

Click Add Node from the right-side panel. The Install Model Application popup is displayed.
Select the required model version from the list and click Proceed. A popup is displayed to select the API key to complete the integration process if needed.

Select an API Key, Secret or an Integration, as required. If not available:
If there is no secret, click Add New Secret and follow the steps.
To set the integration later, click Set Up Later.
Click Install Model. A confirmation message is displayed, and the model node will be added to the Node Library.
Add Application Nodes
Dataloop allows the installations of applications by allowing them to be hosted and executed on:
Dataloop's Managed Compute (internal infrastructure): The applications run on the Dataloop's Compute.
External Compute Providers (e.g., OpenAI, Azure, GCP, IBM, NVIDIA) via API Service Integration: The applications run on external provider's compute, which requires secret credentials to complete the installation.
Open the Pipelines page.
Click on the pipeline from the list. The pipeline page is displayed.
In the Node Library on the left-side panel, click on the ➕ icon. The Add Pipeline Nodes page of the Marketplace is displayed.
Select the Applications tab.

Select the required application node from the list. By default, the application nodes are sorted by Installation Status.
Click Add Node from the right-side panel.
Click Proceed. A popup is displayed to select the secret key, API key, or integration to complete the integration process, if needed.
If there is no secret key, click Add New Secret and follow the steps.
To set the integration later, click Set Up Later.
Click Install Application. A confirmation message is displayed, and the application node will be added to the Node Library.
To view application details, click on the View Application link. It navigates you to the CloudOps page.
Install Trainable Models
When you see there are no trainable models available in the Train model node, follow the instructions to install them:
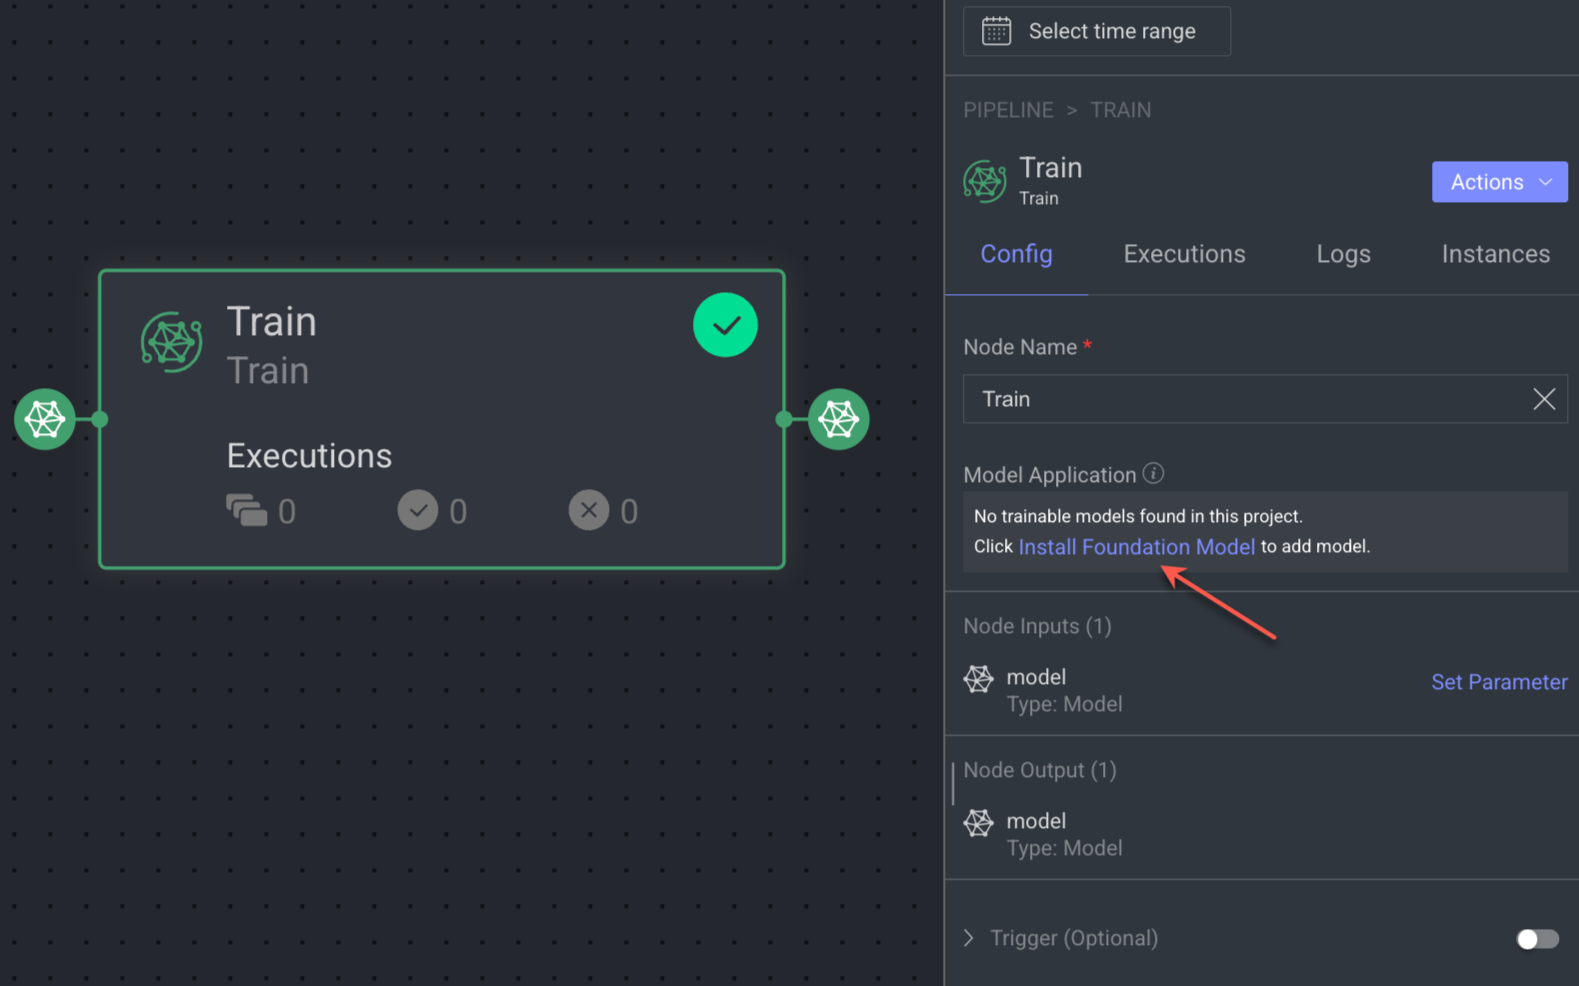
Click on the Install Foundation Model. The Select a Foundation Model page is displayed.
Select a trainable model, and click Install. The Install Model Application popup is displayed.

Select the required model variation from the list and click Install Model. A successful message is displayed, click View Model to view the newly installed model in the Model Management page. Also, the newly installed model will be selected in the node configuration section.
Install Models
When you see there are no models available in the Evaluate Model Node, follow the instructions to install them:
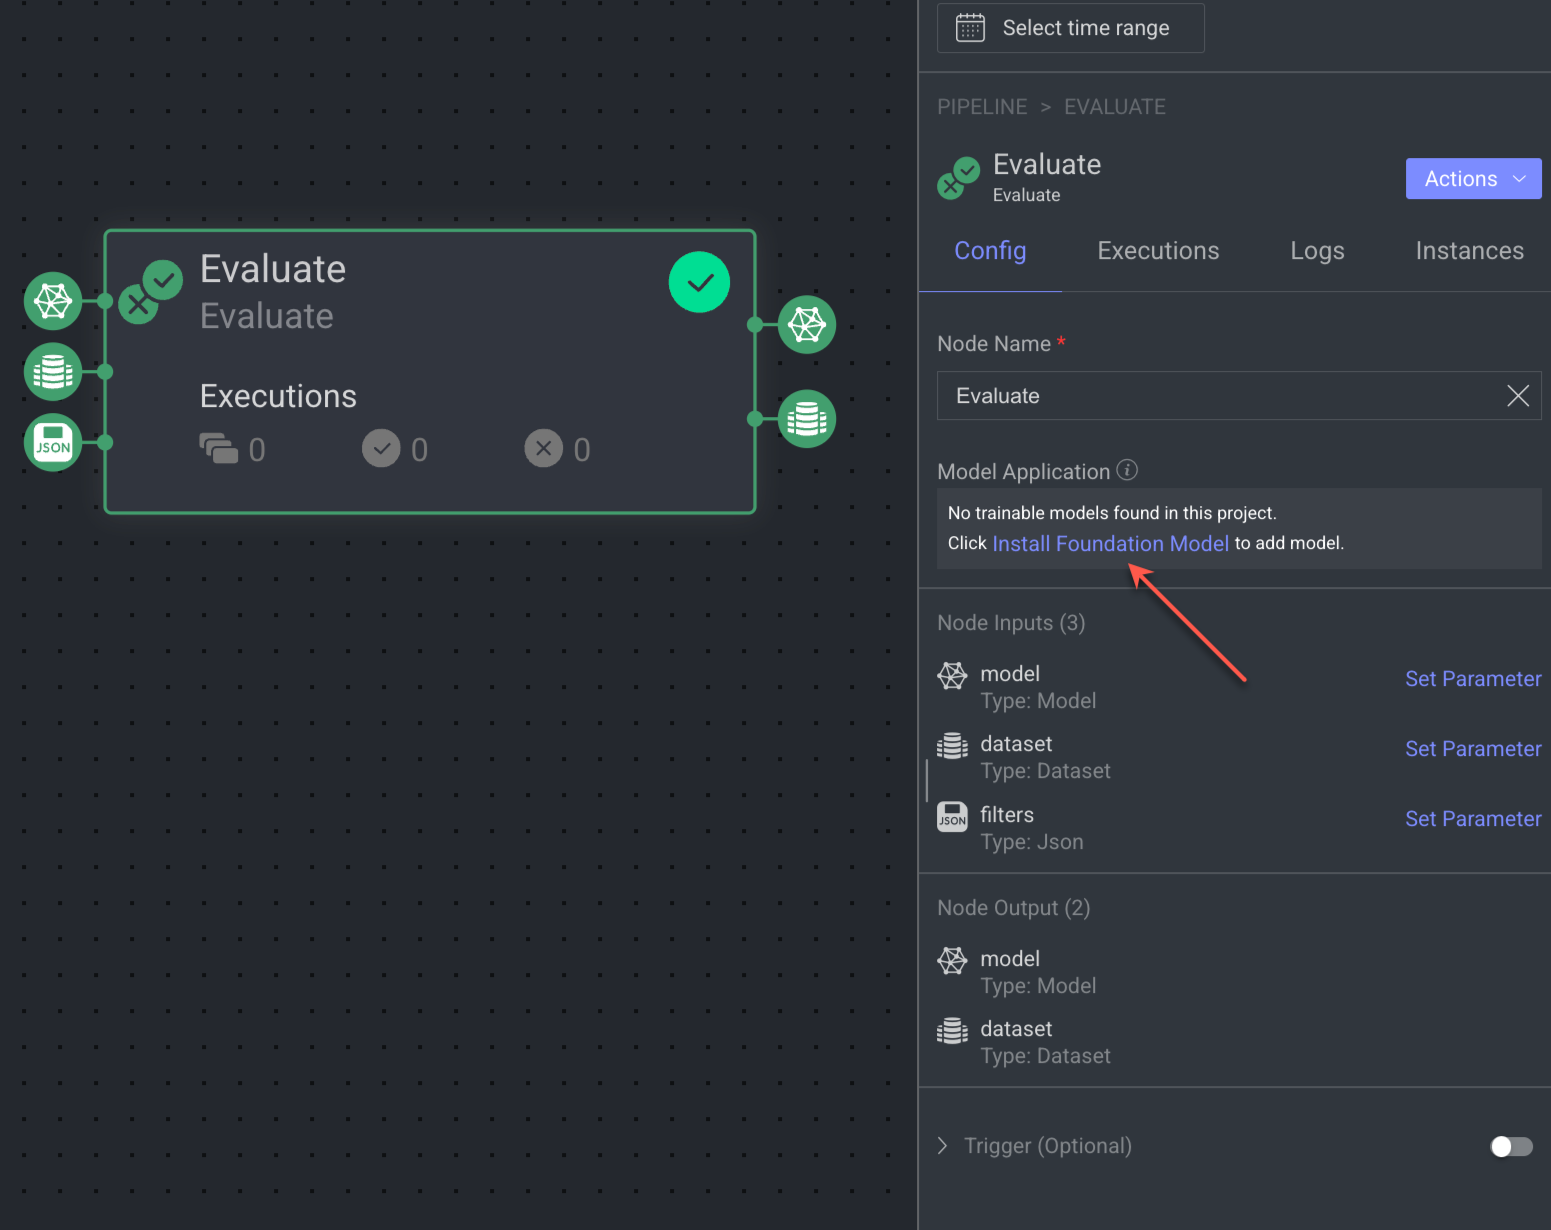
Click on the Install Foundation Model. The Select a Foundation Model page is displayed.
Select a model and click Install. The Install Model Application popup is displayed.
Select the required model variation from the list and click Install Model. A successful message is displayed and the newly installed model is available in the Model Management page.
Once installed, it will be available for selection for the evaluation.
Set Pipeline Triggers
Dataloop allows you to set triggers on pipeline nodes.
Remove Model Nodes
Important
The node will be removed only from the Node Library but will remain available in the Marketplace under the Models tab for re-adding.
Open the Pipelines page.
Click on the pipeline from the list. The pipeline page is displayed.
In the Node Library on the left-side panel, identify the node from the list and hover over.

Click on the X icon. A confirmation message is displayed.
Click Remove. The removal success confirmation message is displayed.
Re-add Ppipeline Nodes
Follow these steps to restore a removed node to the Node Library:
Open the Pipelines page.
Click on the pipeline from the list. The pipeline page is displayed.
In the Node Library on the left-side panel, click on the + icon Add new nodes. The Models tab of the marketplace is displayed.
Identify the model that you have to re-add to the library and click Add Model -> Restore Pipeline Node. A confirmation message is displayed.
Re-adding pipeline nodes scenarios
For uninstalled applications: The button will display Add Node.
For installed applications:
If a node shortcut exists, the button will display Add Model.
If there is no node shortcut (removed), the button will display Add Model with a dropdown offering:
Add Model
Restore Pipeline Node
Undo/Redo Pipeline Editing Steps
While structuring the pipeline and making adjustments, you can use the Undo/Redo to trace back editing steps back and forth as needed, without having to manually change back the pipeline configuration. This includes nodes added or removed, nodes connectivity, and nodes settings.
Undo/Redo Limitation
Undo/Redo actions do not track code changes in code nodes. Manual edits are not currently versioned or traceable.
.png)
Copy Pipeline ID
Go to the Pipelines from the left-side navigation panel.
Identify the Pipeline and click on the ⋮ three dots icon.
Click Copy Pipeline ID from the list. The pipeline ID will be copied to the clipboard.
Rename Pipelines
Go to the Pipelines from the left-side navigation panel.
Identify the Pipeline and click on the ⋮ three dots icon.
Click Rename Pipeline from the list.
Make the update and click Confirm. A confirmation message is displayed.
Update Pipeline Settings: On Pause Action
Each pipeline has its own independent settings. Configuring the desired behavior for one pipeline will not impact any of your other available pipelines.
To configure pipeline behavior when paused:
Go to the Pipelines from the left-side navigation panel.
Open the Pipeline from the list.
Click on the ⋮ three dots and select the Settings from the list. The Settings popup is displayed.
Choose the desired action from the dropdown list:
Always ask me what to do:
Enable: Keep pipeline triggers activated:
Disable: Deactivate pipeline triggers:
Click Save Changes to the settings to apply them permanently.
View Executions Data
Go to the Pipelines from the left-side navigation panel.
Identify the Pipeline and click on the ⋮ three dots icon.
Click View Executions from the list. The CloudOps → Executions tab is displayed.
View Logs Data
Go to the Pipelines from the left-side navigation panel.
Identify the Pipeline and click on the ⋮ three dots icon.
Click View Logs from the list. The CloudOps → Logs tab is displayed.
View Audit Logs
Go to the Pipelines from the left-side navigation panel.
Identify the Pipeline and click on the ⋮ three dots icon.
Click View Audit Logs from the list. The Audit Logs page is displayed.
Delete Pipelines
Warning
All the applications created by the Pipeline will be deleted.
Go to the Pipelines from the left-side navigation panel.
Identify the Pipeline and click on the ⋮ three dots icon.
Click Delete Pipeline from the list. A confirmation message is displayed.
Click Yes. A confirmation message is displayed.