The Note annotation tool is designed to enable communication between the annotator and the annotation manager.
The Note Annotation is available for images and videos only.
This tool allows annotators, annotation managers, or reviewers to raise and resolve questions and issues while working on either an annotation task or a QA task.
Create an (QA) Issue Note
To create a note, follow these steps:
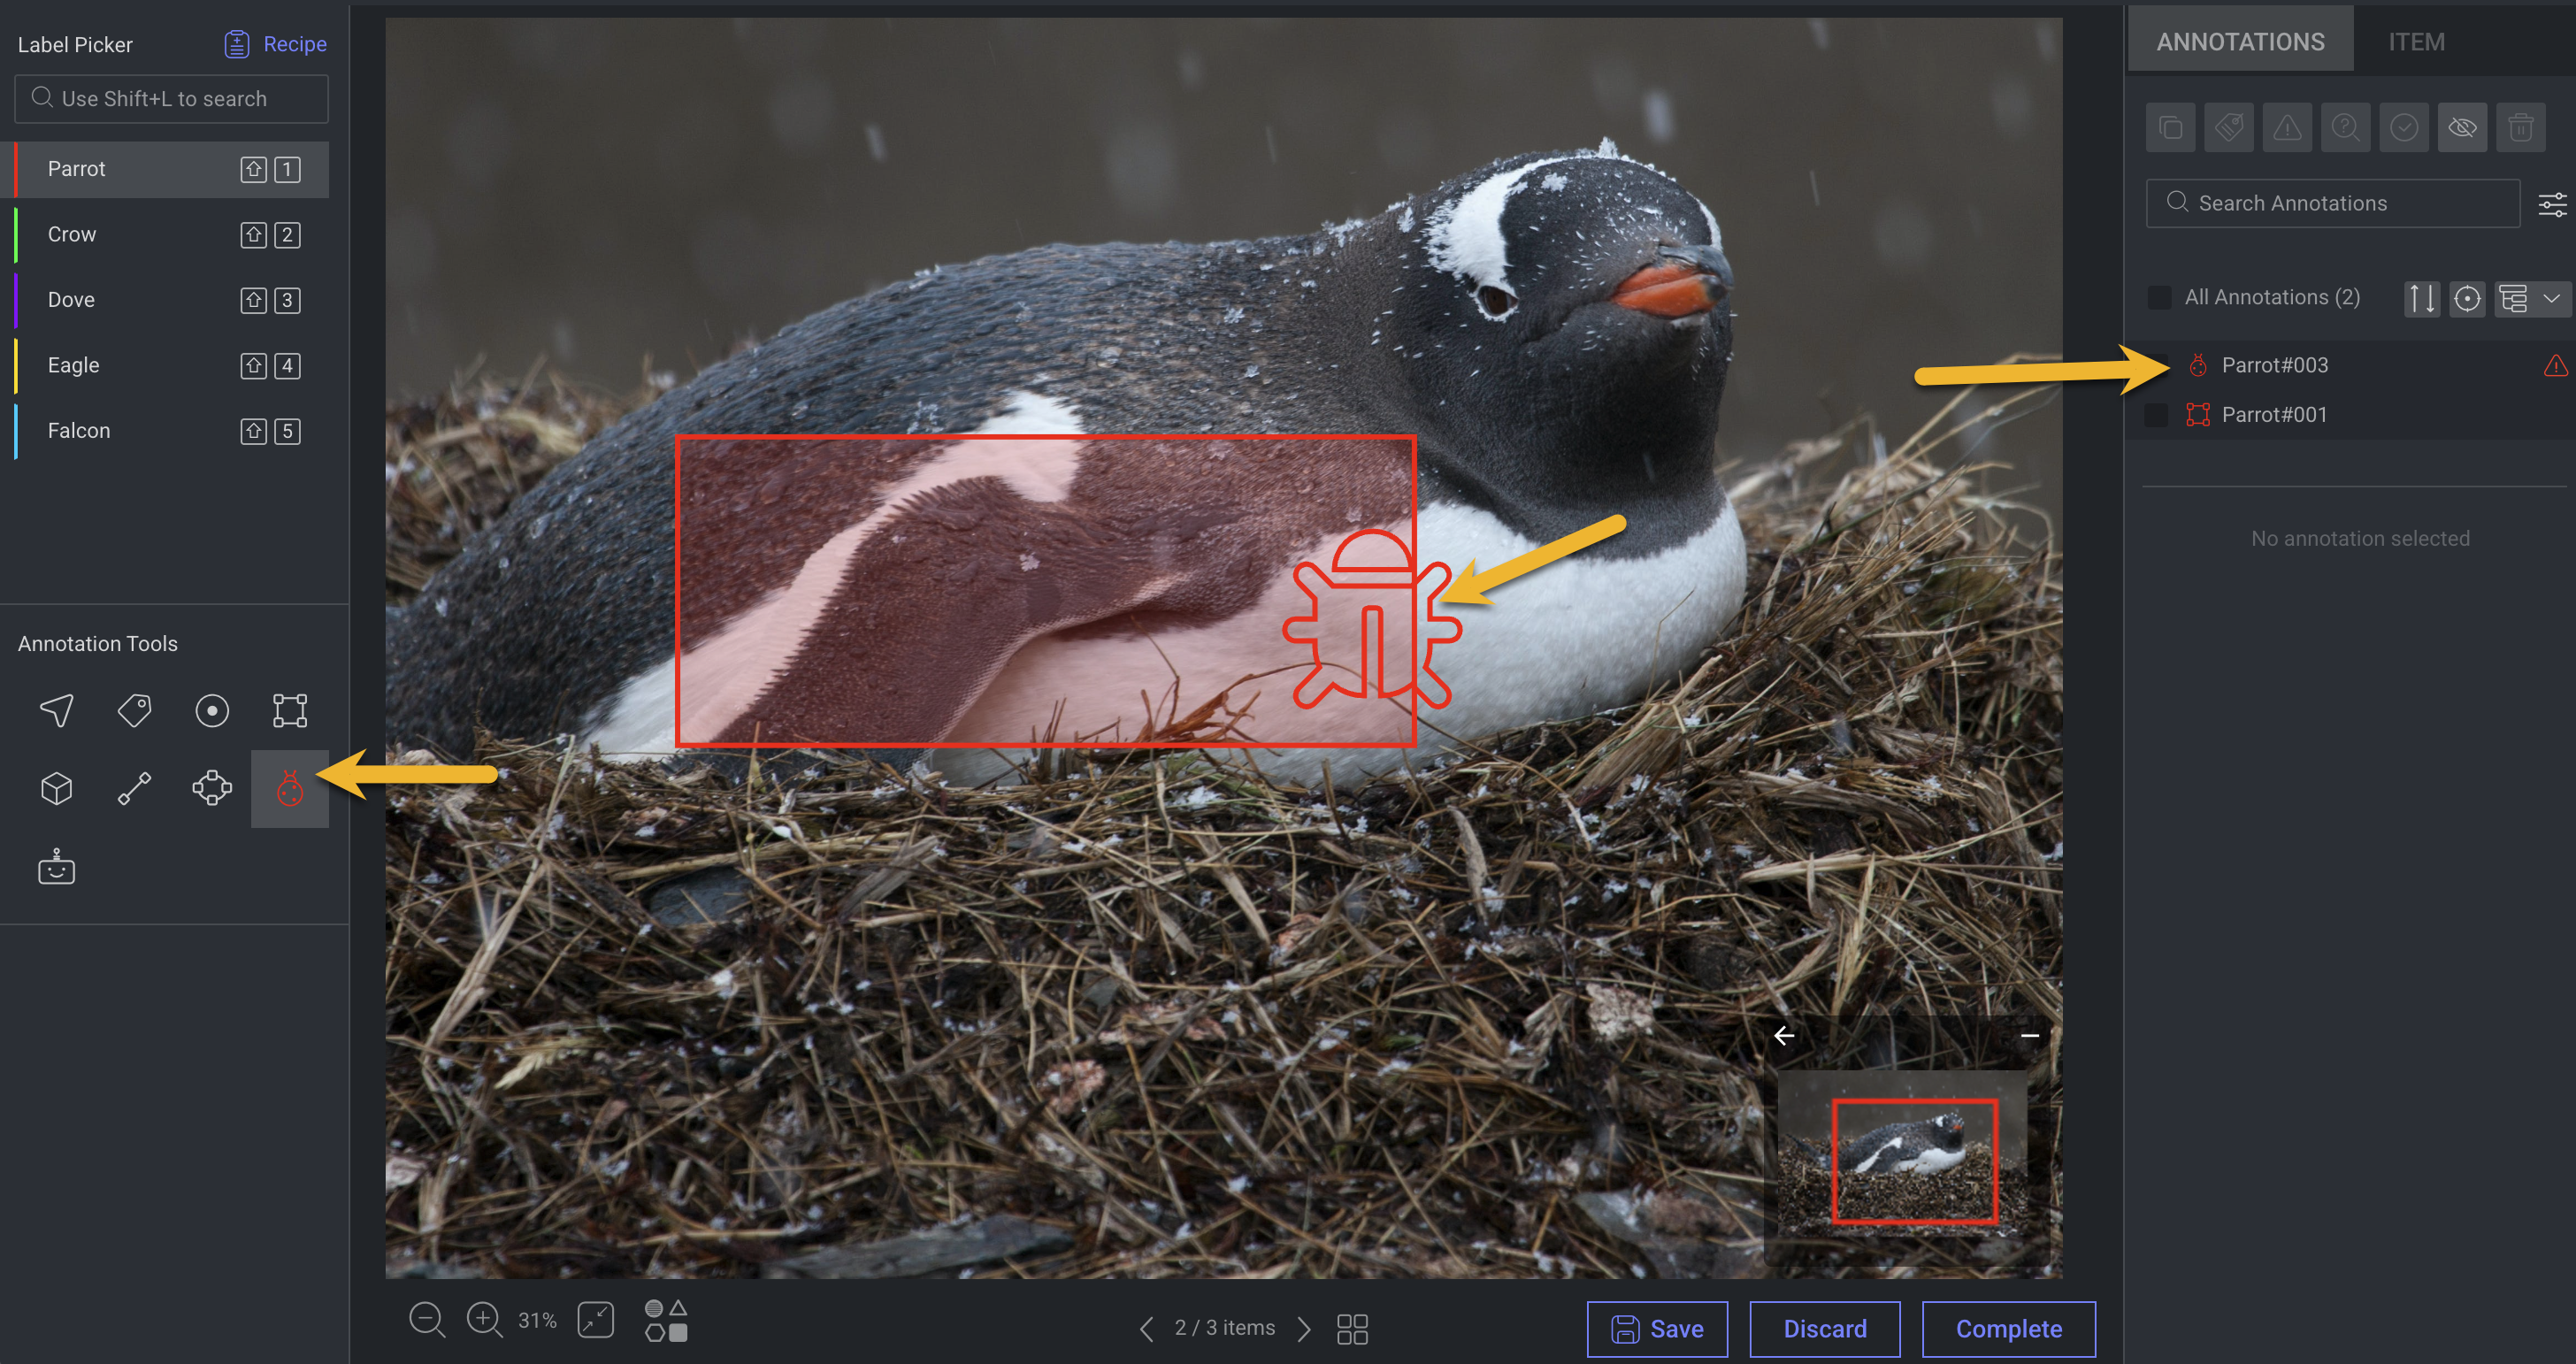
Click on the Note (the ladybug icon) tool.
Click the place on the image where you need to create the note. (On a video, you can also adjust the start and end time for the Note annotation to appear).
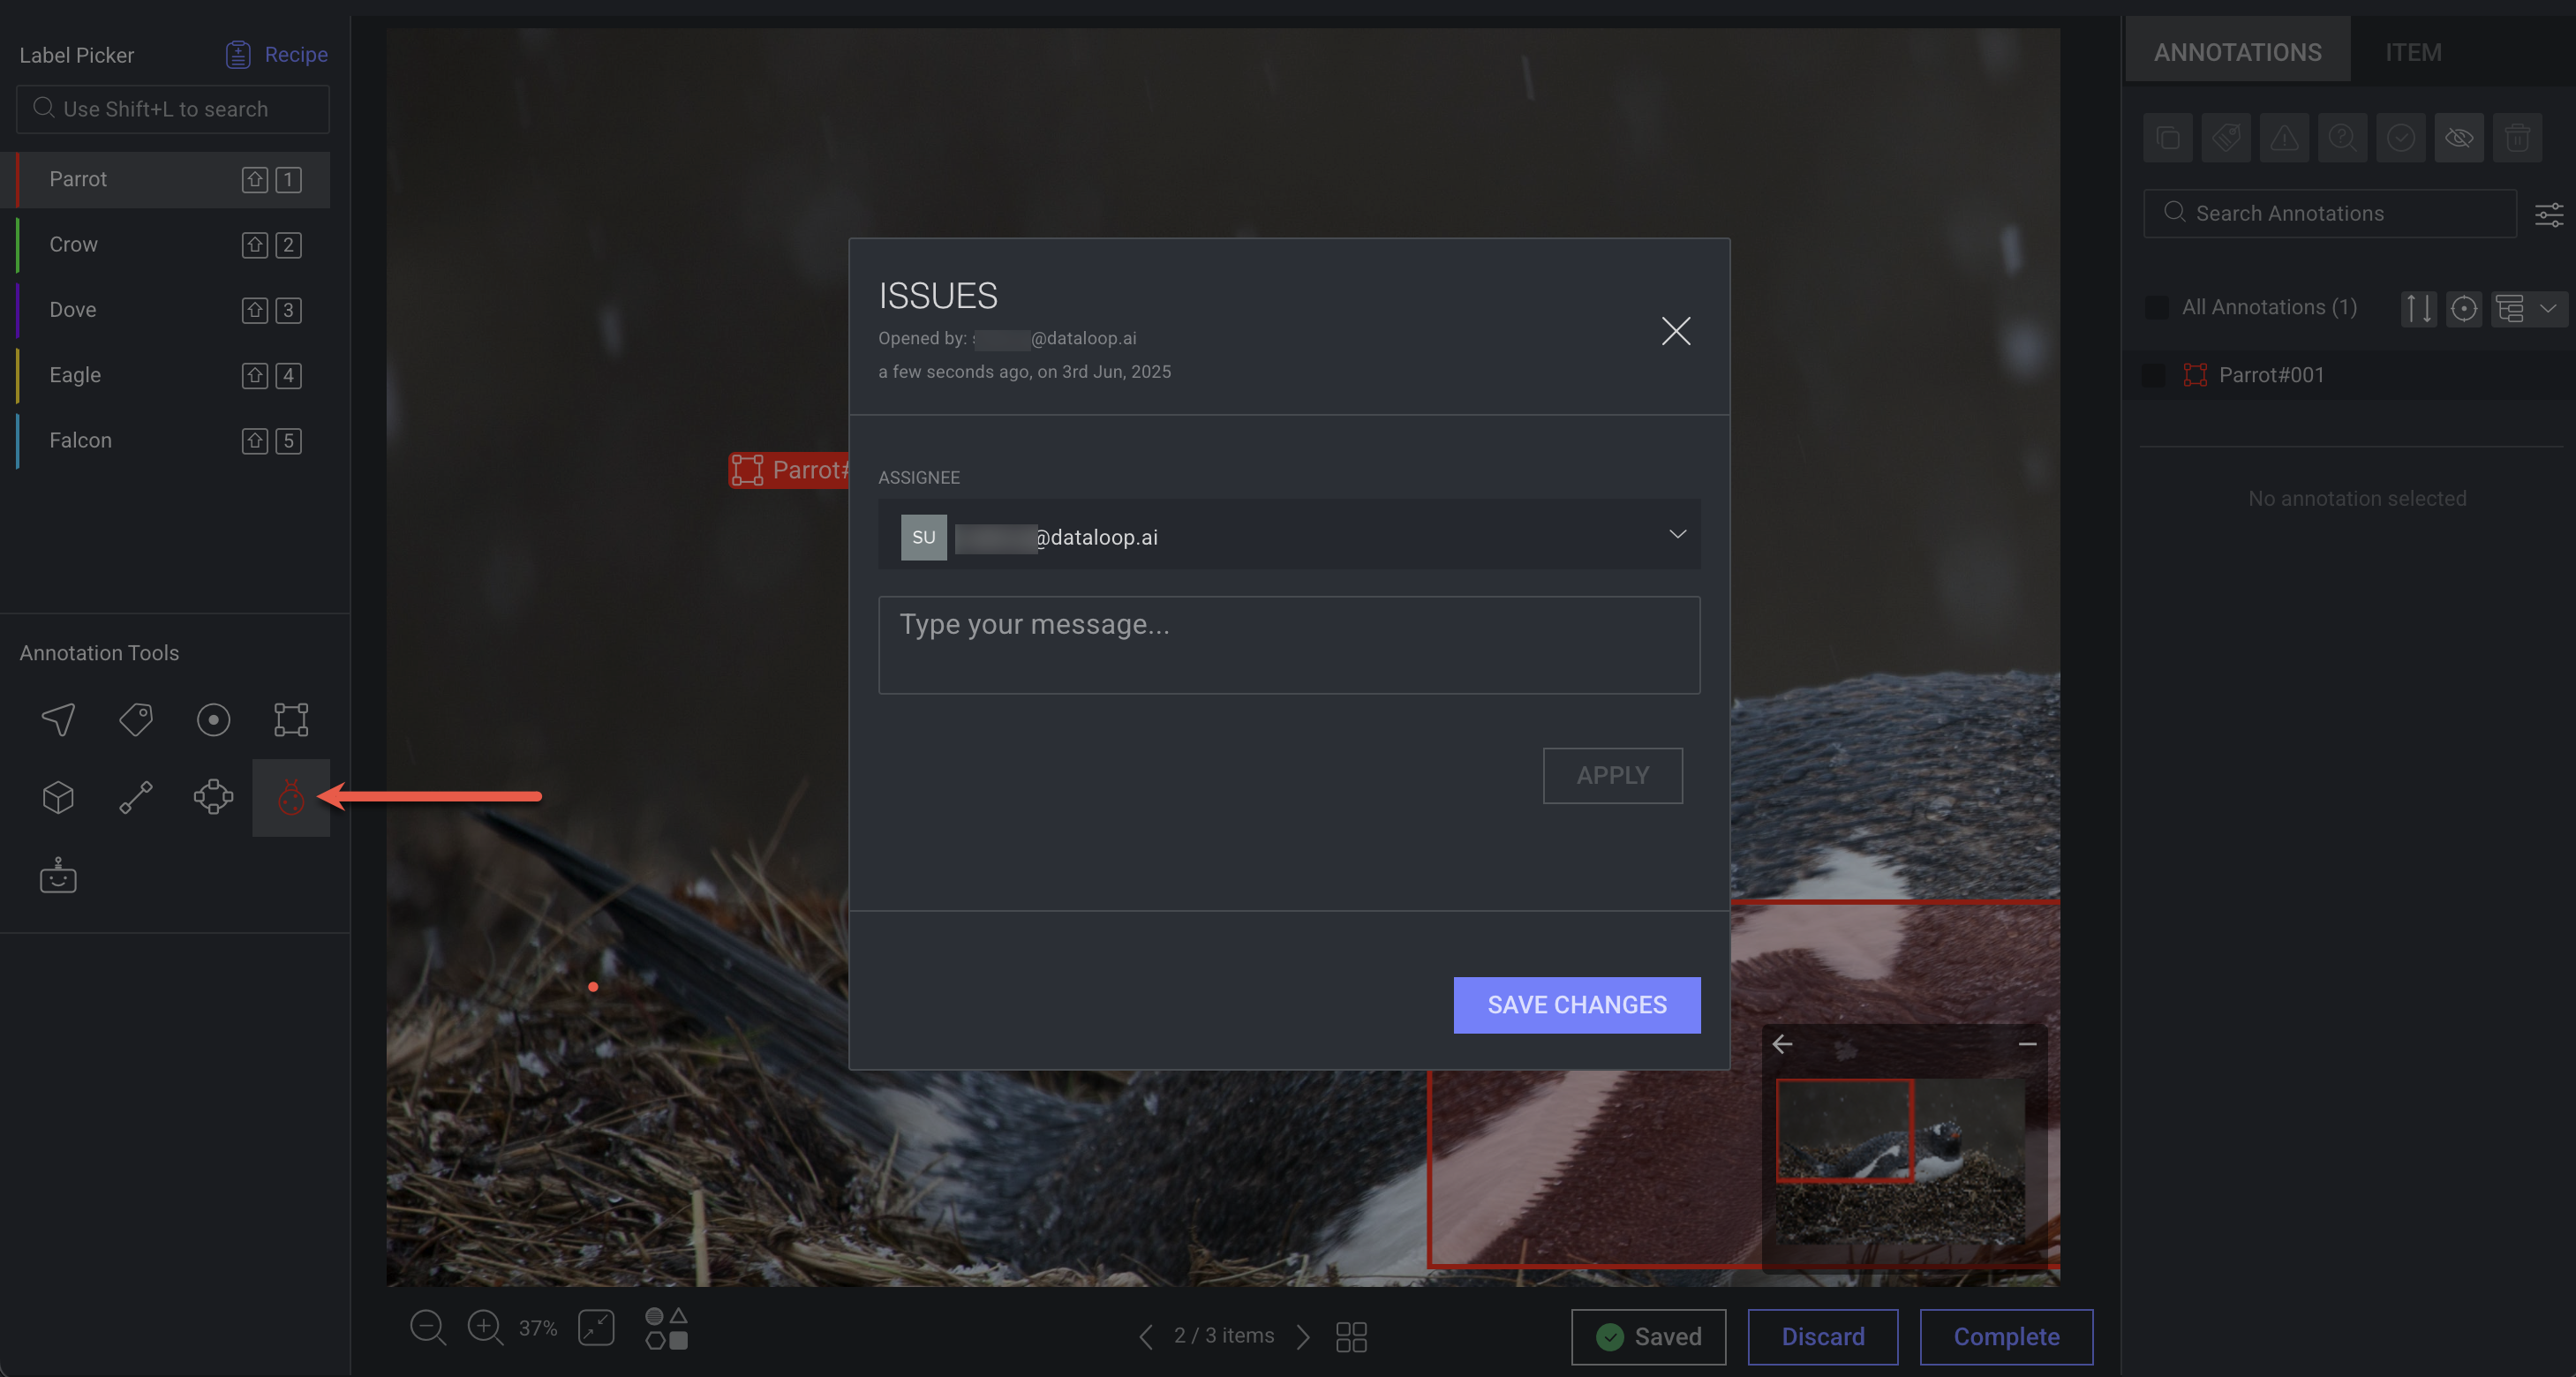
In the Issues dialog box, (optional) Assignee: Select a new assignee.
Note Assignment Warning
Some assignees may no longer be part of the project.
If you assign the note to a deactivated user, it will still be linked to their original labeling assignment.
Consider selecting an active user or handle the note directly from the assignment screen.
Type a free-text message and click Apply or press Enter to submit your message.
If you wish to edit or delete a message in the Issues dialog box, hover over the message and click the edit or delete icon.
Finally, click Save Changes to save the note. Now, a ladybug mark will appear on the image in the place where you created the note, and the annotator or annotator manager will be able to read the note and respond to it.
Notes:
Notes (ladybug marks) are adjustable in their size and can be dragged on the canvas.
Every message includes the creator’s username, content, and creation date.
To read the messages inside a Note, ensure you selected the Note tool from the tool list.
Now, double-click on the annotation (the ladybug mark) and the Issues Dialog will appear, allowing you to read the messages listed at the bottom of the box or enter a new message.
Opening, Reviewing, and Resolving Issues
Notes:
Notes, issues, and reviews contain the assignment ID of the assignment in which they are made and are seen by the annotator working on that specific assignment.
When assigning an issue to an assignee who has no assignments or tasks, the issue will receive the assignment ID of the assignment person who created the issue which is working on.
Adding a Note/Issue in a Task vs Dataset Browser
If a note is created in a task, it creates an issue in that task. That issue is visible and can be reviewed in the task.
If a note is created in the dataset browser, the issue is visible and can be reviewed in the dataset browser and analytics, but not in any task (the note icon will appear, but an issue will not be created, and the item can still be set to Completed status).
This also applies to creating notes from the SDK. If the note/issue is created from the SDK without an association to a task (i.e., without a taskId or assignmentId), an issue will not be created on any task but can be viewed from the dataset browser and analytics.
An issue or a note created with no assignment/task association will not be assigned to any user for review or approval, simply because there is no one specific to assign the note/issue to.
Such a situation can occur if a note or issue is created from the dataset browser and not in a task context.
To resolve this situation, you will need to use the Dataloop SDK and add an assignment ID to the annotation (see SDK Update Annotation).
When an annotation manager or higher-role user (developer or owner) creates a note, this will create an issue. ![]()
When an issue is created, the annotator will not be able to mark the item as Done, until the issue is addressed. The annotator will need to address the issue, click on the magnifying glass icon for review, and only then click Done.
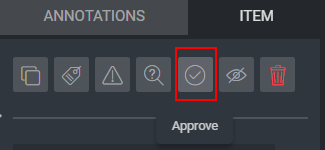
The annotation manager can review the item, and if the issue has been addressed satisfactorily, Approve it by clicking the checkmark icon at the top of the Annotation panel.
Unless deleted, Note Annotations will remain visible and their internal text messages will be accessible through the Annotation Studio.
If you wish to filter all items that have a note on them, use our data filter to filter items for Annotation Type: Note. This can be done in the Dataset browser and the Task browser.
Once a note is deleted it does not exist in the Annotation JSON file, and therefore there is no way to list all items that had a Note annotation if the note was deleted.
The total number of issues created can be seen in the Analytics Progress Dashboard.
QA Note Annotation
Note annotation allows a QA reviewer to create a new annotation and assign it for review by an annotator. While using standard Issues allows the reviewer to flag existing annotations for correction, the Note tool allows flagging annotations missed by the annotator. The process for using note annotation as part of the review process is:
Select the Note tool and create a note annotation where the original annotator may have missed placing one.
In the dialog box, select the annotator you wish to assign the Note to (since the item can have annotations from several sources).
Drop down list of annotators
A. The list includes all annotators with an annotation assignment (not QA) containing the item, and all users that are annotation managers or above.
B. The first name in the list is the annotator that was the last to assign a status to the item. For example, the most likely one to be the designated assignee.
The Note annotation will be created, and it will immediately have an Issue on it. The Complete status will be removed from the item, and it will be available for fix in the annotator's assignment.