DDOE pipelines provides a user-friendly interface for building, managing, and monitoring end-to-end machine learning workflows. DDOE's pipeline can be made up of different nodes, each with a different role in the pipeline, such as storing data, executing functions, training models, or sending data to annotation or QA tasks.
Node Library
The Node Library in DDOE's Pipeline offers a comprehensive list of available nodes, including both default and installed options. You can easily search for specific nodes using the search bar to help build your pipeline. Additionally, the Node Library allows you to add new model nodes and application nodes, from the Marketplace by clicking on the Plus (+) icon.
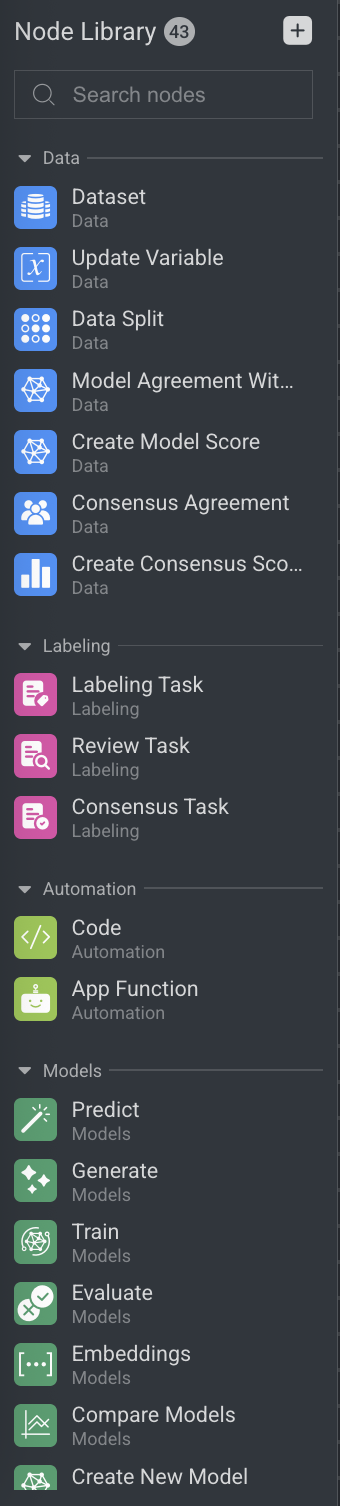
By default, the following node categories are available on the DDOE's Node Library:
The Search nodes field allows you to search for nodes based on their category and name. Each node elements will serve a unique support to the pipeline to accomplish its task. Once you place a node on the canvas and clicking it will bring up the node’s Config in the right-side panel.
Node Inputs
For providing input to a pipeline node, you have three available methods:
Node-to-Node Connection
Form a linkage between the nodes. The input to the subsequent node can be derived from the output of the connected predecessor node. This connection allows the input to be transferred and processed during runtime.Static Input
Establish a static input by assigning a fixed value directly to the node input. Note that this value remains immutable during runtime, ensuring consistency.Dynamic Input (variables)
Facilitate a dynamic input by assigning a variable directly to the node input. This variable offers flexibility as it can be updated at any point during runtime. This provides the ability to alter and adapt processing based on real-time conditions or changes in data.
Node-to-Node Connection
Connections can only be made between compatible nodes:
An image item, for example, cannot be passed to a function node that deals with annotations. In such a case, the item should be passed to a function that extracts the annotations, which then can be passed to the function that deals with annotations.
The type of output being passed by a node is determined by the event that triggers the action – for example, if an asset is triggered by an
item.completed event/status, the asset will be a typed item. If the asset is triggered byannotation.created, it will be of type annotation.The DDOE default nodes have their asset type presets, whereas functions inherit their asset type from function input/output parameters.
Static Input
Static inputs are useful for setting a predetermined or constant value for a pipeline node. The value will remain constant throughout the runtime of the pipeline, providing a consistent input for the node's executions.
To set a static input for a pipeline node:
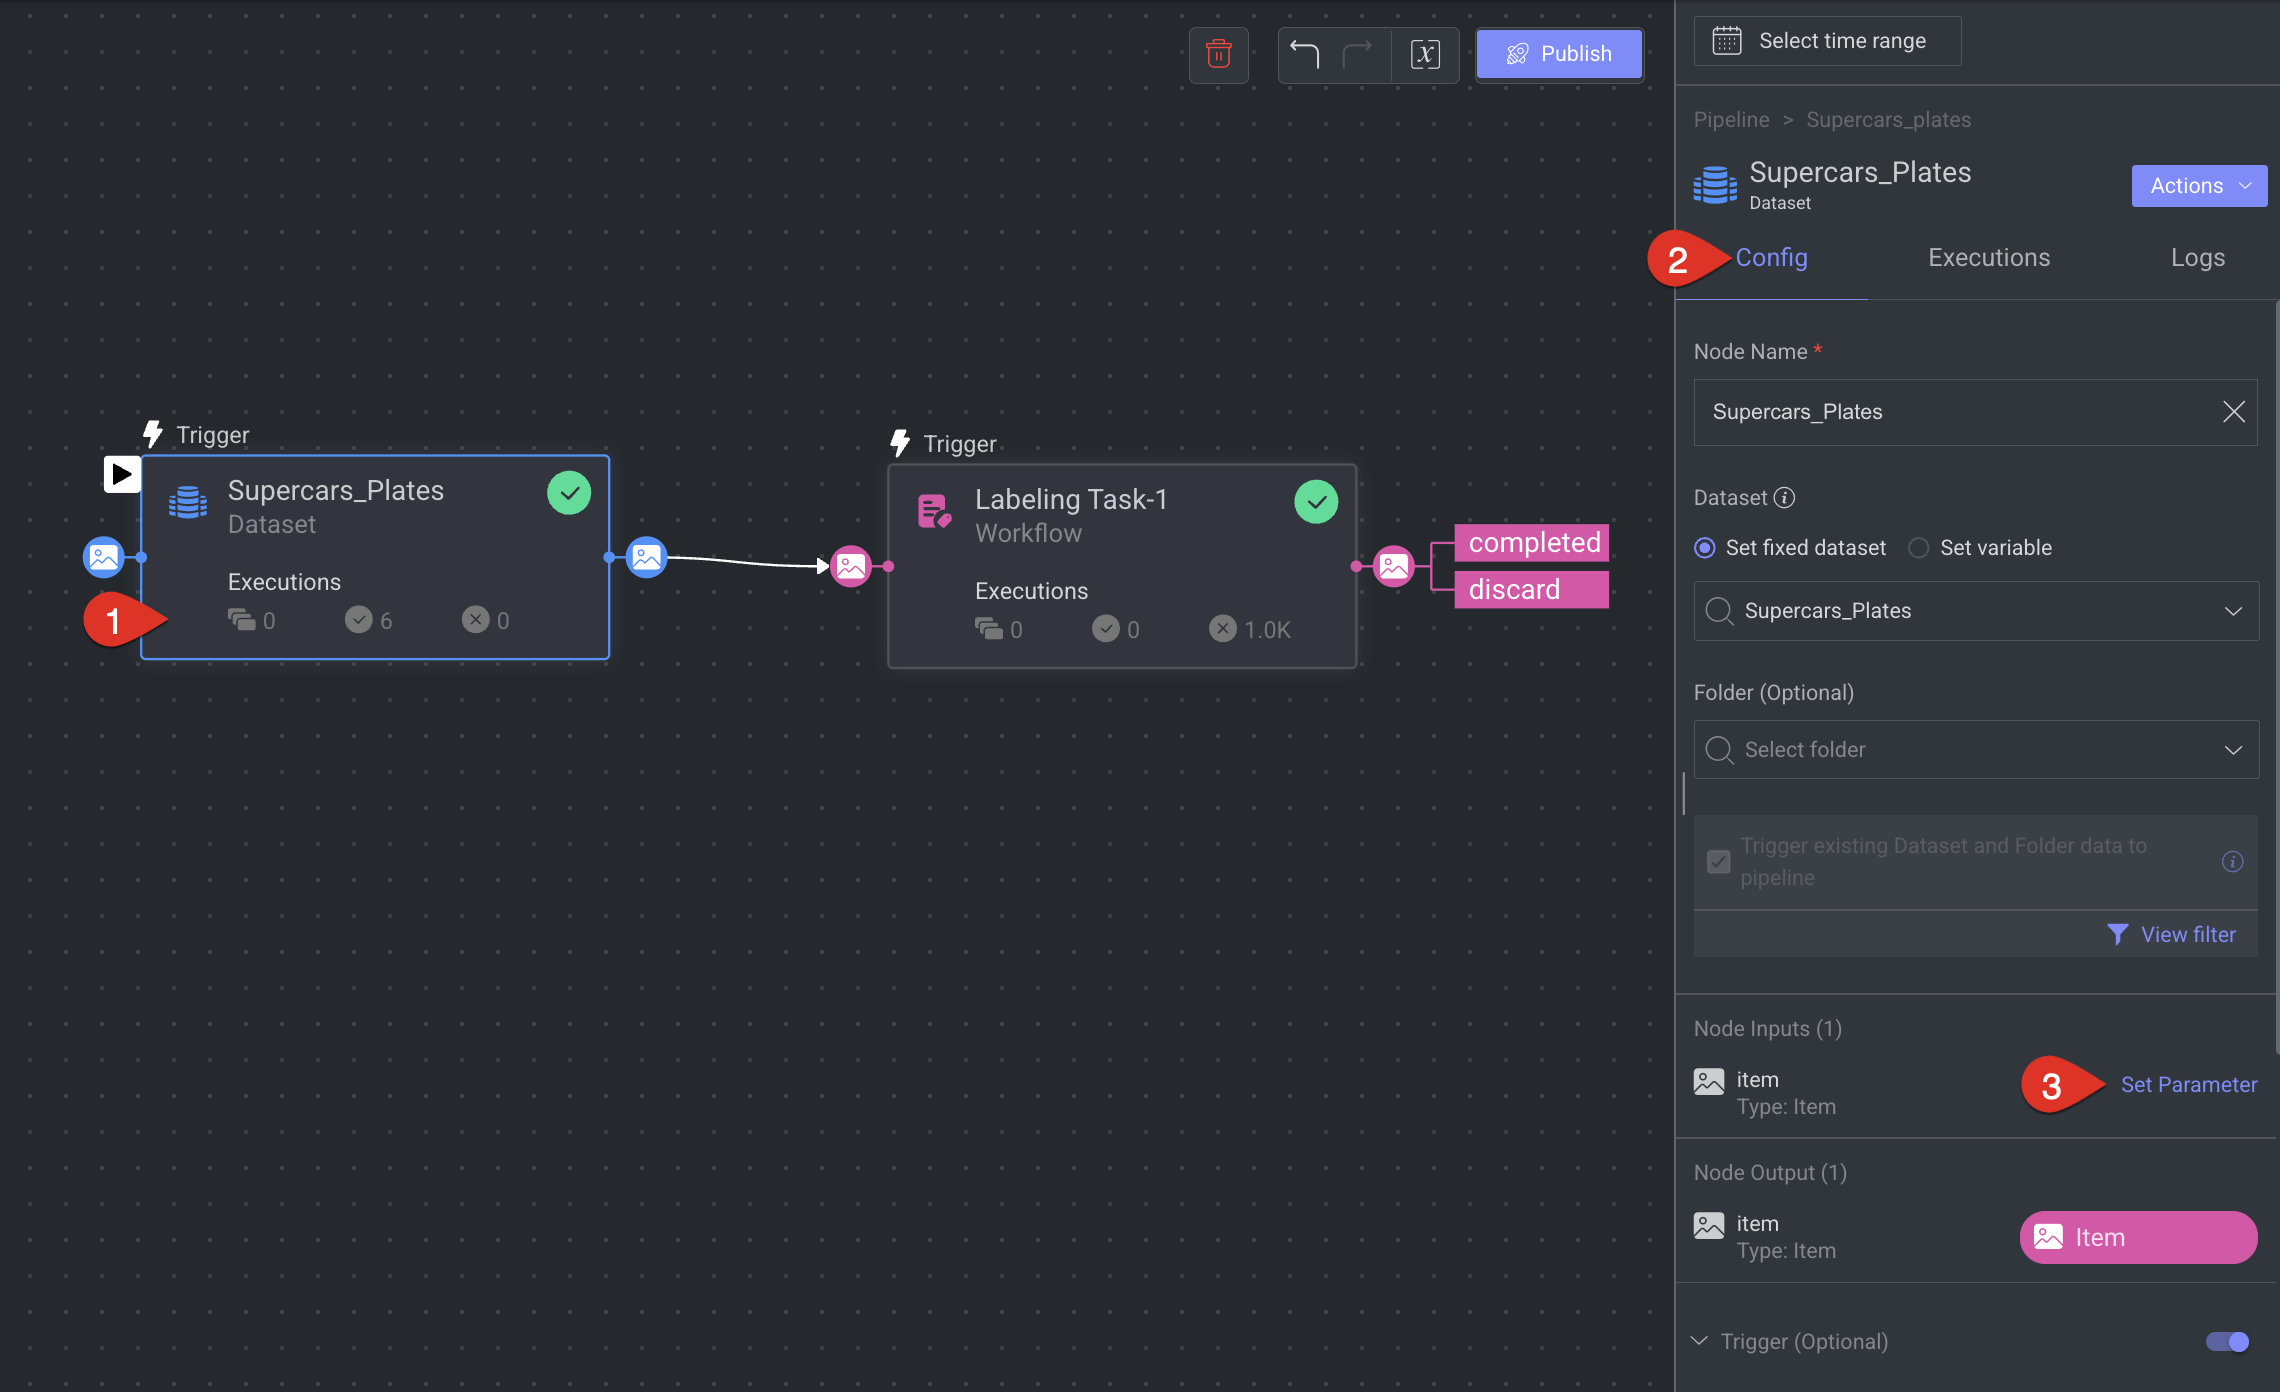
Select the Pipeline Node.
Open the Config tab in the right-side panel.
Click on the Set Parameter button.
Choose Fixed Value: In the dialog that will open, choose the Fixed value.
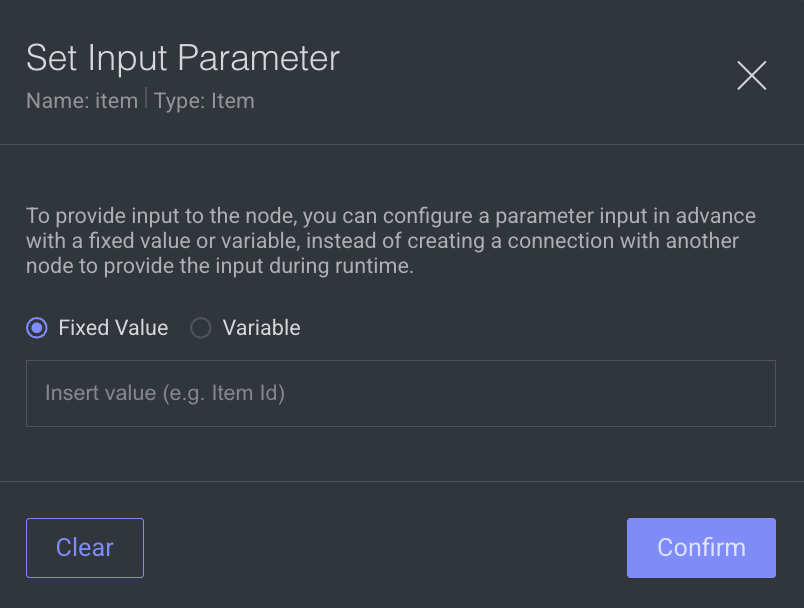
Input Value: Type the desired value. For entity type inputs, set the entity ID as a value (for example, dataset.id, task.id, etc.), and click Confirm.
Notes
Incompatibility with Connections: A fixed value and a node-to-node connection cannot be assigned simultaneously for the same input.
Visual Confirmation: Once the static input value is set, an indicator will be displayed on the canvas confirming the successful setup.
Dynamic Input: Variables
Pipeline variables enable setting and managing dynamic parameters within a pipeline. The variables can be accessed in multiple pipeline nodes simultaneously and can be changed during runtime.
Set Variables as a Node Input
To set a variable as a default input for a pipeline node:
Select the Pipeline Node.
Open the Config tab in the right-side panel.
Click on the Set Parameter button.
Choose Variable: In the dialog that will open, choose Variable.
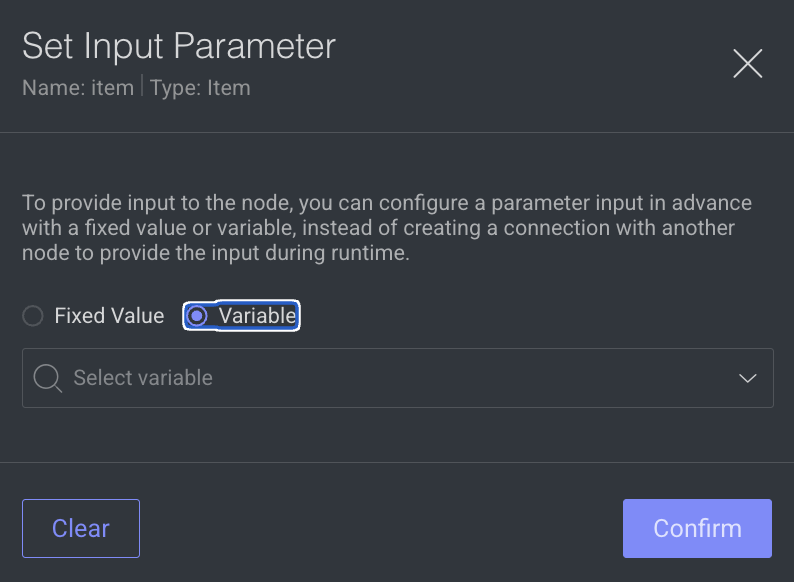
Set variable: Please select the desired variable from the dropdown menu. It's important to note that only variables with a type that matches the input type will be visible in the dropdown list.
Click Confirm.
Add a New Variable
To set create a new variable:
Click on the variables button on the Pipeline Header.
.png)
Click on Add New Variable (or, Manage Variables if variables are already existing). The Manage Pipeline Variables dialog will get open.
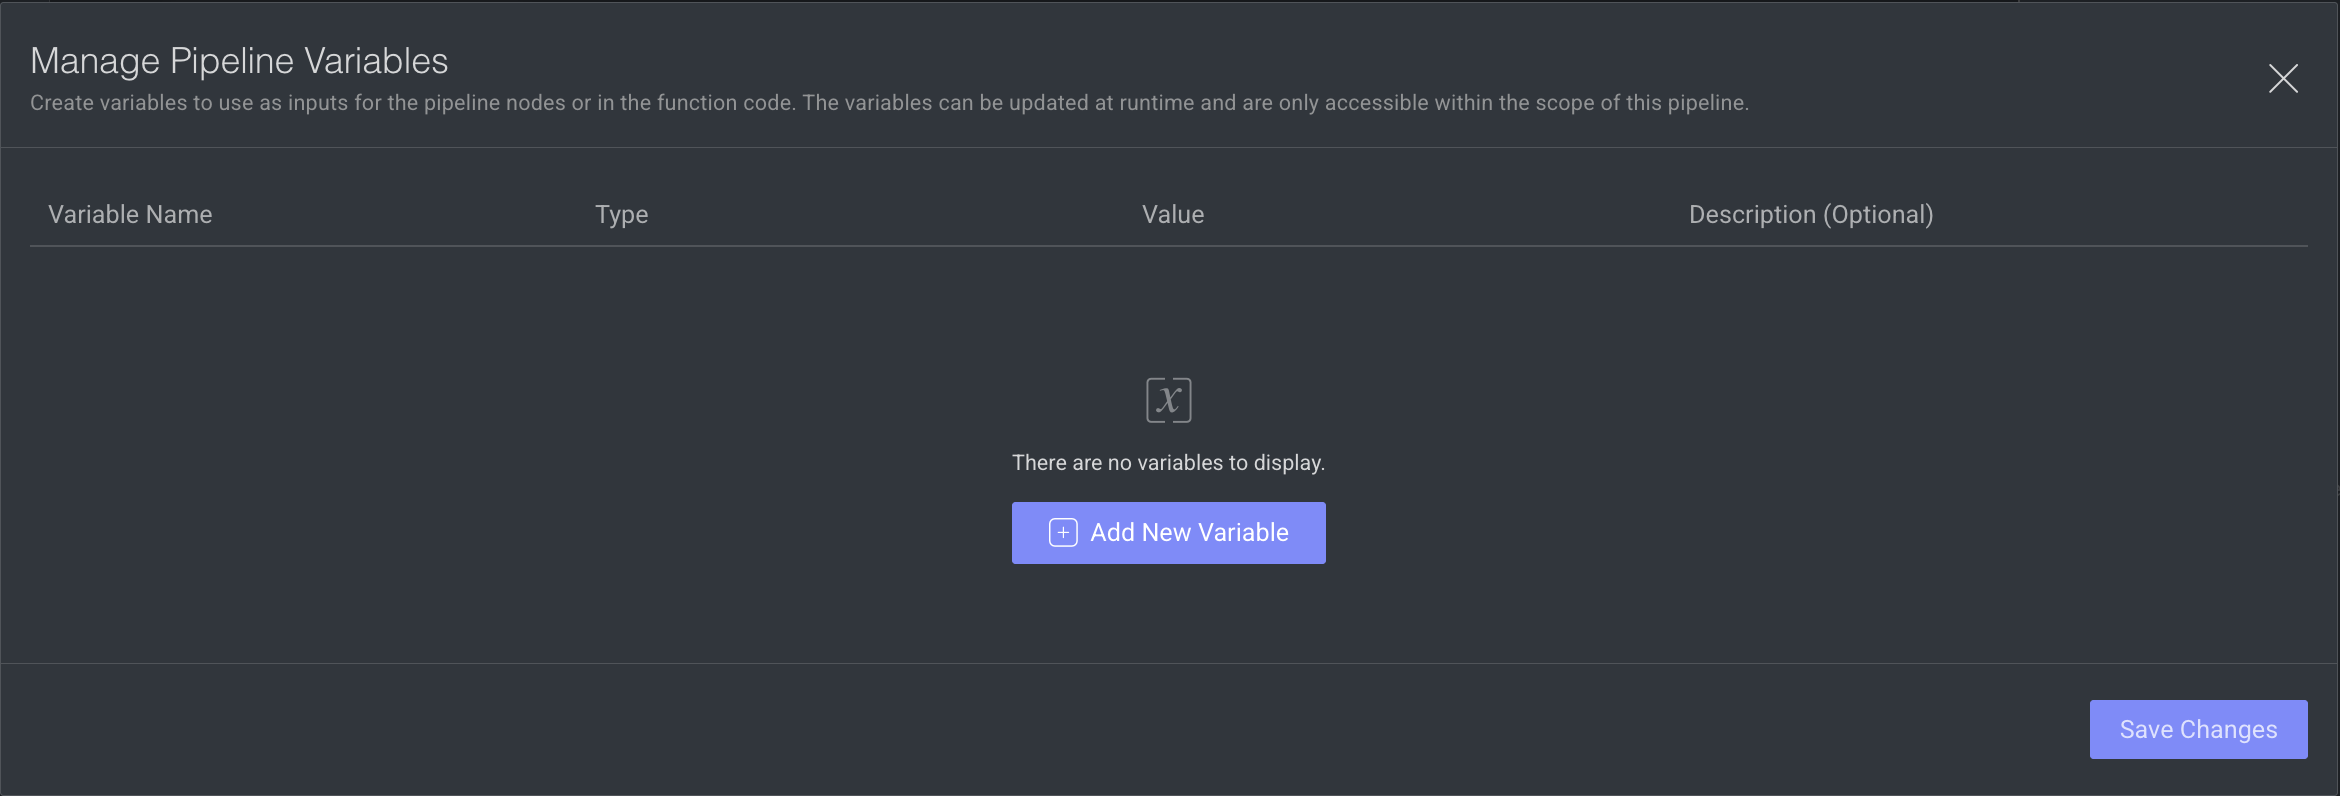
Click Add New Variable. An empty row will be displayed.
Fill in the required fields for the variable: Name, Type, Value, Description (optional).
All fields are mandatory but the description.
Variable Type should match the input type.
Click Save Changes.
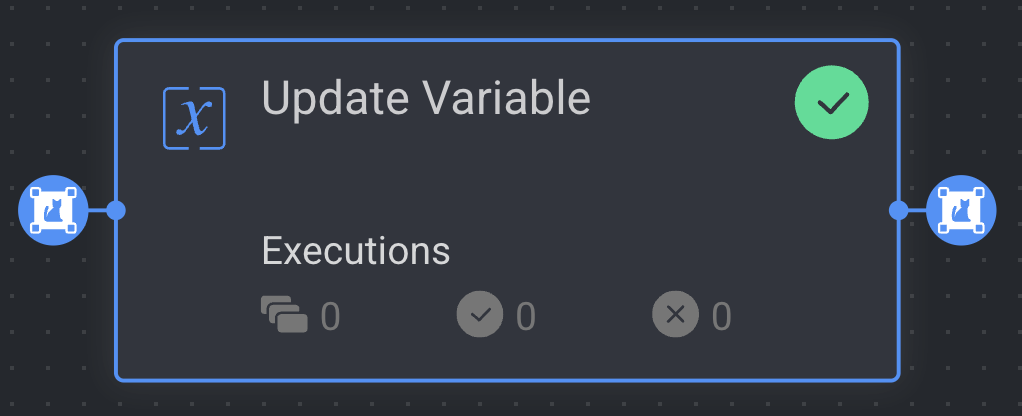
Update Variable Values
Unlike fixed parameters, the values of pipeline variables can be updated during the execution of the pipeline. When a variable's value is updated, it is automatically propagated to all nodes that use the variable.
Variables can be updated via:
SDK: using an App Function or a Code node.
Using the Update Variable node.
Updating variable for existing executions
Only pipeline executions with the status Created will be affected when updating a variable value. Executions with the status "In Progress" will remain unchanged.
Editing or Deleting Variable
Deleting variables that are used as pipeline node input is impossible
Editing Variable name/type for existing variables is impossible.
Node Details
Clicking on a node in the pipeline will bring up the Configuration tab relevant to that node. For more information about nodes and their configuration, see the Pipeline Nodes article.
Executions tab: When a node is selected, the Executions tab provides details about the execution of each item processed through that node. Choose a specific execution from the list to access its detailed information. DDOE stores executions for a maximum of 90 days.
Logs tab: The Logs tab showcases all log entries, including function and service level logs, application installation processes (from initialization to completion), generated during executions of the corresponding node within the selected time-frame. DDOE stores logs for a maximum of 14 days. Click on the log to view log details in the bottom. Utilize the following options to navigate through the logs:
Search: Enter free text to search through the logs.
Log Level Filter: Filter logs by selecting a level (critical, error, warning, info, debug) to find logs at that level and above.
Show Service Logs: Show/hide service-level logs, aiding in the debugging and resolution of service-level errors and issues.
Instances tab: This tab is active specifically for Custom nodes such as FaaS and Code nodes, providing information about the service instances (machine replicas) connected to the pipeline.
Node Status
The Node Service Status feature allows users to monitor the real-time status of their nodes, which is determined by the instance status. The available statuses include:
Status | Description |
|---|---|
Active | This status indicates that the application service on this node is currently active. |
Initializing | This status indicates that the application service on this node is currently undergoing initialization. To check its status, select the node and open the Instances tab. |
Inactive | This status indicates that the application service on this pipeline node is paused, and pending executions will be queued. |
Failed | This status indicates that the application service on this pipeline node has encountered an issue preventing it from starting. Refer to the service logs to identify and address errors. |
The service status for all services is shown in the pipeline once you activate it. Hovering over the Node Status triggers a popup, providing additional details about the status.
The service status is visible only when the pipeline is in the running state and is not displayed when pausing the pipeline.
The service status indication is shown in the following locations for the selected node:
Top right-side of the Pipeline Nodes.
Under the node name in the right-side panel.
Instance tab in the right-side panel.