Pipelines
You can include items in multiple labeling and review (QA) tasks as needed. By using different recipes (work instructions), you can break complex annotation projects into smaller, more manageable tasks. This approach simplifies execution, improves monitoring and quality control, and enables you to integrate automation steps and domain experts throughout the process.
You can design, manage, and visualize annotation workflows most effectively in DDOE Pipelines.
Use Pipelines to Automate a Labeling Task
DDOE allows you to create a Labeling Task Workflow Using a Pipeline Template to streamline and manage the labeling process efficiently.
To create the workflow, follow the steps:
Open the Tasks from the left-side menu.
Click Create Task. The task type section popup is displayed.
Select the From Pipeline Template from the list, and click Continue.
Select a Workflow widget and verify the details displayed on the right-side panel. A preview of the template with the available nodes is displayed.
Click Create Workflow. A new pipeline workflow page is displayed, and you start building your workflow by using various pipeline nodes.
Pre-Labeling Items
The Pre-Labeling feature in DDOE leverages AI models to automatically label data, significantly accelerating annotation workflows and minimizing manual effort. The installed and deployed models in DDOE are eligible for generating predictions.
Important
Billing Model: Pre-labeling operations utilize your Serverless Automation budget, with billing based on the model’s active runtime.
Auto-Scaling Behavior: Most marketplace models are configured with a scale 0–1 policy, meaning they automatically scale up only when an execution is pending and shut down afterward to optimize resource usage.
Model Input Requirements: Model input requirements may vary. While most models accept standard data types such as images or text files, others—such as large language models (LLMs)—may require structured inputs like prompt items. Always review the model’s input specifications before use.
Getting Started
To initiate the pre-labeling process, follow these steps:
Install a Model
Ensure that the model includespredictfunctionality to support inference. Also, you can Create Your Own Model with links to supporting resources.Deploy the Model
Only models that have been deployed can be used for pre-labeling tasks. Learn moreApply Pre-Labeling
Once the model is deployed, you can initiate predictions using any of the following three primary methods:Dataset Browser
Manually select items within the dataset and run predictions using the Predict function.Pipelines
Build a pipeline and insert a Predict node before the Labeling Task to automate model inference during task execution.Model Services with Triggers
Enable automatic predictions by setting up event-based triggers. This method is ideal for continuous, hands-off workflows that respond to new data uploads in real time.
Pre-Labeling Items
Using Dataset Browser
The Dataset Browser in DDOE provides a quick and intuitive way to apply pre-labeling to selected items using deployed machine learning models. This is particularly useful for tasks such as classification, detection, or segmentation, where automation can accelerate the annotation workflow. Refer to Predict with a Model for more details.
Using Pipelines
DDOE Pipelines enable automated pre-labeling by integrating model predictions directly into your data annotation workflow. This approach is ideal for continuous data flows, large-scale batch processing, or any use case where automated labeling is required before manual review.
1️⃣ Create a New Pipeline
From the DDOE main interface, open the Pipelines page from the left-side menu.
Click Create Pipeline → Start from Scratch.
Provide a name for your pipeline.
Click Create Pipeline to open the pipeline editor.
2️⃣ Add and Configure Pipeline Nodes
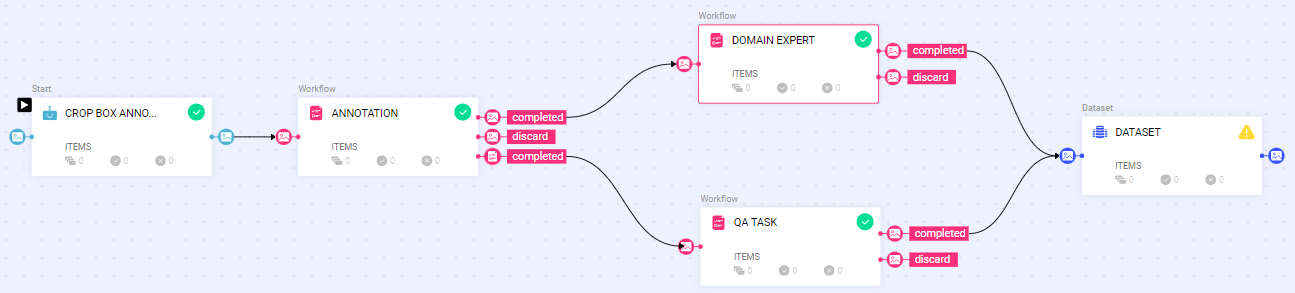
Using the left-side Node Library, drag and connect the following nodes in the following sequence:
.png)
Select the source dataset that contains the items you want to process.
This node serves as the entry point for the pipeline.
Choose a deployed model from your project to run predictions.
This node will apply AI-generated annotations to incoming items.
Create or select a labeling task where the predicted items will be reviewed.
This allows human annotators to validate or correct the model's output.
3️⃣ Enable a Trigger to Automate Execution
Select the Dataset Node.
In the right-side panel, enable a trigger to define how and when the pipeline should start.
For example, selecting "Item Created" as the trigger will automatically start the pipeline each time a new item is uploaded to the dataset.
This setup enables hands-free pre-labeling of newly added items.
4️⃣ Start the Pipeline
Once all nodes are configured and connected, click Start Pipeline from the top bar.
Begin adding items to your dataset. The pipeline will automatically:
Run the selected model on each item
Apply predictions
Route items to the labeling task for review
Using Model Services
DDOE allows you to automate the pre-labeling process by using deployed model services combined with event-based triggers. This method is highly scalable and ideal for hands-off workflows where predictions are automatically applied to new items as they are added to datasets in the project.
How It Works
Model Services are deployed from the Model Management module.
Triggers are added to these services to listen for specific dataset events.
When an event (e.g., item upload) occurs, the model service automatically runs prediction on the new item.
Predictions are applied and can optionally be passed to a labeling task for human review.
1️⃣ Install a Model with Predict Capabilities
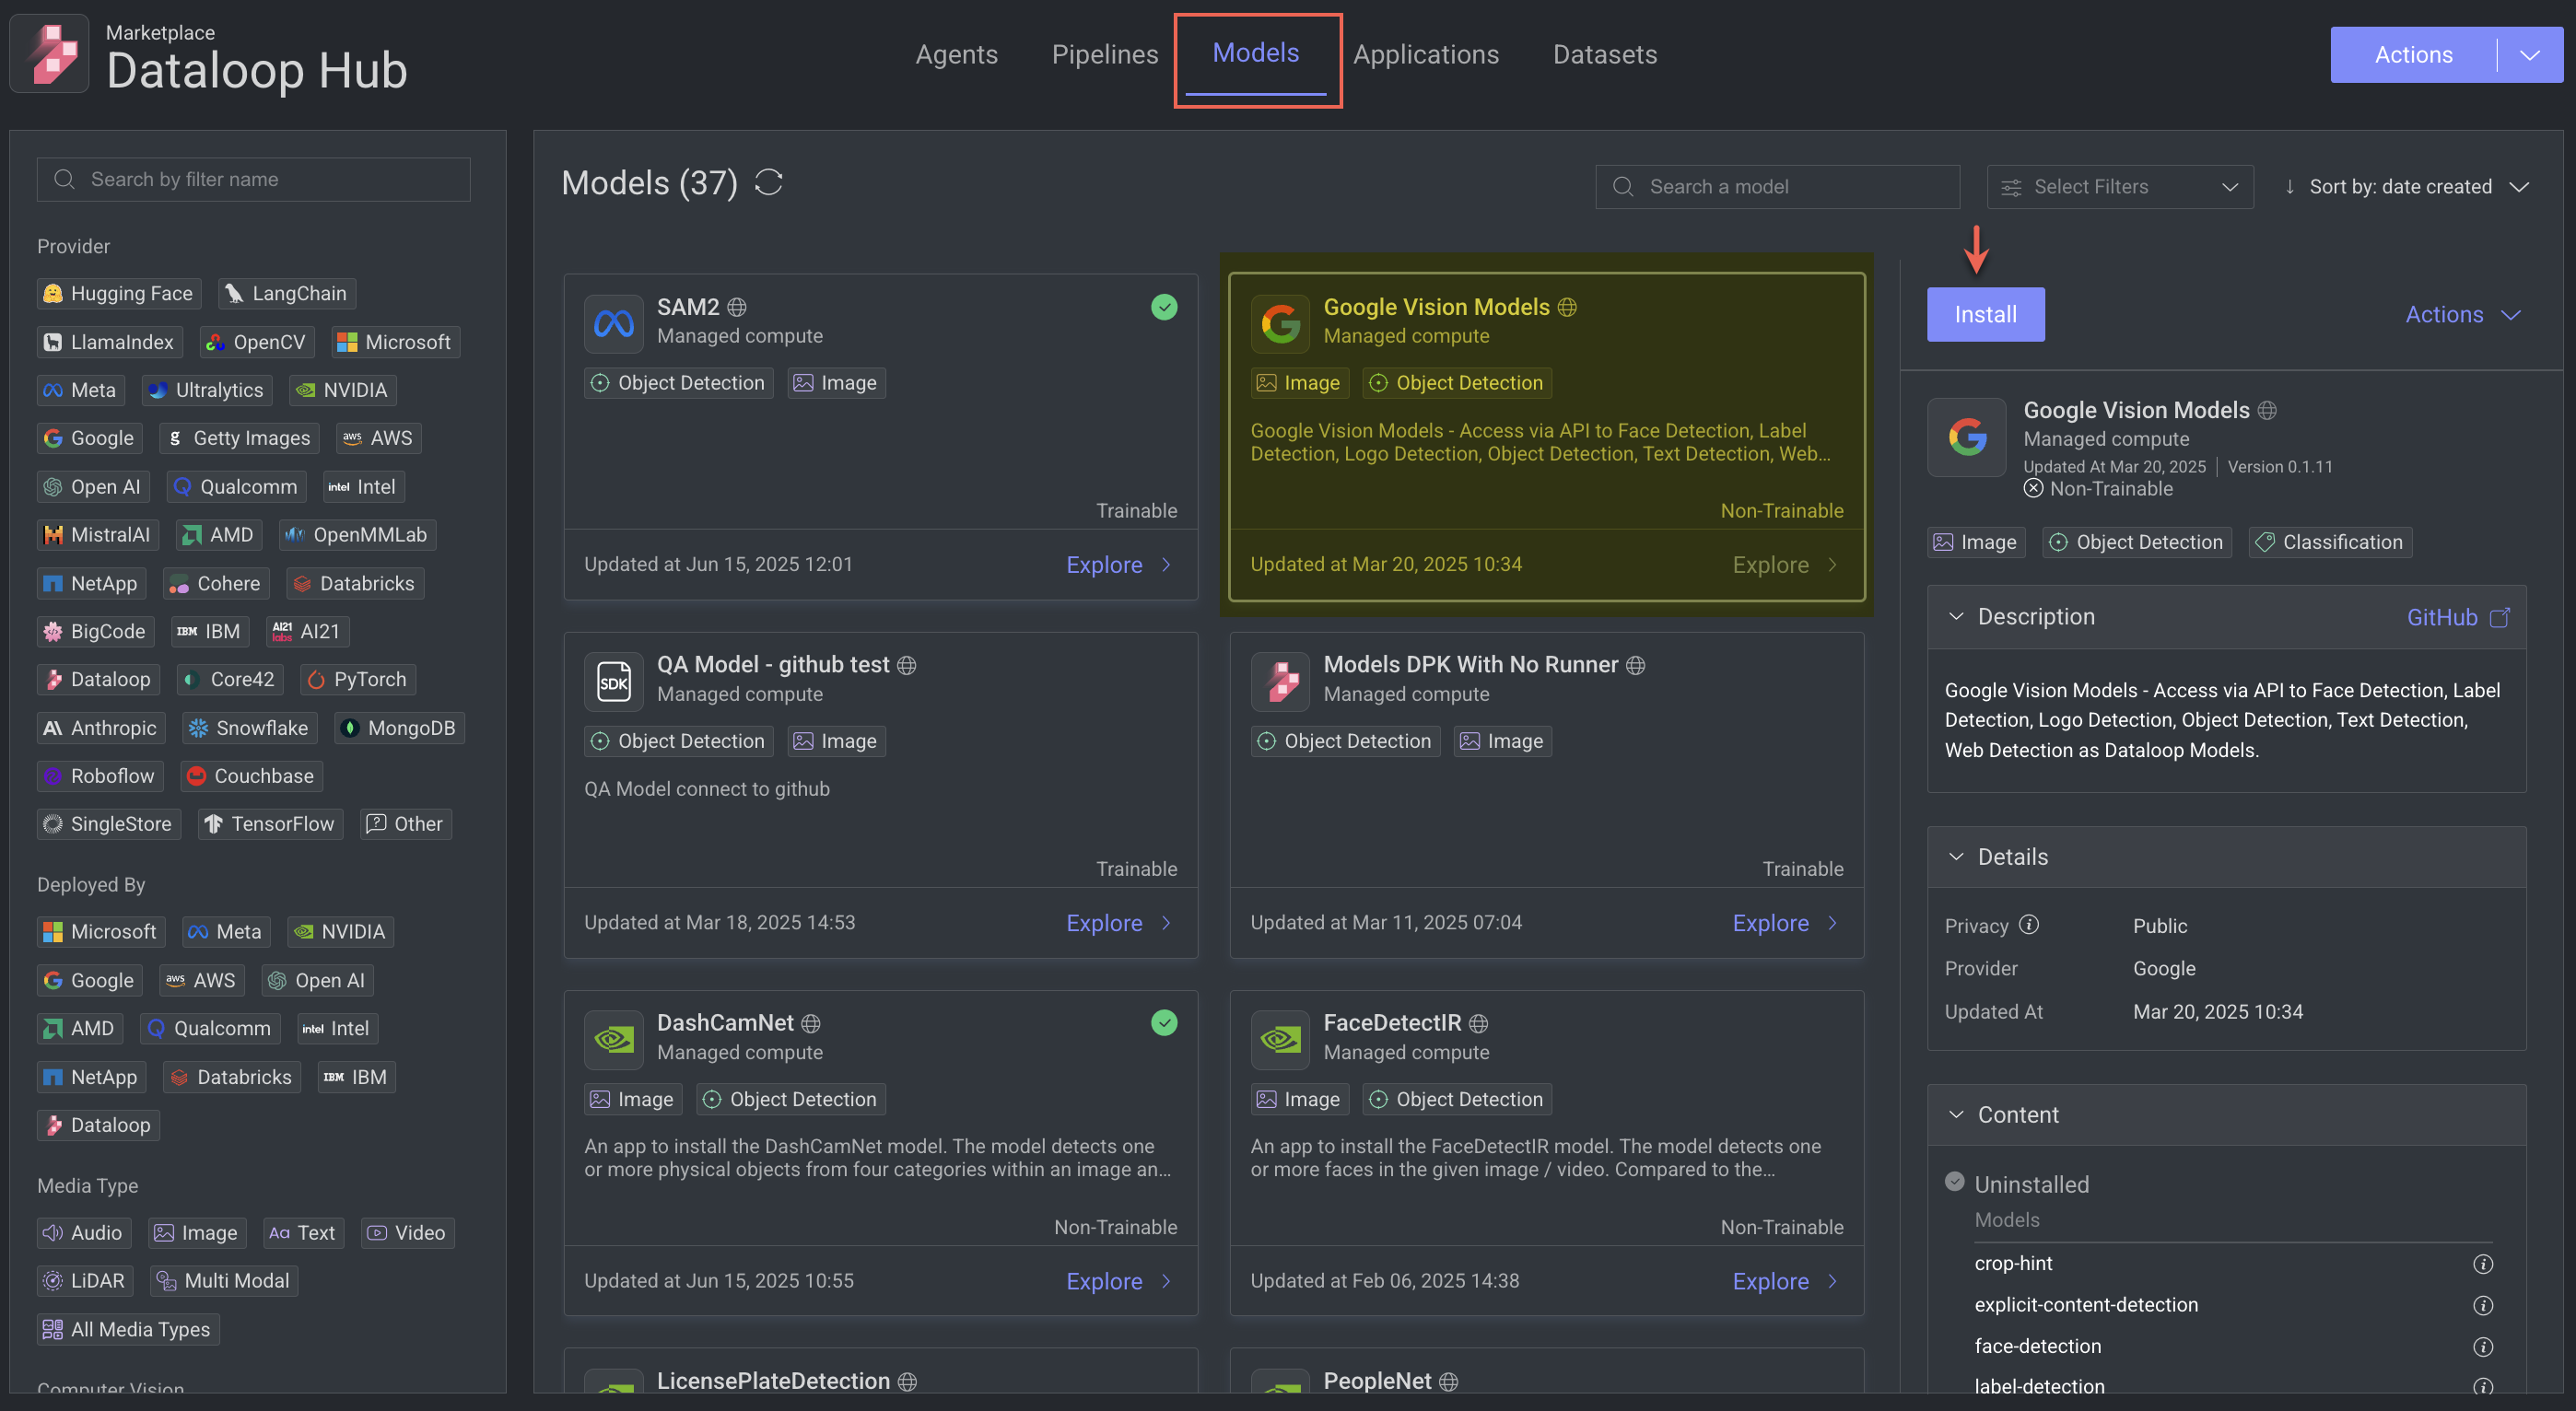
Go to the Marketplace from the left-side menu in DDOE.
Search for a model that includes the Predict function (e.g., classification, detection, segmentation).
Click Install to add the model to your project. The installed model will be available under the Models → Versions tab. Learn more.
Bring Your Own Models
You can also bring your own custom models and register them with the appropriate predict handler.
2️⃣ Deploy the Model as a Service
Go to the Models page from the left-side menu.
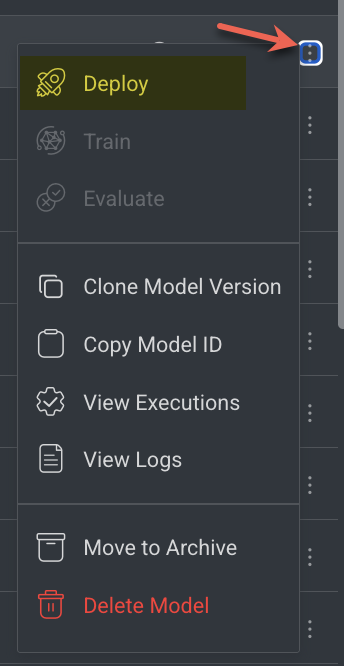
Select the installed model from the Versions tab, click on the three-dots and click Deploy. Learn more.
Configure service parameters (e.g., instance type, autoscaling options) as needed.
Once deployed, the model becomes available as a service that can be triggered.
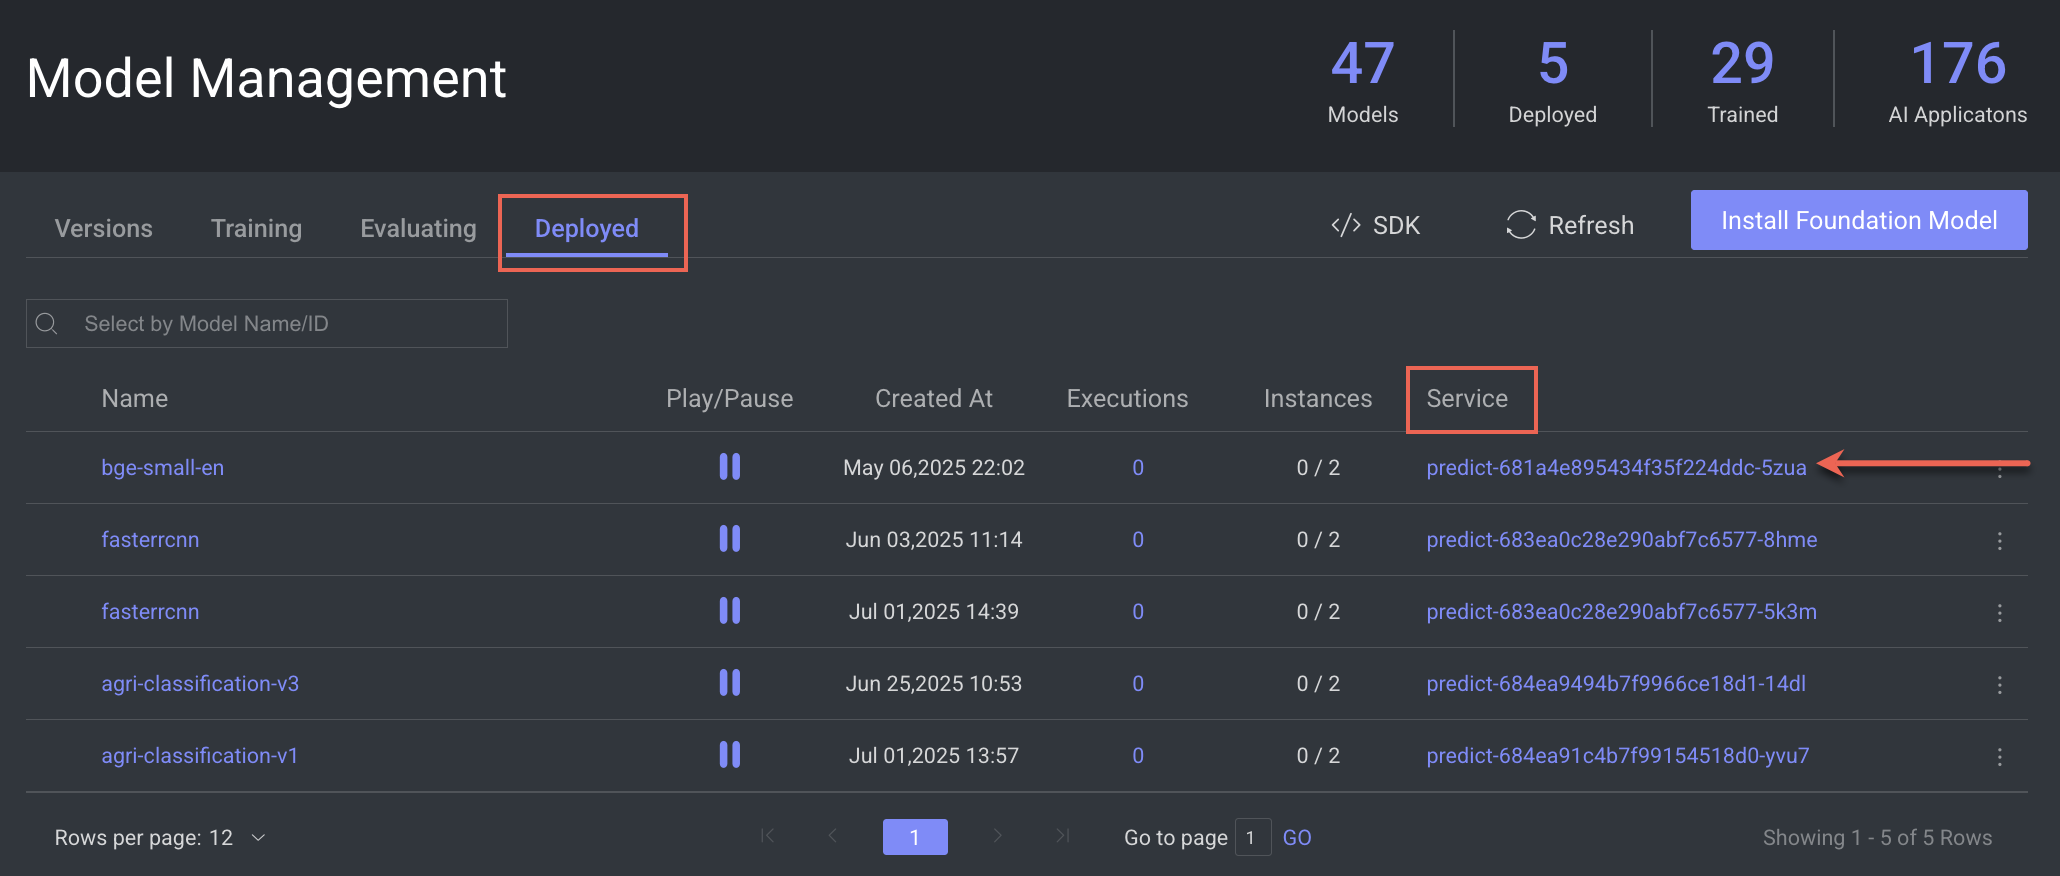
3️⃣ Open the Services Panel
In the Models → Deployed tab, click on the service. For example,
predict-681a4e895434f35f224ddc-5zuaThe service detailed page is displayed.
4️⃣ Add a Trigger to the Service
In the service details view, click Service Actions.
Click Add Trigger from the list.
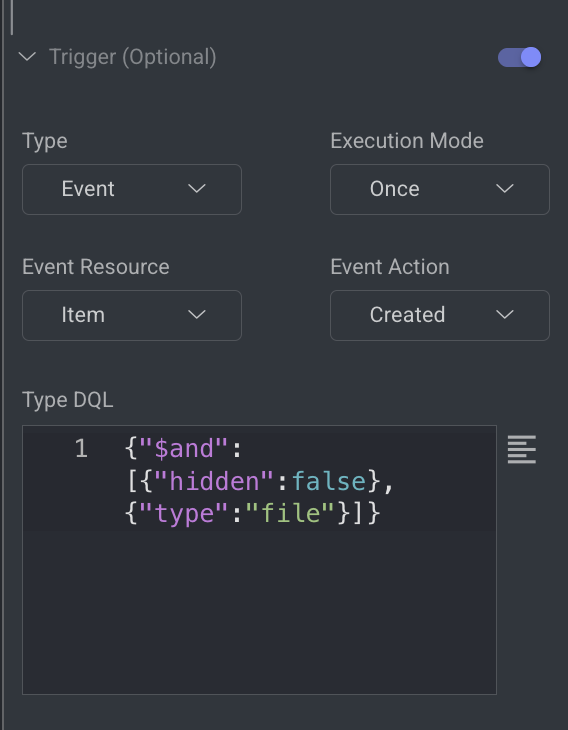
Choose an event-based trigger, such as:
Item Created – triggers prediction when a new item is uploaded to a dataset
Item Metadata Updated – triggers when metadata is modified
Set filter conditions if needed (e.g., target specific datasets or file types).
Click Save Changes. Learn more.

Once the trigger is active, the service will begin running predictions automatically whenever the trigger condition is met.