DDOE enables seamless dataset management by allowing you to upload data directly into its file system or sync from external cloud storage solutions. This flexibility ensures efficient data organization and easy accessibility within the platform.
Upload data into DDOE's Storage
Users can directly upload their data files, datasets, or other relevant information into DDOE's storage infrastructure. This process typically involves selecting the files or data to be uploaded and initiating the upload through DDOE's user interface or SDK.
File System option for Datasets
When using the File system option for Datasets, files' binaries are uploaded and stored on the DDOE storage (GCP hosted).
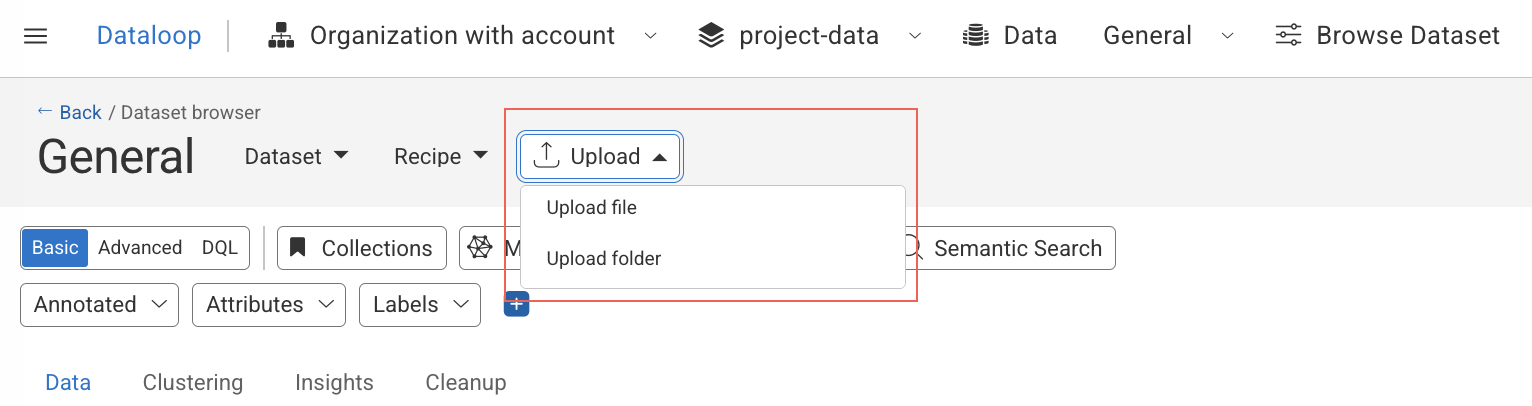
From the Dataset Browser:
In the Dataset-browser, click the Upload.
From the Dashboard:
In the Dashboard page, go to the Data-Management widget and find the dataset.
Click the Three-dots → Upload → File upload or Folder upload.
From the Data Management:
In the Data → Datasets, click the Three-dots → Upload.
Select File upload or Folder upload from the list if you need to upload individual files or entire folders.
Find the file or folder and click Upload. A confirmation message is displayed.
Important
Browser upload limits: A browser crash or halt is possible while attempting to upload one or more files larger than 1 GB and more than 100 folders, since browsers are not designed to manage the upload process. Your computer's configuration and Internet connection can affect the precise number. To upload many files and folders, use the SDK as detailed in the Upload and Manage Data tutorial.
View Corrupted Video Files: To view the corrupted video files when you uploaded, click here
Upload User Metadata
Once your items are placed within a Dataset, you have the ability to utilize the SDK or API to include your custom context as user metadata. Various examples of such context:
Camera number
Area taken
LOT/Order number
Developers
To learn how to upload items with user-metadata, read here.
Linked items / URL items
Linked items enable the utilization of a file on the DDOE platform without the need to store it on DDOE servers or establish integration with cloud storage. These linked items are made possible through the use of JSON files that contain URLs serving as pointers to the binary files stored on the customer's storage.
Use can opt to use links in any of the following scenarios:
To Keep Binaries Out of the DDOE Platform: By utilizing links, you can avoid storing the binary files directly on DDOE servers. This is advantageous when you want to reduce data storage costs or maintain data on your own infrastructure while still benefiting from DDOE's functionality.
To Duplicate Items Without Actually Duplicating Their Binaries: Links allow you to create copies or references to items in DDOE without replicating the associated binary files. This is helpful when you want to organize or categorize items differently within DDOE without increasing the storage footprint.
To Reference Public Images by URL: When working with public images or files hosted externally, you can use links to reference them by their URLs. This simplifies the process of incorporating and displaying these external resources within your DDOE projects without the need for redundant storage.
Create linked item (JSON)
Create a JSON file that contains a URL to an item from your bucket.
Upload the JSON file to the platform.
The JSON representation will be displayed as a thumbnail of the original item, accompanied by a link symbol. Whenever you click to open the file, the DDOE platform will retrieve the stream of the original item.
For linked items, the video duration is not available, unlike local items where you can retrieve this information.
{
  "type": "link",
  "shebang": "dataloop",
  "metadata": {
    "dltype": "link",
        "linkInfo": {
             "type":"url",
            "ref":"https://www.example.com",
                "mimetype": "video"
        }
  }
}
Bulk Connection of Multiple Linked Items
To efficiently link multiple items to a Dataset in bulk, the platform offers a feature for importing them from a CSV file
Simply upload a CSV file that includes a list of URLs corresponding to the items in your storage bucket. Once the CSV is successfully uploaded, the platform automatically generates a folder using the name of the CSV file and creates JSON files within that folder. These JSON files are then linked to the original items and are readily available within your dataset.
Bulk Upload
CSV files can also serve as a means to bulk-upload file binaries.
CSV file format
Field | Required | Description |
|---|---|---|
ID | Yes | Optional file name in case a name is not provided. |
URL | Yes | Link to the item. This link must be public for the browser to be displayed. |
image_bytes | Yes | Mandatory if the URL is not provided. |
name | No | Item name to use in the Dataset. |
action | No | link - to generate the JSON |
mimetype | No | Image/jpg - default mime type to be used. |
item_metadata | No | Update the metadata of the item. |
item_description | No | Add text to the description root property of the item. |
ETL pre-processing
ETL (Extract, Transform, Load) pre-processing, also known as data pre-processing, is a critical stage in the data pipeline that occurs before data is loaded into the DDOE platform.
A created event trigger on the DDOE platform becomes active each time a file is added to a dataset. By default, any image files that are uploaded or added to DDOE are automatically queued for processing through a global image preprocessing service, that:
Generate a thumbnail for the images.
Extracts information about the file and stores it in the items' meta-data entity of the DDOE platform, including the following information:
Name
Size
Encoding (for example, 7bit)
Mimetype (for example, image/jpeg)
Exif (image orientation)
Height (in pixels)
Width (in pixels)
Dimensions
Private Preprocessing Service
DDOE's global preprocessing service is designed to serve all of its customers as a unified service, capable of scaling in response to varying workloads while maintaining an optimal configuration.
For customers who aim to gain independence from the global preprocessing service and ensure uninterrupted performance in production-level projects, unaffected by potential load fluctuations generated by other DDOE customers. Customers have the option to install and run it within their projects using their dedicated resources.
To learn more about this option, contact Dataloop.
Additional Preprocessing Services
You can define a created trigger within their projects, enabling you to call uploaded items in your own functions for tailored preprocessing.