Overview
- 27 Oct 2025
- Print
- DarkLight
- PDF
Overview
- Updated On 27 Oct 2025
- Print
- DarkLight
- PDF
Article summary
Did you find this summary helpful?
Thank you for your feedback
In Dataloop, an ontology serves as a structured framework that defines the labels and attributes used for data annotation within a project. It is a fundamental component of a recipe, which encompasses the ontology alongside work instructions, annotation tools, and settings. This structure ensures consistency and clarity in the annotation process, facilitating effective machine learning model training.
The Ontology page displays a list of recipes available in the current project, along with details such as labels, attributes, associated datasets, associated tasks, creation and update information, and more.
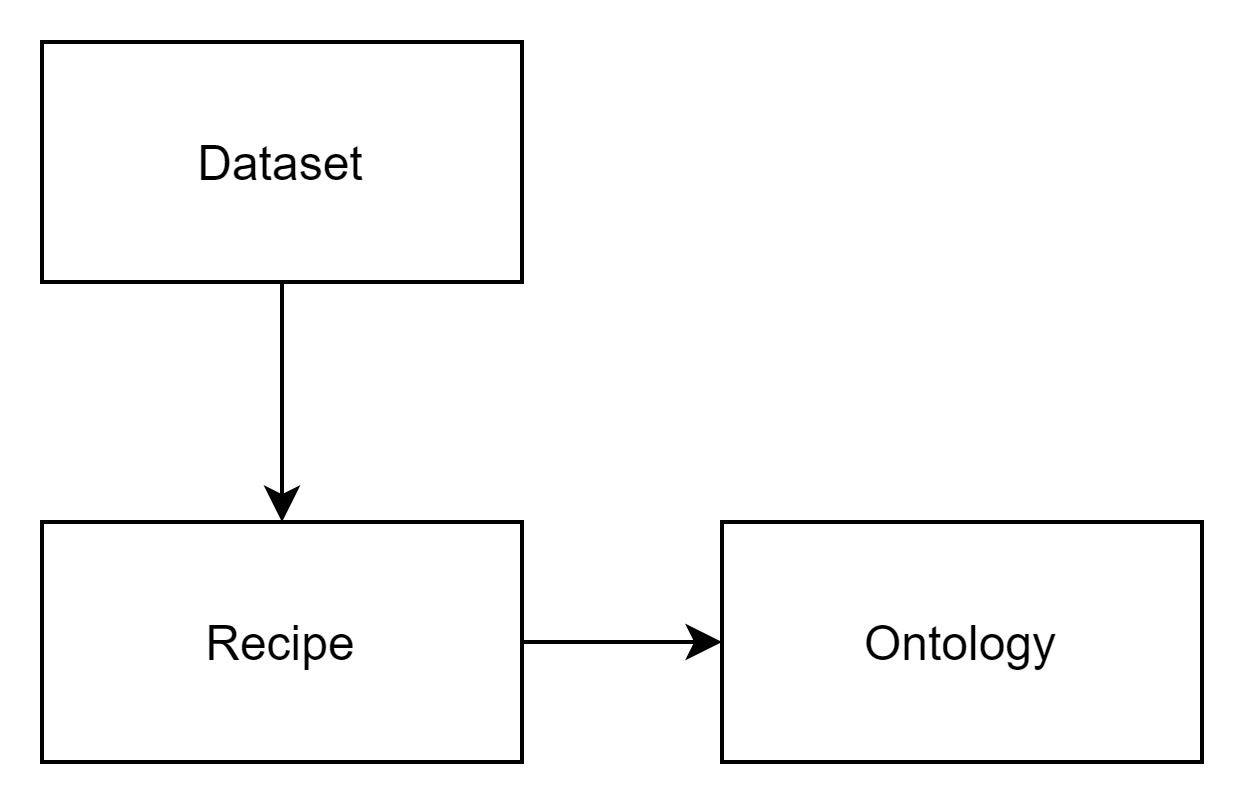
Dataloops' taxonomy is based on 2 main entities - Recipe and Ontology.
Recipe – Recipe is a container for work instructions, and includes a single Ontology entity, and work instructions as a collection of:
Tool Selections - mapped to labels from the Ontology
Various Settings
Annotation and QA instructions files, etc.
The recipe is used when creating a Task (annotation or QA task) - the task binds the Recipe (labels, attributes, instructions) with the data and the team to work.
Ontology - Contains the labels (classes) and attributes used in the project. The dataset ontology is the building block of a model and helps define the information applied to data to represent the knowledge models that are then trained to inference.
Labels (like classes) are the names used for classifying annotations.
Attributes allow additional independent degrees of freedom to define labels.
Types of Recipes
Recipe v1 (Legacy)
Classic ML is designed for traditional machine learning pipelines and structured data labeling workflows.
Best suited for:
Computer Vision (image classification, detection, segmentation)
Natural Language Processing (text classification, entity recognition)
Audio analysis (speech labeling, transcription)
3D/LiDAR data annotation
Features and Setup:
Define hierarchical labels and custom attributes
Configure annotation tools (bounding box, polygon, keypoint, etc.)
Set label colors, import/export labels from text files
Provide detailed PDF work instructions to guide annotators
Enable rule-based studio configurations to control labeling behavior
Fully compatible with SDK and automation tools for model-assisted labeling
GenAI / Multimodal Recipe
The Multimodal recipe is tailored for evaluating and managing responses from Generative AI models and multi-input annotation tasks.
Best suited for:
LLM-based workflows (prompt-response evaluation)
Image + Text alignment tasks
Multimodal data analysis
Features and Setup:
Start with ready-to-use templates or design a custom layout
Define input prompts, responses, and evaluation criteria
Customize interface for tasks like ranking, scoring, classification, or open-ended assessment
Support for integrating multiple data types (text, images, audio, etc.) within a single annotation flow
Ideal for prompt engineering, response quality benchmarking, and human-in-the-loop validation
Provide detailed PDF work instructions to guide annotators.
Features
Search recipes using recipe names
Filter recipes using recipe creator names
Create, manage, and clone recipes
Change the default recipe of a dataset (switch recipe)
Add hierarchical labels
Set label color
Import labels from the TXT file
Create attributes
Section ID identifies attributes when using the SDK
Supports different types of attributes
Multi-select (check-box)
Single-select (radio button)
Free-text
Scale/range
Yes/No
Import/Export Ontology
Recipe
Developers Guide
To learn how to work with recipes via SDK, read here.
By default, every Dataset is linked with a single Recipe.
When creating a new Dataset, users can select to link it with a new Recipe carrying the same name as the Dataset or link it with an existing one.
Annotation and QA tasks are linked with a recipe as the work instructions. By default, the recipe is set to be the one linked with the Dataset from which data in the task is taken. However, the recipe can be changed when creating/editing a task, therefore a single item can be worked in multiple tasks, each with a different taxonomy.
Create a Classic Recipe
Navigate to Recipes from the lift-side menu.
Click Create Recipe.
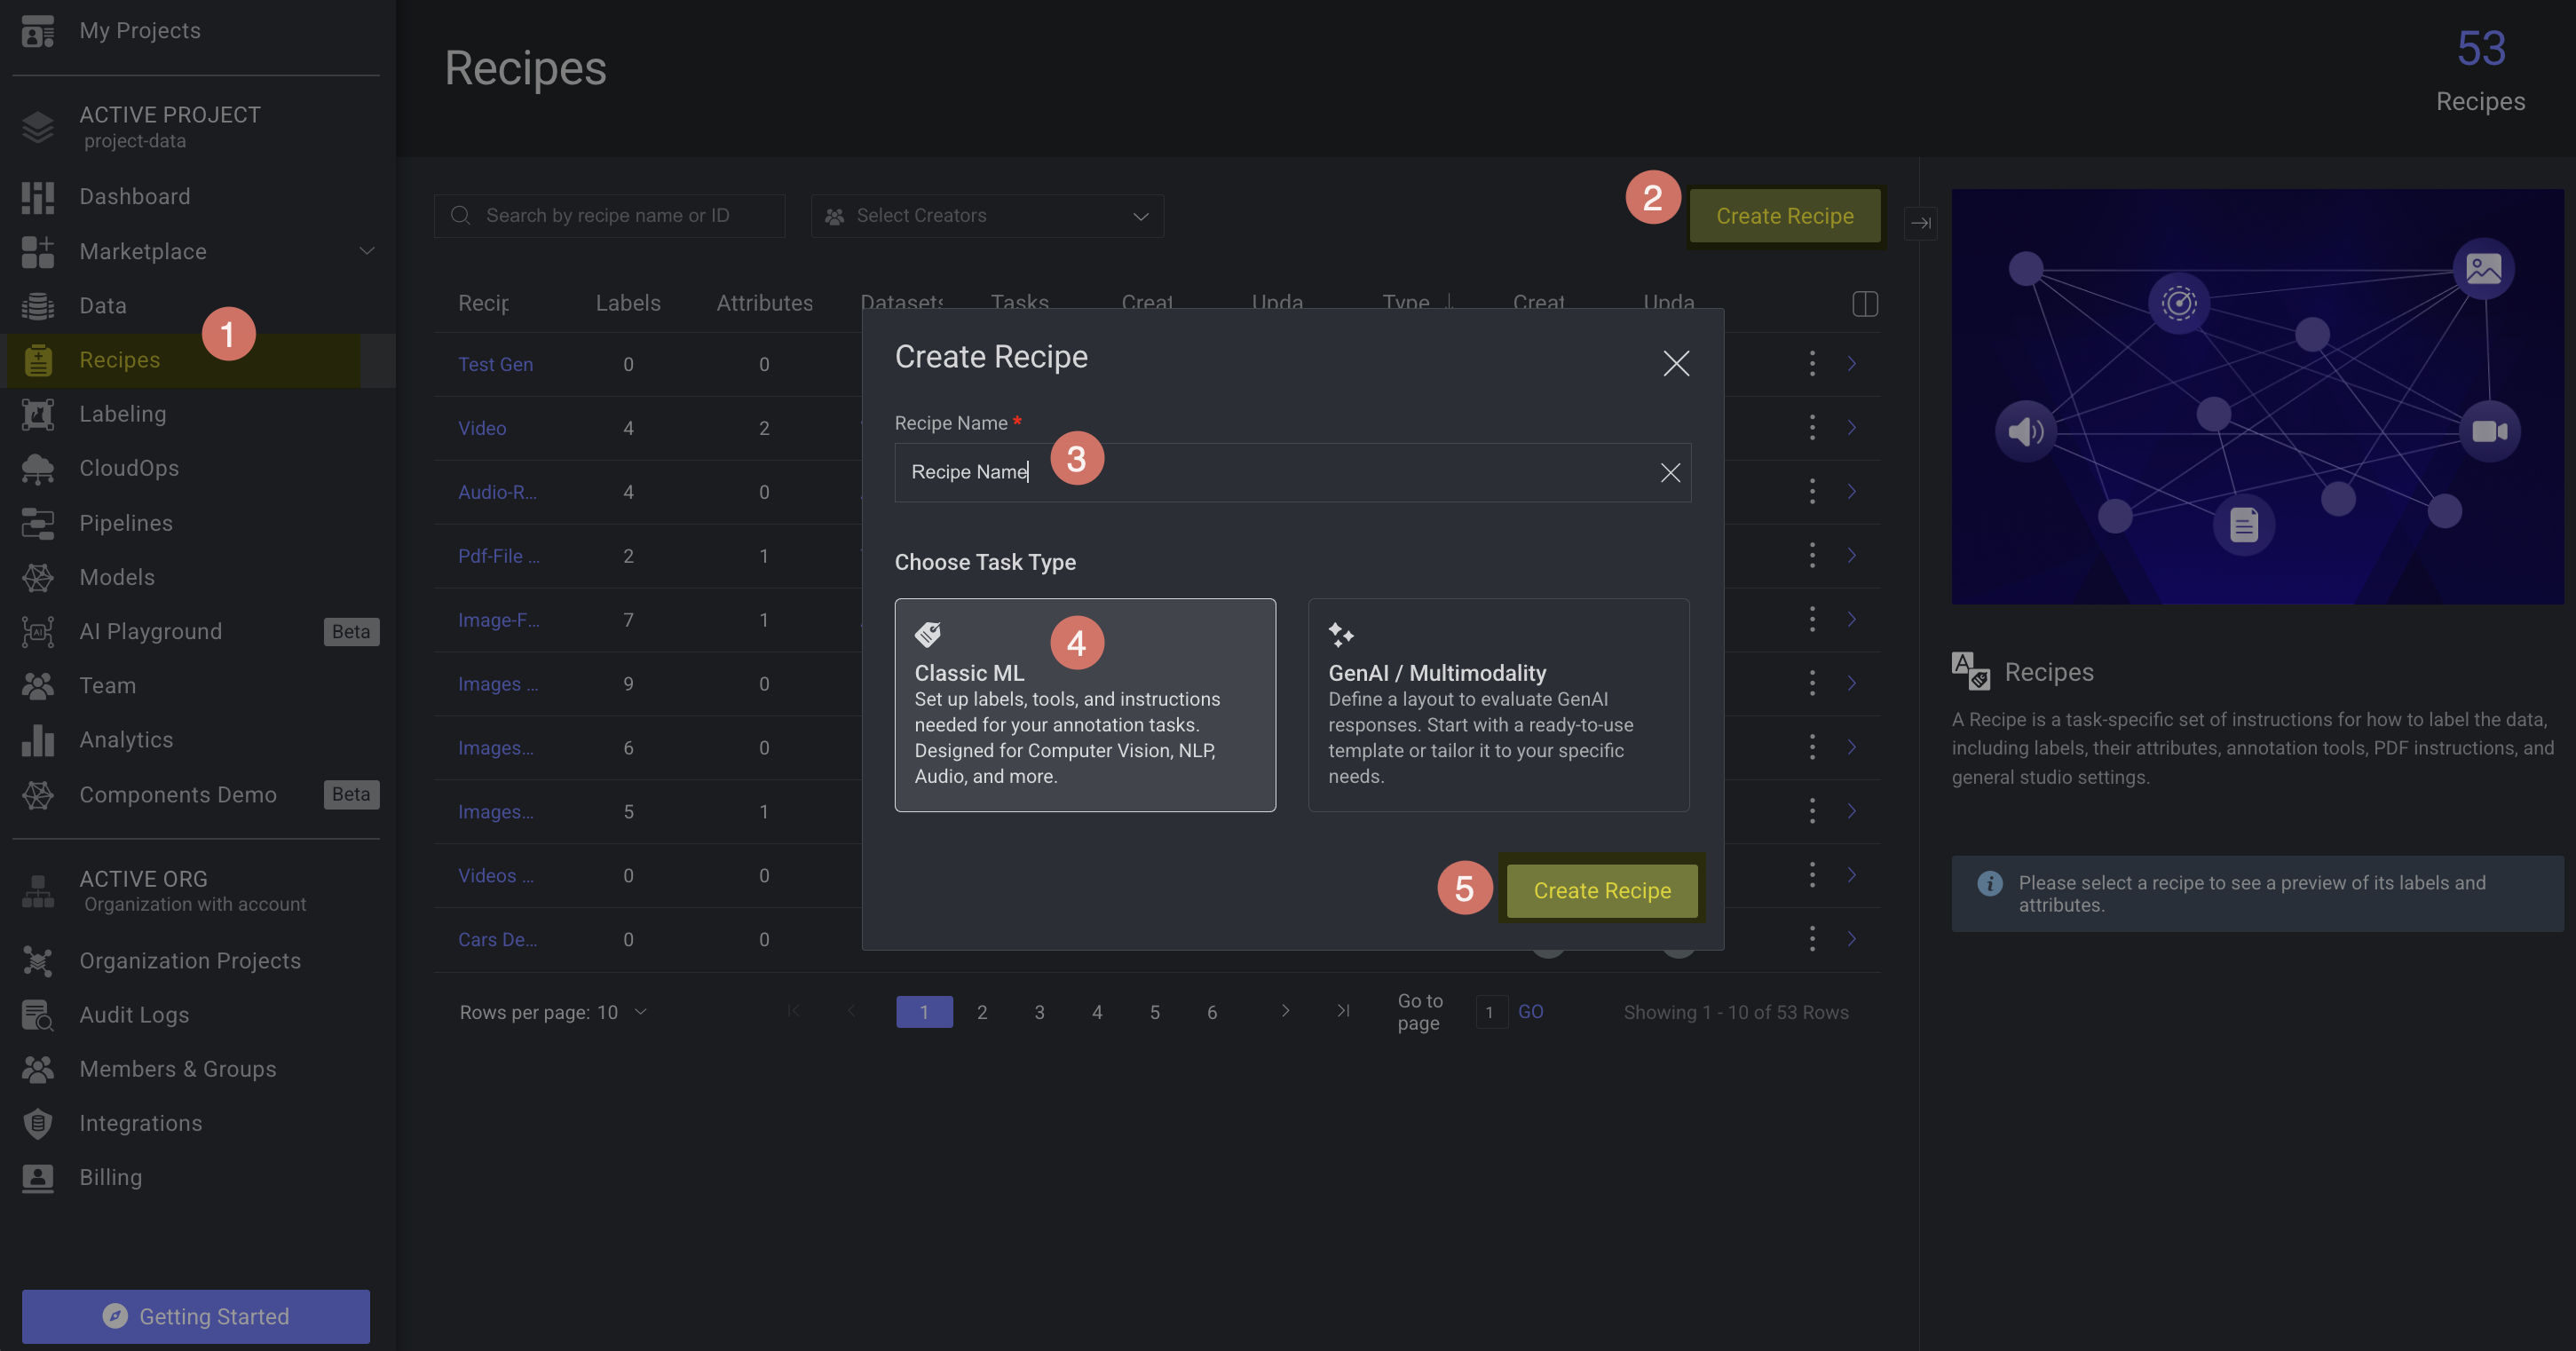
Recipe Name: Enter a name for the new recipe.
Select the Classic ML task type.
Click Create Recipe. The new recipe page is displayed.
Access a Recipe Page
To open the recipe page for a specific Dataset, use one of the following options:
From the Dashboard:
In the project dashboard's dataset table, click the Recipe icon for the selected Dataset.

Form the Recipe menu:
Click on the Recipe from the lift-side menu.
Locate/search for the recipe from the list.
Click on the recipe.
From an Annotation studio:
Click on the Recipe link above the label-picker section.
Or,
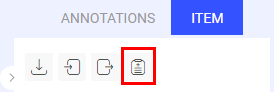
Select the Item tab from the right-side panel.
Click on the Recipe icon in the Item-Info tab,
View Preview of a Recipe
Click on the Recipe from the lift-side menu.
Locate or search for the desired recipe in the list.
Select the recipe. A preview of the selected recipe will appear in the right-side panel, displaying its labels and attributes.
Edit a Recipe
Click on the Recipe from the lift-side menu.
Locate or search for the desired recipe in the list.
Click on the three dots and select Edit Recipe from the list.
Make required changes and click Save.
Clone a Recipe
Click on the Recipe from the lift-side menu.
Locate or search for the desired recipe in the list.
Click on the three dots and select Clone Recipe from the list.
Click Confirm. The cloned recipe will be created and listed.
Export Ontology
Click on the Recipe from the lift-side menu.
Locate or search for the desired recipe in the list.
Click on the three dots and select Export Ontology from the list. A JSON file will be downloaded.
Copy Recipe ID
Click on the Recipe from the lift-side menu.
Locate or search for the desired recipe in the list.
Click on the three dots and select Copy Recipe ID from the list. The recipe ID will be copied.
Delete a Recipe
Click on the Recipe from the lift-side menu.
Locate or search for the desired recipe in the list.
Click on the three dots and select Delete Recipe from the list.
Click Delete to confirm.
Deleting a recipe from a dataset that has been set as the recipe for other datasets too (switched recipe) will be deleted from all linked datasets.
Switch a Recipe in the Dataset
To change the recipe linked from one dataset to another:
Click on the 3-dots action button of a dataset entry (from either the project overview or the Datasets page)
Select Switch Recipe
Select a different recipe from the list and approve.
Ontology
Ontologies contain the labels and attributes of a recipe. They do not have representation outside a specific recipe, and currently reusing an ontology on different recipes requires exporting them from one and importing them into another.
Updating the Ontology with a Label Thumbnail Using the SDK
The following code snippets demonstrate how to add a new label with a thumbnail and how to update an existing label to include thumbnail display data using the Dataloop SDK.
Adding a Label with a Thumbnail
import dtlpy as dl
dataset = dl.datasets.get(dataset_id="65f82c9fc26fd1bc97ea9915")
ontology = dataset.ontologies.list()[0]
ontology.add_label(label_name='dog', color=(34, 6, 231), icon_path=r"C:\Datasets\Dogs\dog.webp")
Updating an Existing Label with a Thumbnail
import dtlpy as dl
dataset = dl.datasets.get(dataset_id="65f82c9fc26fd1bc97ea9915")
ontology = dataset.ontologies.list()[0]
# Add label if not already existing
ontology.add_label(label_name='dog', color=(34, 6, 231), icon_path=r"C:\Datasets\Dogs\dog.webp")
# Create a label object with display data
label = dl.Label(tag='dog',
                 display_label='dog',
                 display_data={'displayImage': {'itemId': '65fa86e310864a269c607064',
                                                'datasetId': "65f82c9fc26fd1bc97ea9915"}})
# Update the label in the ontology
ontology.update_labels(label_list=[label], update_ontology=True)
Import Ontology
To import an ontology as a JSON file:
Open the respective recipe.
From the bottom right side, select the import ontology.

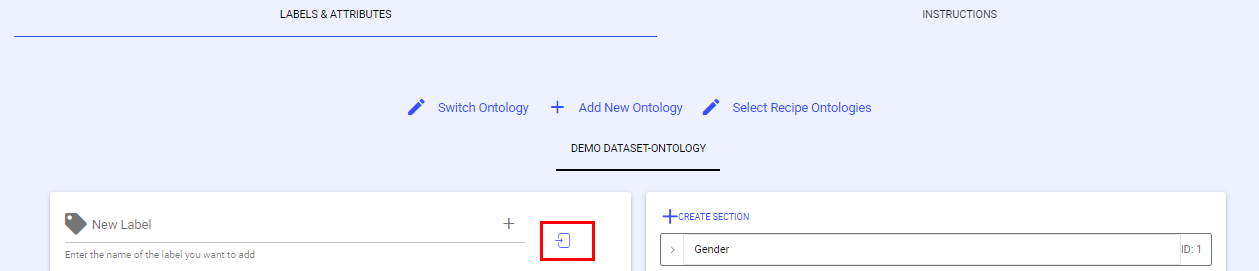
Import Labels
To import labels/attributes from the platforms' interface:
Imported labels should be in a TXT file, following these guidelines:
Every label in a new line.
Labels hierarchy is by separating them with ".". For example, "Car.Type.SUV".
Open the respective recipe.
From the Labels and Attributes tab, select the import option for labels.
Select a TXT file.