After your data items or folders are uploaded or synchronized, the Dataset Browser enables you to filter and refine them using the features outlined below.
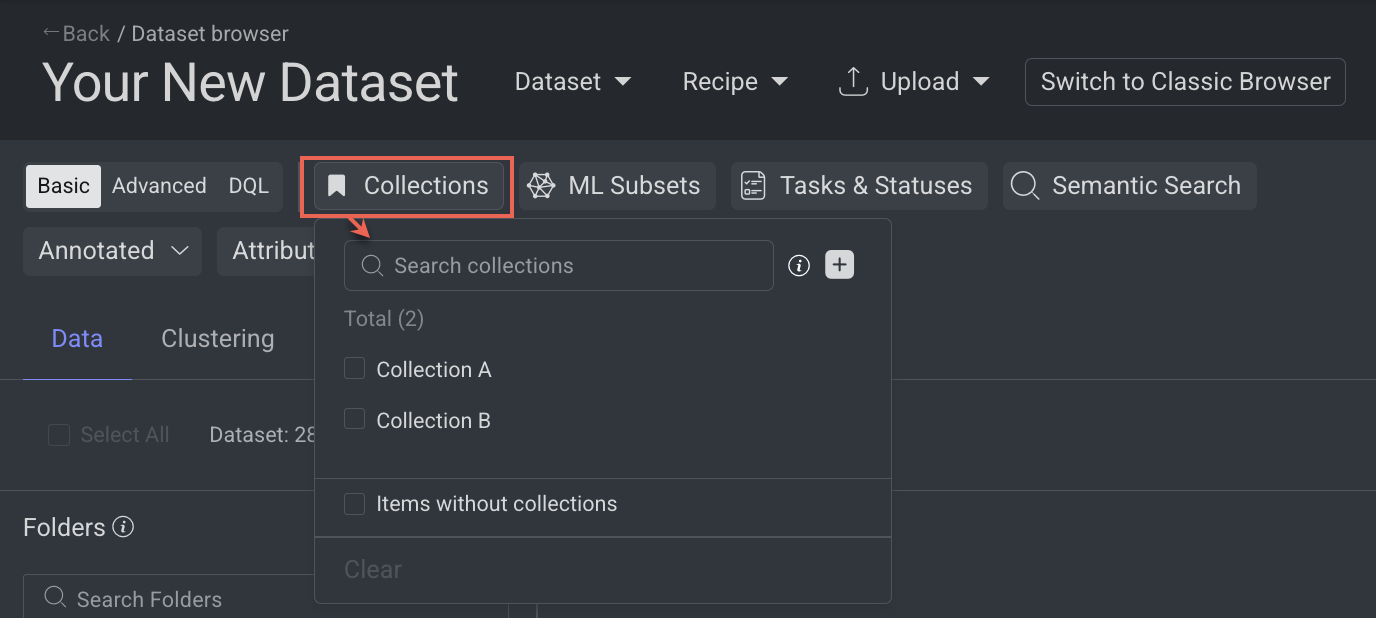
Filter by Collections
The Collections feature in Dataloop's Data Browser helps organize data by allowing you to group specific sets of items based on task needs (e.g., annotation, review, training) into a collection folder. You can create up to 10 collection folders.
Open the Dataset Browser: Go to the Data → Datasets → Your Dataset → Data Browser.
Select the Collections from the top-bar. The available items are displayed in folder wise.
Select a collection from the list. Once selected, only items included in that collection will be displayed.
Filter Items without Collections
Click on the Items without collections
Learn more about Collections.
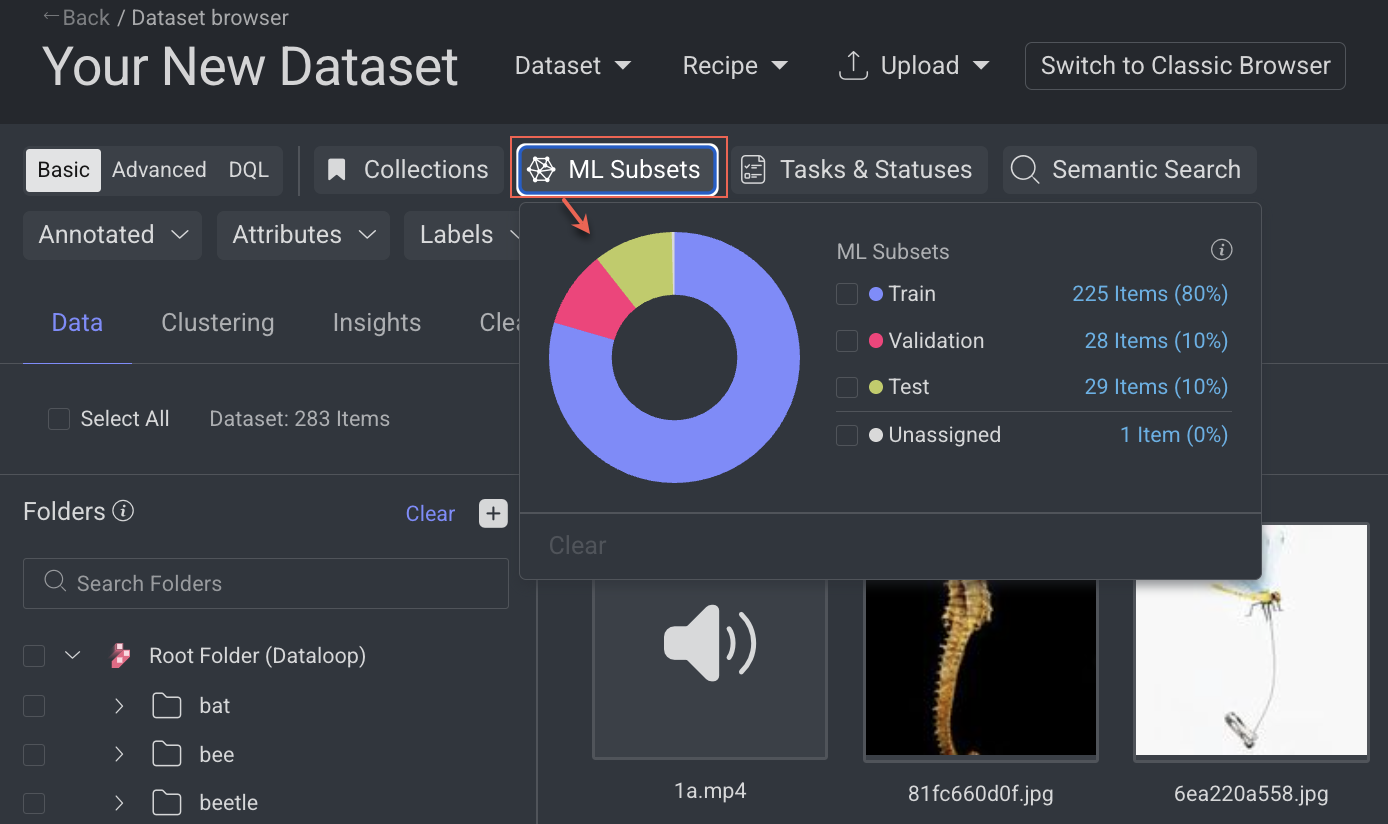
Filter by ML Subsets
The ML Subsets view in Dataloop’s Data Browser is a dedicated feature that streamlines machine learning workflows by helping you organize and manage datasets more efficiently. It enables you to classify and filter items according to their ML subset assignments—such as train, validation, and test—which are essential stages in the ML lifecycle for model development and evaluation.
Open the Dataset Browser: Go to the Data → Datasets → Your Dataset → Data Browser.
Select the ML Subsets from the top-bar. The available items are displayed in folder wise.
Select a subset. For example, Train, etc. and click outside of the ML Subsets pop-up. The items are added to the train subset will be filtered and displayed.
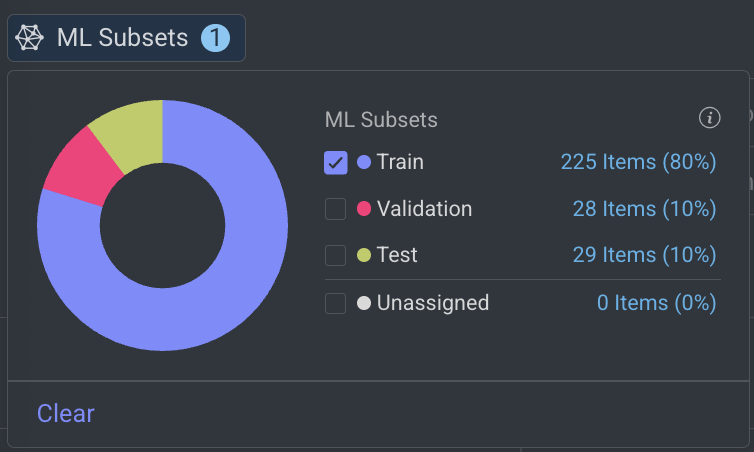
A search query for the train subsets will be also added and visible on the Items search field.

If there are no items added to ML Subsets, click Split Into Subsets.
Learn more about ML Subsets.
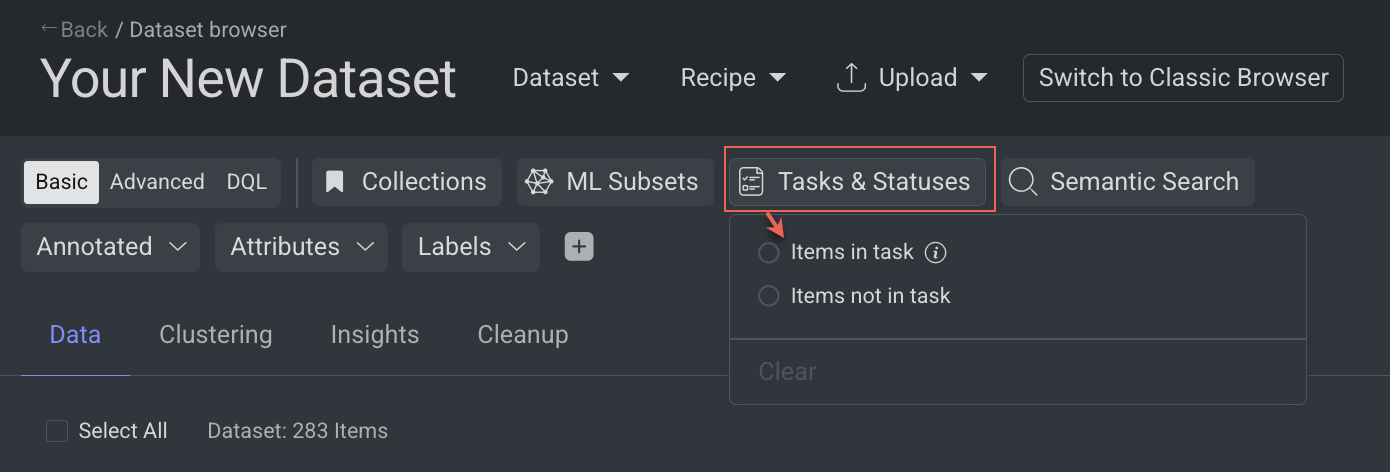
Tasks & Statuses
The Tasks & Statuses filter in Dataloop's Data Browser allows you to filter and search for items based on task-related attributes, such as task status or lack of assignments. This feature offers advanced filtering options, enabling better data management.
Prerequisites: Create a Task.
Filters Items by Tasks & Statuses
Open the Dataset Browser: Go to the Data → Datasets → Your Dataset → Data Browser.
Select the Tasks & Statuses from the top.
Select the following options to filter items:
Items in task:
Search tasks: Select a task to filter items included as part of this task.
Filtering by Status:
Use the Timestamp to select a time period to view the items. Use the filter to view items based on the following task status options.
Items with Status [= (equals)]: Filter items that have one of the following assigned task status: Complete or Discard
Items with Status [!= ( not equals)]: Filter items that do not have one of the following assigned task status: Complete or Discard.
Items without Status: Filter items that do not have a status. The DQL (Data Query Language) query will update accordingly.
Items Not in task: Filter items that are not part of any tasks.
Item Status
An item earns the status annotated if it receives any form of annotation, such as a classification, a note, or any other tool-generated annotation, regardless of whether this occurs in the dataset browser or during a task. However, being annotated doesn't necessarily mean an item is completed.
This situation may arise if the item is annotated via the dataset browser, where annotations can be saved without assigning a status, or if it's annotated during a task without the complete button being engaged. Perhaps because the annotator plans to return to it later.
Completed status is assigned to an item when an annotator finalizes their work on it by clicking the complete button during a task.
An approved status is granted after an item undergoes a QA task and the QA tester decides to approve it by clicking the respective button.
An item is deemed not annotated if it lacks any annotations. Interestingly, an item can be marked as completed and yet be considered not annotated if the complete button was clicked without any actual annotation work being done on it.
Saved Filters
The Dataloop platform allows you to customize and save search queries within data querying or search systems, designed to streamline and optimize user interactions with large datasets.
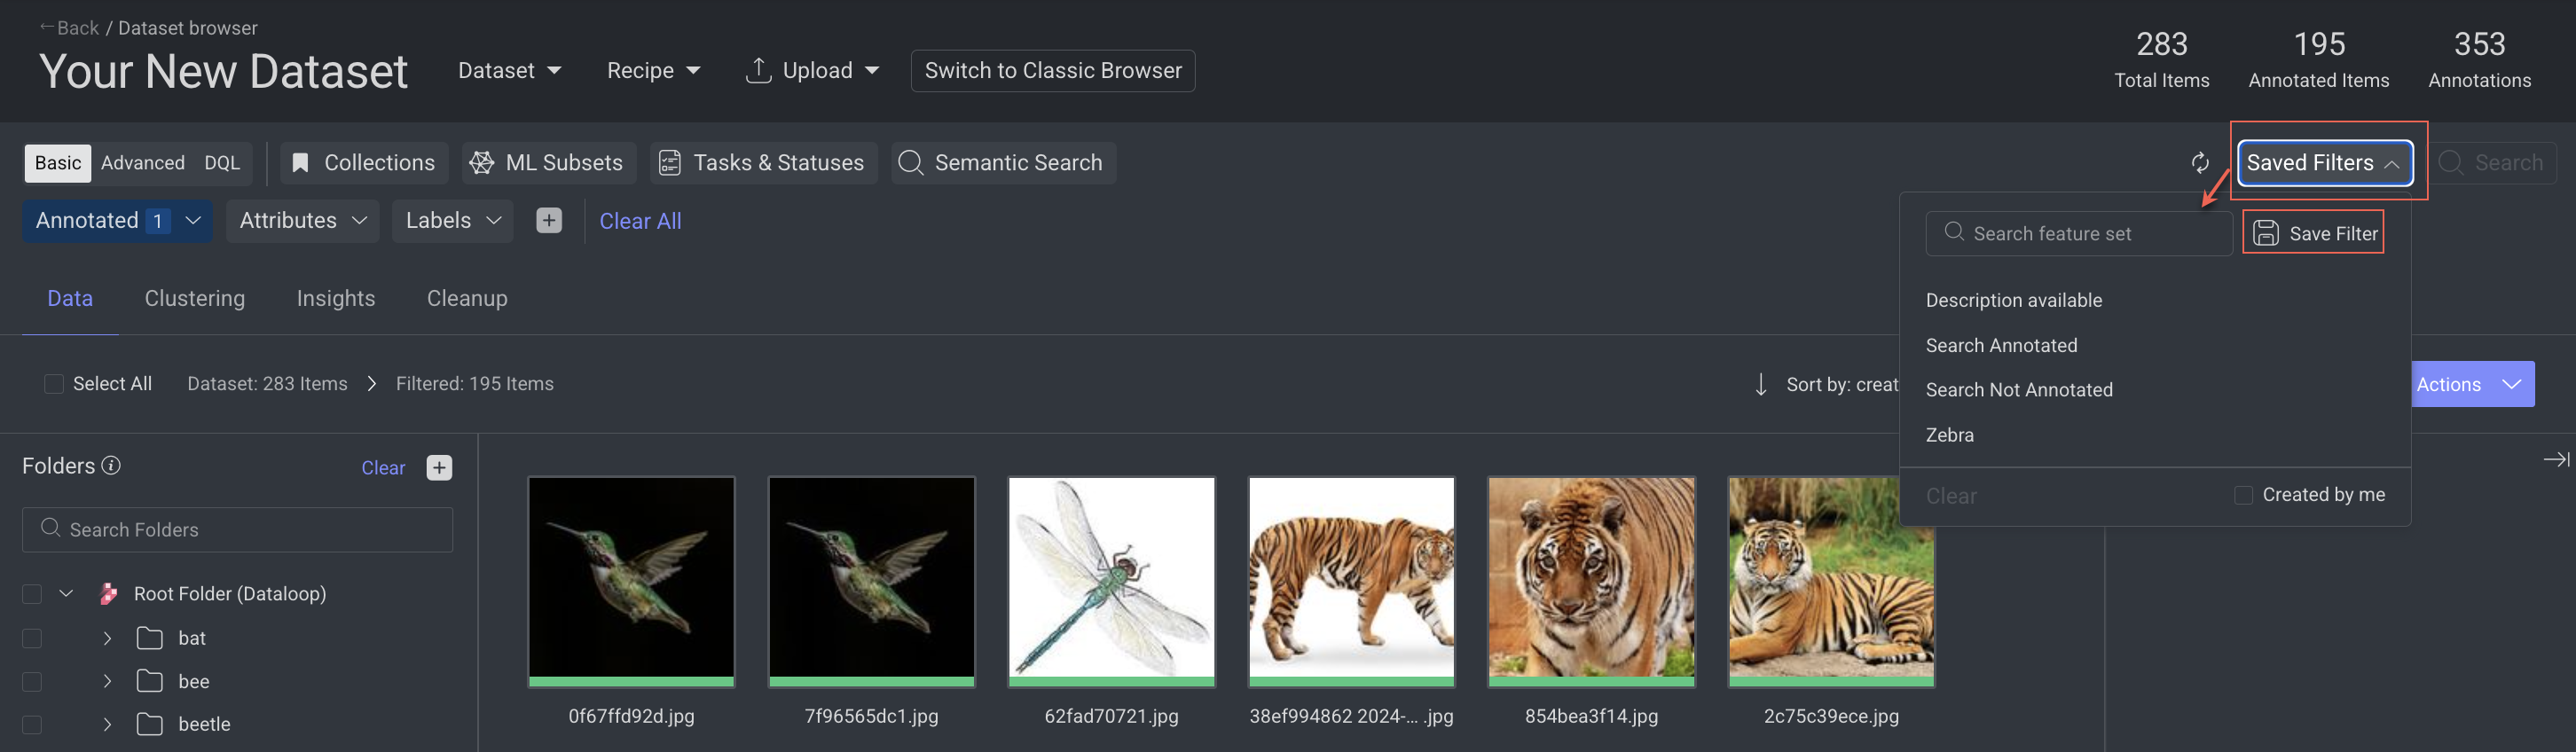
Save Search Queries
Dataloop platform offers the ability to save specific search filter criteria, allowing for efficient and consistent future searches.
Open the Dataset Browser: Go to the Data → Datasets → Your Dataset → Data Browser.,
Create a search query.
Click on Saved Filters.
Select Save Filter. A dialogue window is displayed.
Enter a name for the new filter query.
Click Save. A confirmation message is displayed.
Filter Items Using Saved Queries
Dataloop platform offers the ability to reuse specific search filter criteria.
In the Dataset Browser, click on the Saved Filters.
Select Saved Filters and choose the saved filter from the list. Clicking on the saved filter allows the search query to run and displays the result.
View Saved Filters
Up to three saved filters are displayed in the top menu, above of the search bar. Clicking on any of these filters will automatically run the corresponding query in the Smart Search field, instantly applying the saved conditions to your dataset.
Delete Saved Search Queries
Dataloop platform offers the ability to reuse specific search filter criteria.
In the Dataset Browser, click on the ⋮ Three Dots.
Select the Saved Filters.
Find the query to be deleted and click on the Delete icon when you hover over.
Click Delete Query. A confirmation message is displayed.