The Assignment Browser Interface is a tool designed for managing, reviewing, and annotating image datasets within a project-based system. This document provides an overview of its features, navigation, and functionalities.
Assignments are Read-Only / Locked
During export, the dataset enters Read-Only Mode to prevent changes. A warning message will appear in the Assignment Browser if the item(s) belongs to a dataset currently being exported. While locked:
Saving and modifications are disabled.
Auto-save is off to avoid errors.
Save and Status buttons are disabled.
Actions will trigger an error message.
🔄 Use the Refresh button to check the latest status. Developer or Project Owner can click Unlock to unlock the dataset if needed. Read more
Open the Assignment Browser
To open the assignment browser for a specific task, you can:
Use Assignment Actions: Select a task and click on Open Assignment Browser from the available assignment actions.
Double-click: Double-click on the assignment link to open the assignment browser.
Use the Right-Side Panel: Click on the Browser icon located in the right-side panel for quick access.
Navigation Bar
The top navigation bar contains key controls:
Organization nameselection: Displays the organization or workspace. Click to select a new one from the list.Projectselection: Indicates the currently selected project.Tasks: Provides access to task management features.Task name selection: Select the tasks from the list.Browse Assignment: Assignment browser view. There is no action available on this icon.
Filters & Metadata
This panel allows filtering items based on multiple criteria:
Item Status: Filter images based on their processing state. For example, annotated, not annotated, etc.
Labels: Search for images tagged with specific labels. Click on a label and click Submit Filter.
Team: Filter items assigned to specific team members.
Item Uploaded Date: Sort items by upload date.
File Name: Filter items by their filenames.
File Extension: Filter items by their file extensions, like png, jpeg, etc.
Attributes: Filter items by their annotation attributes.
Annotation Type: Filter items by the annotation types from the list.
Item Size: Filter items by the file sizes by entering the minimum and maximum values in KB, MB, or GB.
Item Metadata: Filter items by item metadata like
meta key type, ordata type.Annotation metadata & QA: Filter items by annotation metadata like the
item with issues,for review (QA),meta key type, ordata type.Item Media Type: Filter items by the types of the item like
image,video,image/jpeg,video/webm, etc.
Data View Types
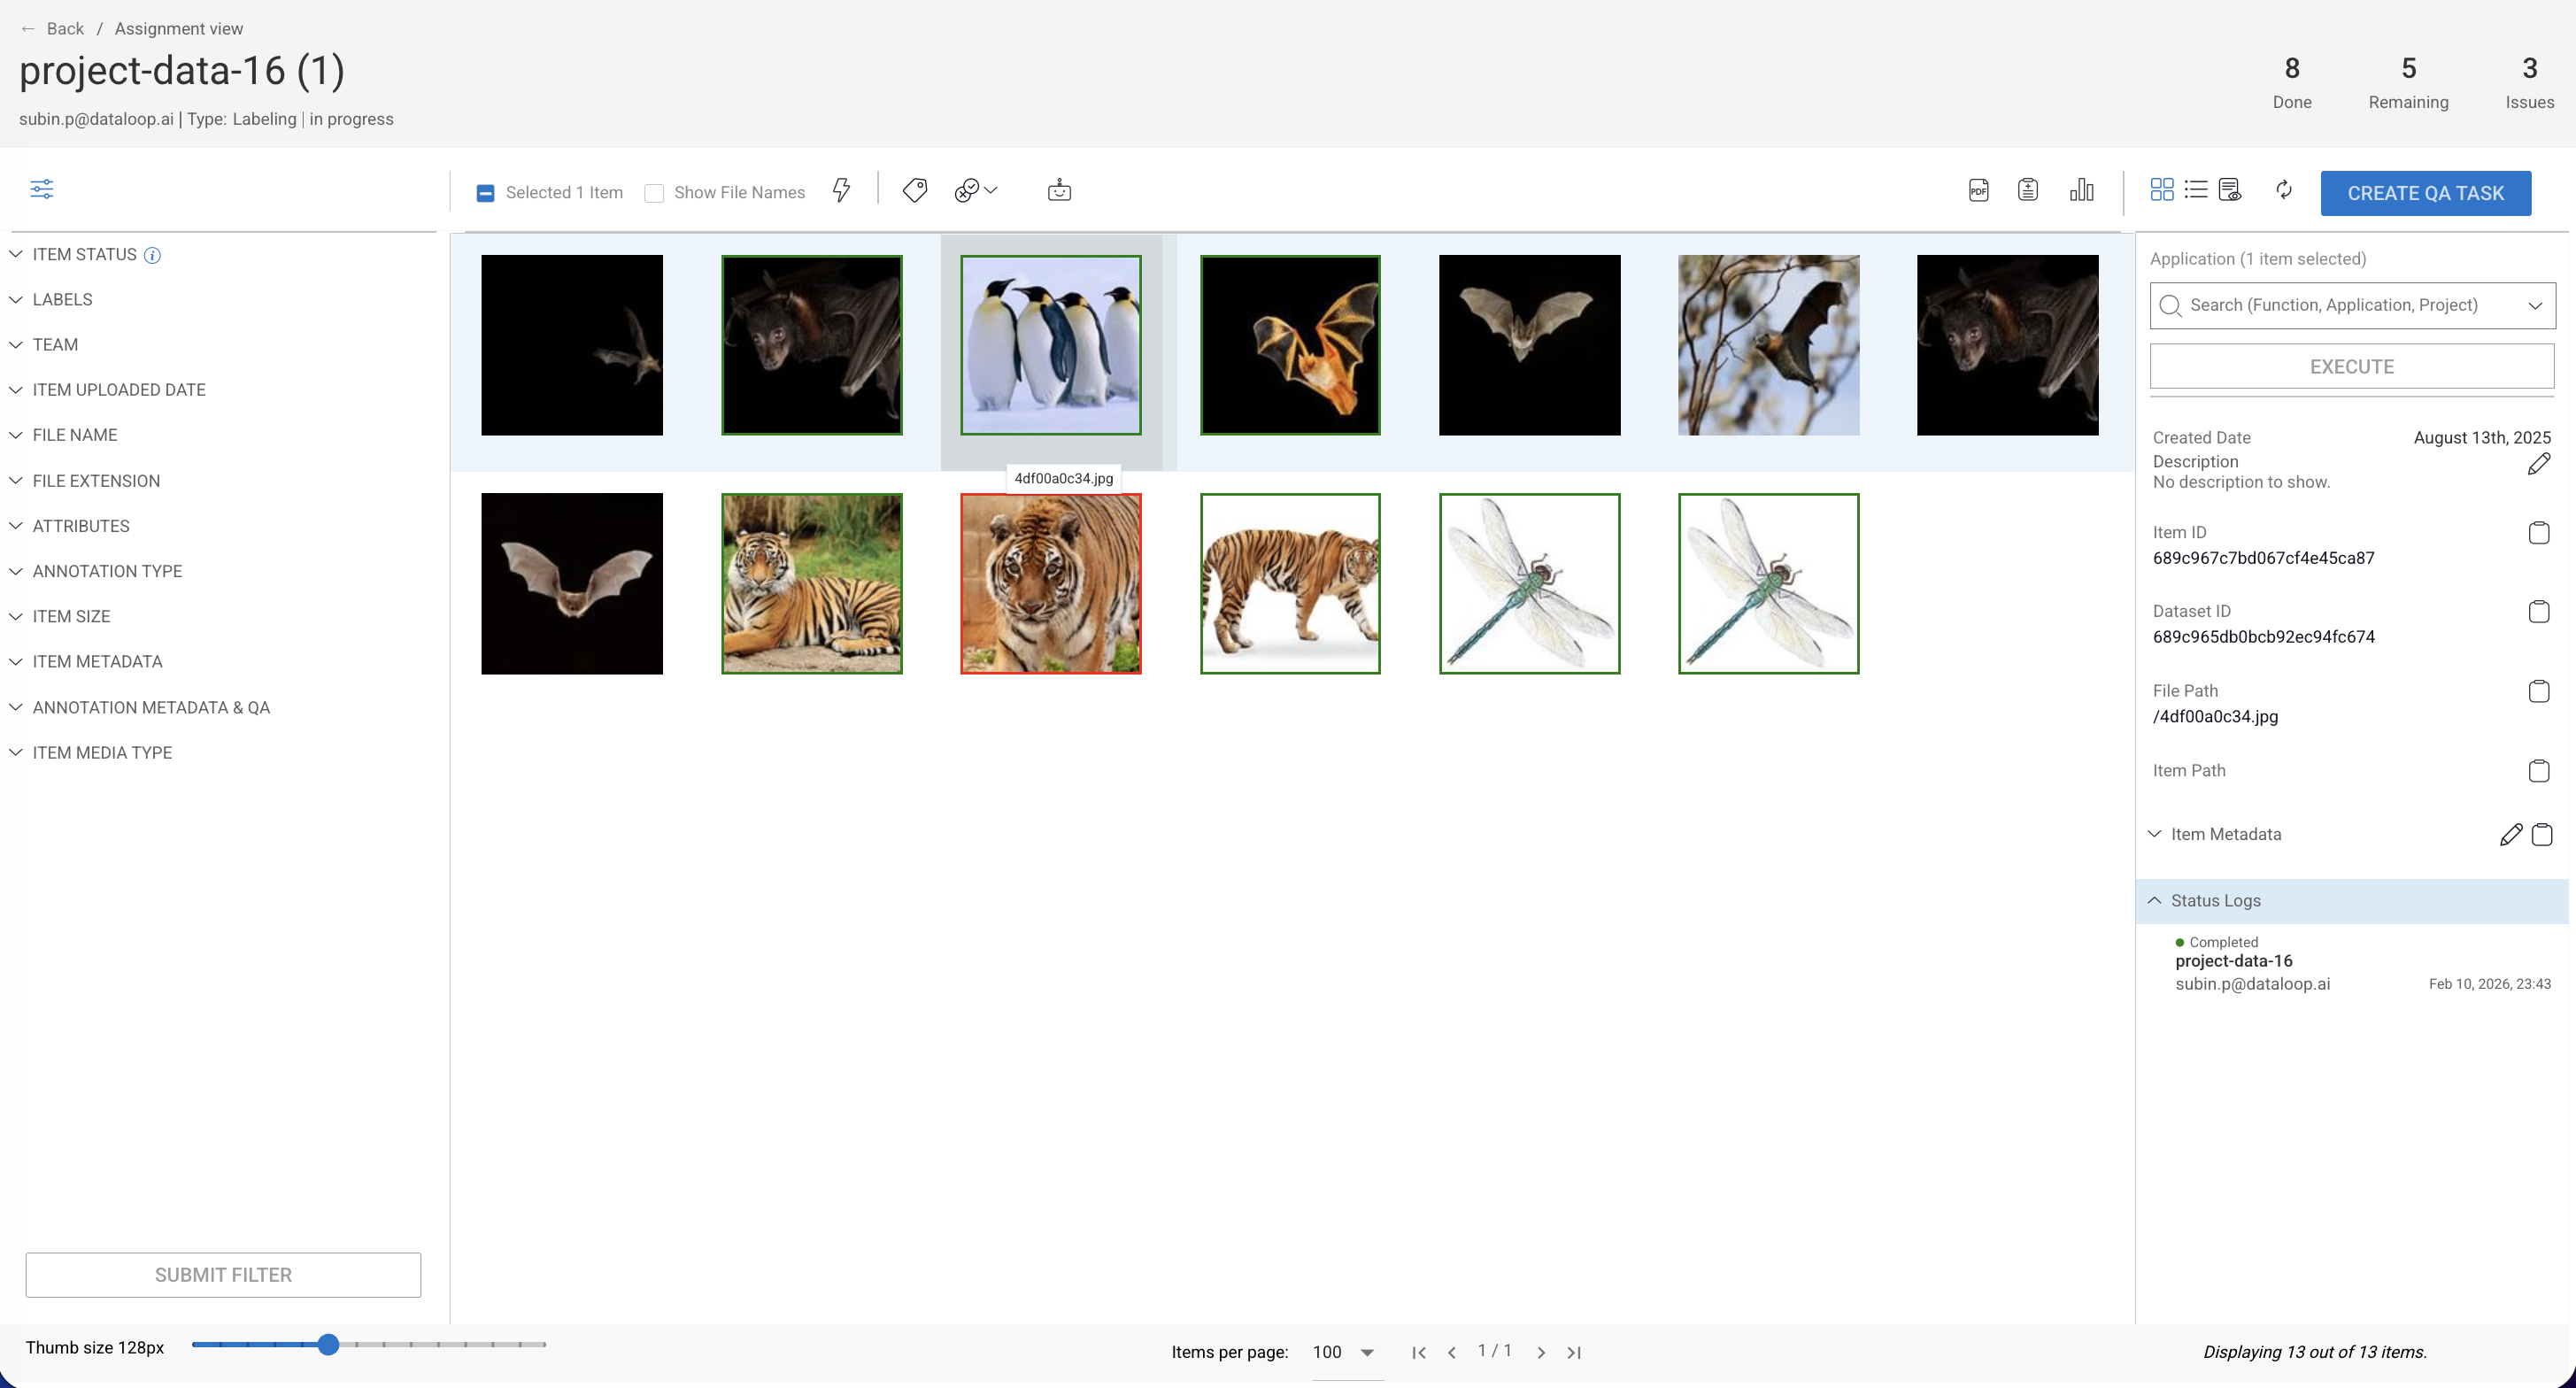
The central display area shows the images in an icon view format by default, but you can select lists, and cards views as well. Key features:
Icons View
The Icons View in the Assignment Browser displays your assignment items in a thumbnail grid layout, providing a quick visual overview of your data.
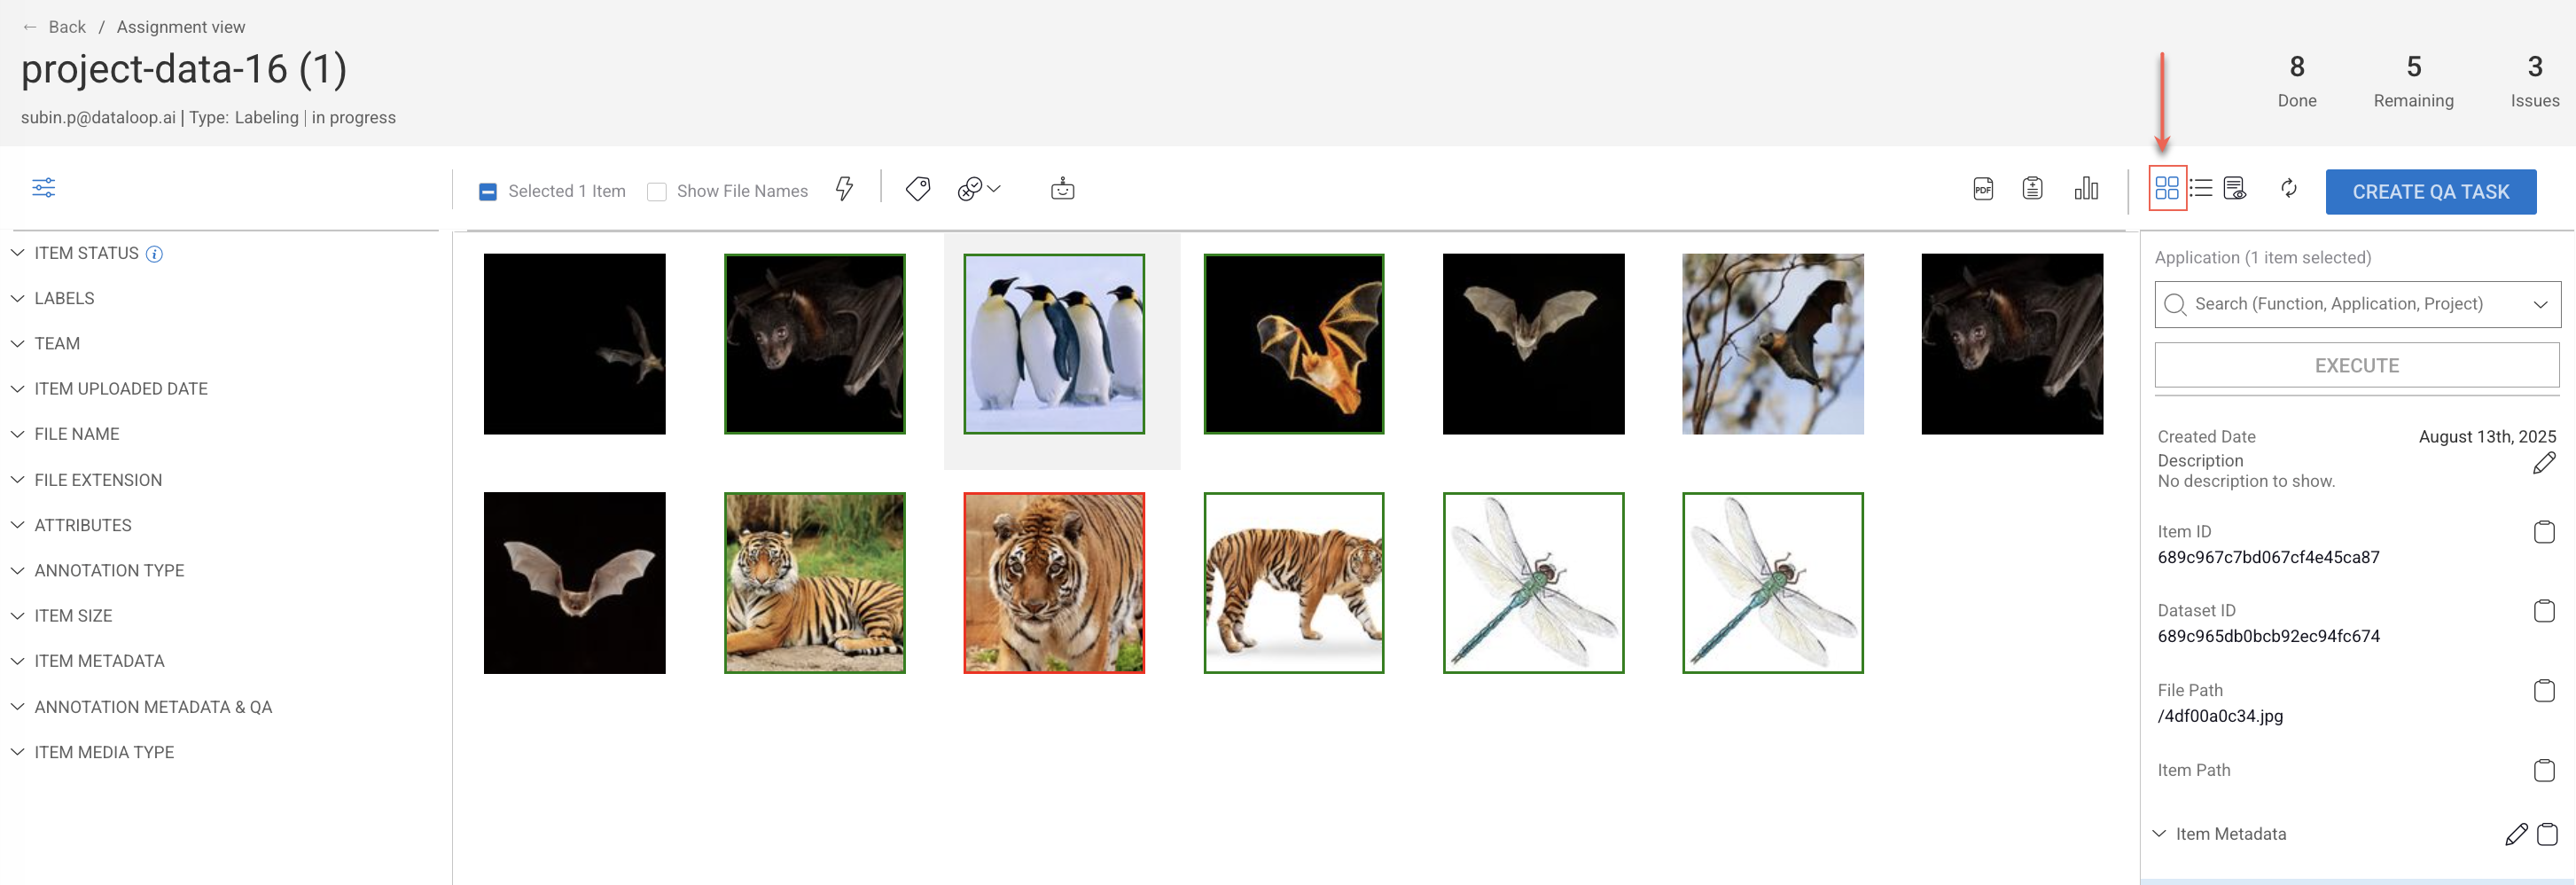
Displays a thumbnail preview of images.
Supports multiple media types including images of animals, landscapes, and various subjects.
Allows selection of items for annotation or QA review.
Lists View
The list view displays assignment items in a structured table format view. Each row represents a file/item with associated metadata.
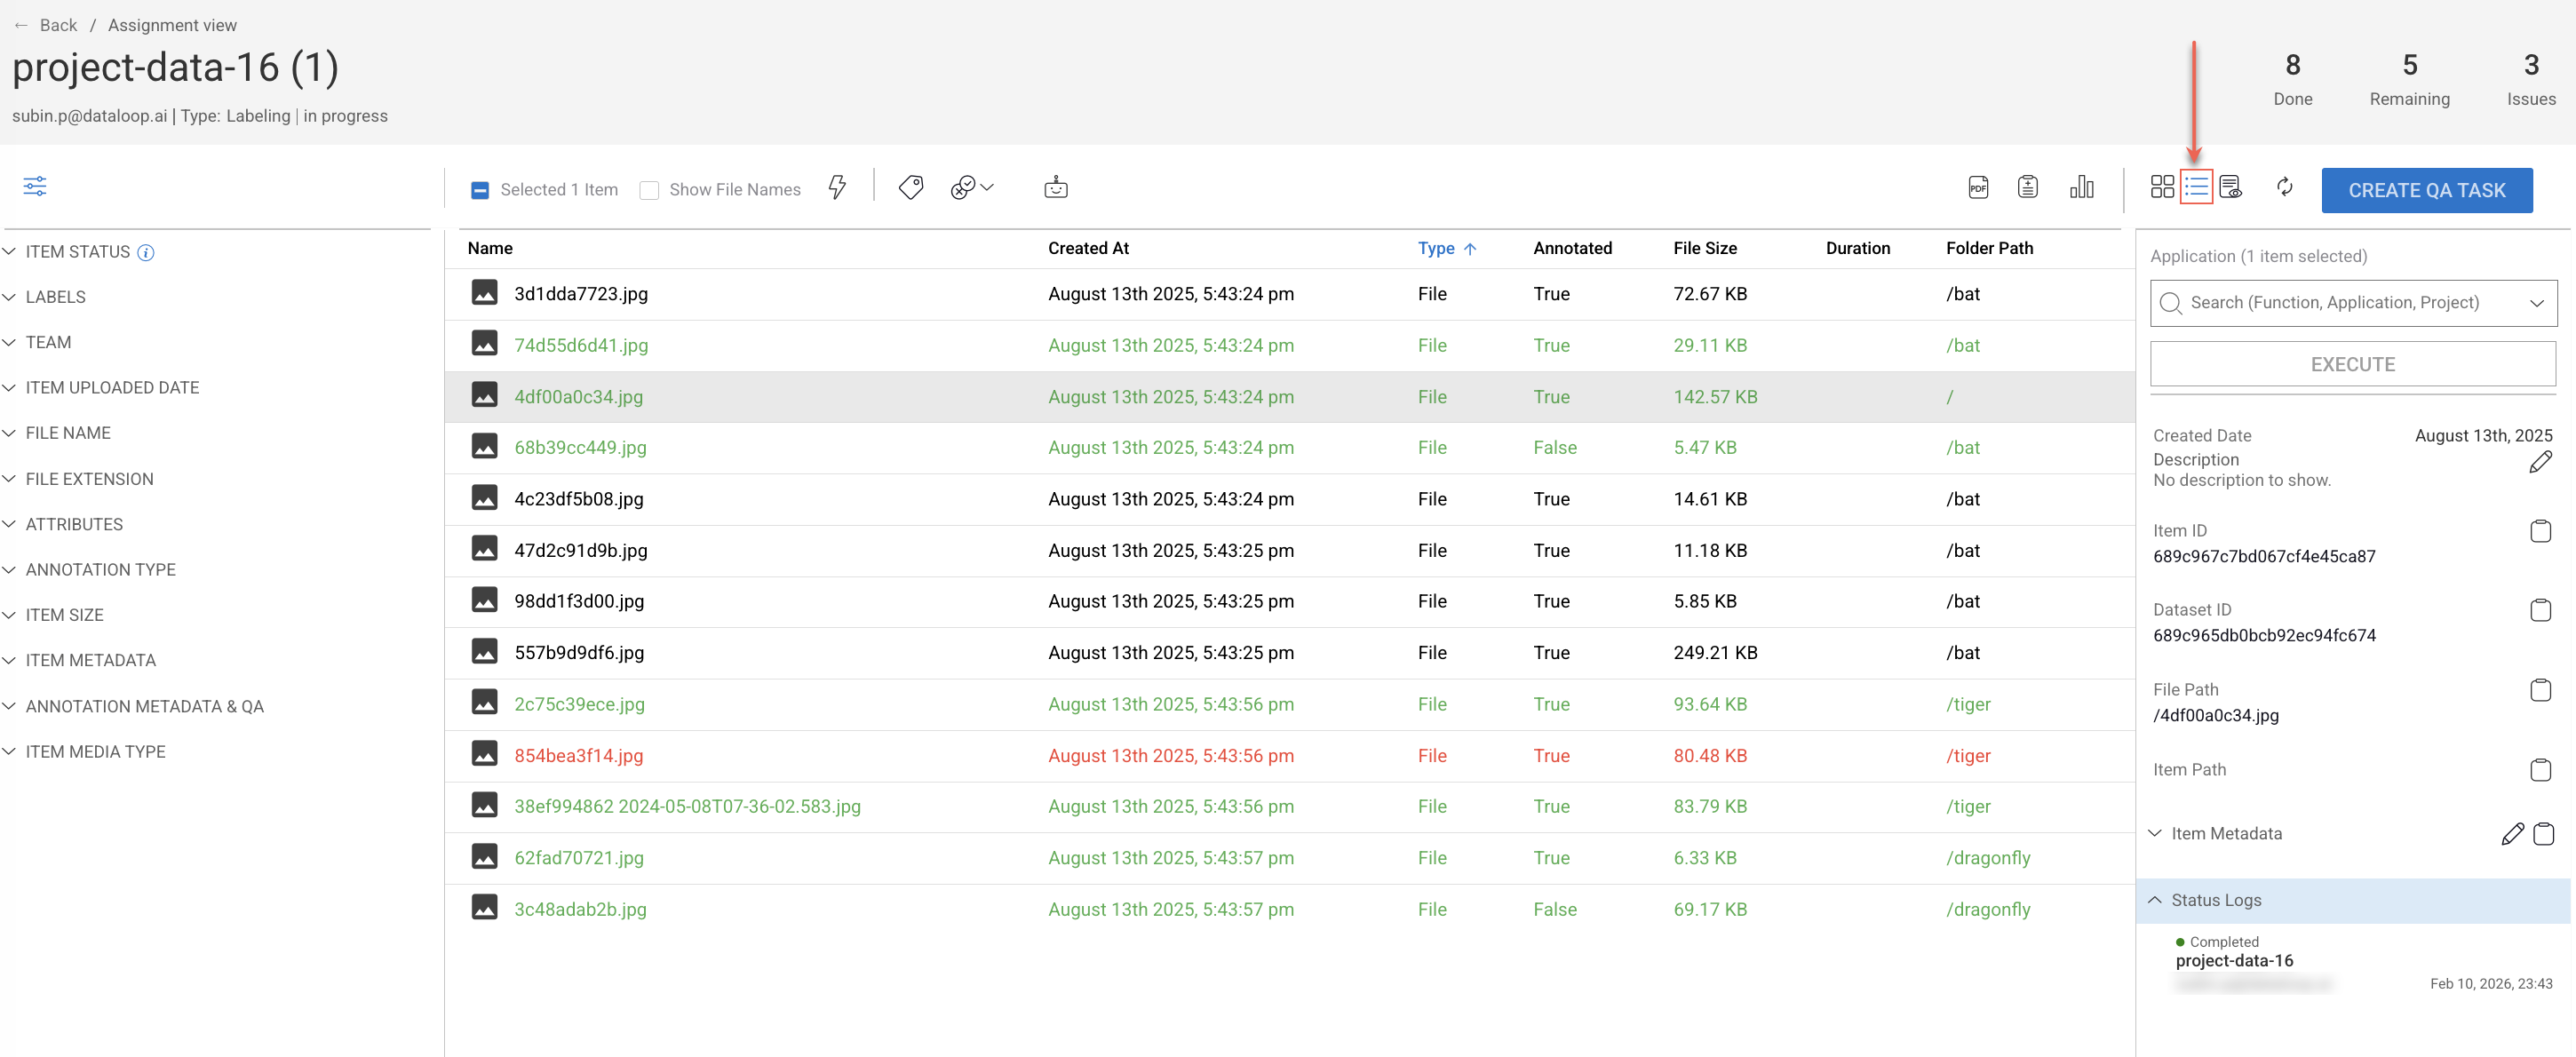
Name: The filename of the image (e.g., 49910fd3ff.jpg).
Created At: Timestamp indicating when the file was added (e.g., November 18th, 2024, 12:21:49 pm).
Type: Specifies whether the item is a file, annotation, or other media type (in this case, all are files).
Annotated: Shows whether the item has been annotated (True/False).
File Size: Displays the size of the file in KB or MB.
Duration: (Not applicable here; relevant for video files).
Folder Path: Indicates the directory or dataset category (e.g., /penguin, /squid, /zebra).
Cards View
The Cards View in the Assignment Browser presents assignment items in an organized card-style layout, designed specifically for bulk classification to enable fast and efficient, allowing annotators to process multiple items without switching between views or opening the Annotation Studio.
To enable the Cards View in your assignment browser, go to the recipe settings.

Zoom Mode (Z): Enable to view a zoomed-in version of the images when hover-over a card image.
Double-click a card to open it in the default viewer.
Use the right-side panel to:
Select Labels for the classifications.
Select Classifications to edit, mark it for review, or delete.
Add description for a selected item.
Annotation Status by Color
In the Assignment browser List View, the color coding of items indicates their annotation task status:
🟢 Green color - completed tasks
Items with a green background (e.g., 7a4c8ba397.jpg in the screenshot) indicate that the annotation task has been completed. This means that the file has gone through the annotation process, and no further action is needed.
⚪ No Color / Default Background (Not Completed)
Items with no color / default background mean that the annotation task is not yet completed. The file is still pending for annotation, review, or further processing.
🔴 Red color - discarded tasks
Items with a red color to indicate that are discarded. This could mean incorrect annotations, missing required data, etc.
.png)
Assignment Browser Actions
The Task Browser Page provides several actions that help users efficiently manage annotation tasks and dataset items. Below is an elaboration of the main actions available on the page.
![]()
Select page ☑️: Allows users to select multiple items on the current page for bulk actions. Useful for bulk classification, or status updates.
Show File Names ☑️: Select the checkbox to show or hide file names under each item, especially in the icons view where images are displayed without much metadata.
Create Trigger (⚡ icon): Allows you to create a trigger by selecting a function name and item action from the list.
Bulk Classification (🏷️ icon): Allows applying a classification label to multiple items at once.
Bulk Status (icon): Used to update the status of multiple items at once.
Applications (icon): Opens the Applications Panel, where users can apply third-party or custom applications to their data, like coco converter, clip extract features, etc.
Recipe (icon): Opens the associated recipe page.
Analytics (icon): Opens the Analytics Dashboard, providing insights into annotation progress, etc.
Icons view: Displays items in the icons view.
List view: Displays items in the table list view.
Item Details
When an item is selected, its metadata appears in the right panel:
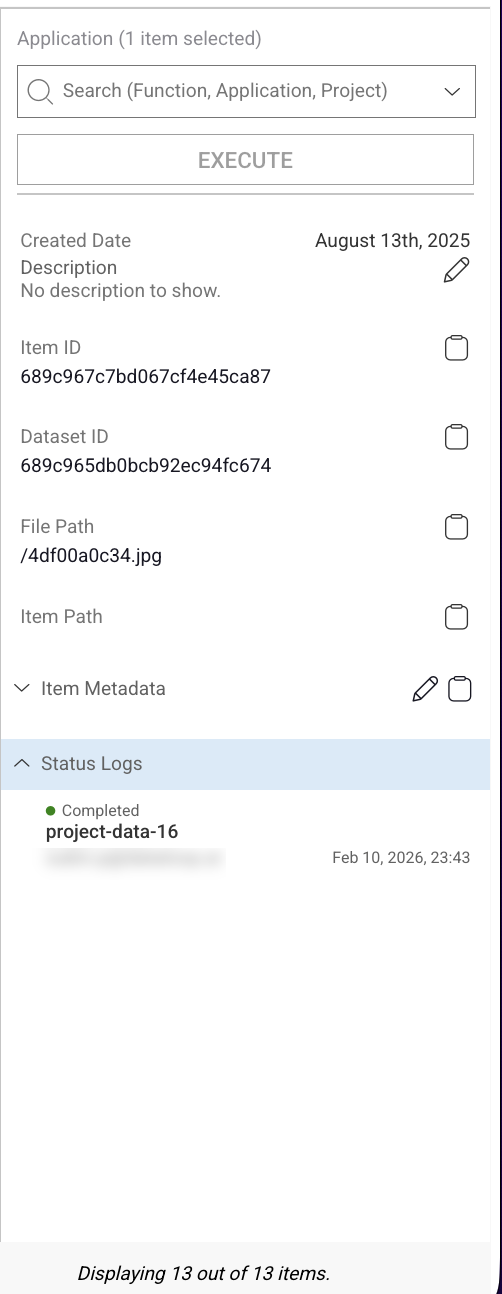
Application or Pipeline (toggle switch): The Application or Pipeline Toggle Switch allows users to choose between executing tasks through either an Application or a Pipeline, depending on their workflow needs.
Application Mode: Executes a standalone Application, which applies a specific function to the selected items.
Pipeline Mode: Runs a Pipeline, which consists of multiple automated tasks in sequence, allowing for a more complex workflow.
Created Date: Displays when the image was added (e.g., November 18, 2024).
Description: Provides additional details about the item.
Item ID: A unique identifier assigned to a data item.
Dataset ID: A unique identifier for datasets.
File Path: Indicates the storage location of the item in the system (e.g., /penguin/1f2cdb8ad.jpg).
Item path: Specifies the structured location of an item within the dataset
Item Metadata: Additional information associated with the item.
Functions: Lists actions or operations that can be performed on the item.
Status Logs: Displays a log of actions performed on the item.
Item Actions
Right-clicking on an item from the task browser allows users to manage and interact with data items efficiently within the platform.
Move: Allows users to relocate items from one folder to another.
Open with: Provides the option to open the selected item in an available studio.
Copy item path: Copies the exact file path of the item to the clipboard.
Download annotations: Exports and downloads any annotations associated with the item in a JSON file format.
Open in new tab (browser): Opens the item in a new browser tab for quick viewing.
Open in new tab (Studio): Opens the item directly in the default annotation studio.
Bulk Classification - Items
The Cards View in the Assignment Browser is designed to support quick and efficient bulk classification of items. This feature enhances task management by allowing users to review and classify multiple items more easily through a visual card layout.
Enable Bulk Classification Mode
To use Card View for bulk classification, a developer, or project owner must enable the following recipe setting:
Open the recipe.
Select the Instructions tab.
In the Global Setting -> select the checkbox ☑️:
Enable bulk classification mode.
When the Enable bulk classification mode is turned on:
The Assignment Browser will default to Card View.
Two more recipe settings become available. These options provide greater control over the information and actions visible within each card.:
Enable item description in cards viewEnable item validation in cards view
Important
When Cards View is enabled, Open assignment in assignment browser is turned on in the recipe settings, meaning annotators will be taken directly to the Cards View in the assignment browser instead of opening the assignment in the relevant studio.
Applying Bulk Classification

From the left-side menu, click Labeling.
Go to the Assignments tab.
Select an assignment and click Assignment Actions.
Choose Open Assignment Browser from the dropdown, or double-click on the assignment name.
In the Assignment Browser, click the Card View icon (if not already active).
Select the desired items from the cards.
In the right-side panel, click on a classification label to apply it. A label chip will be added to all selected items.
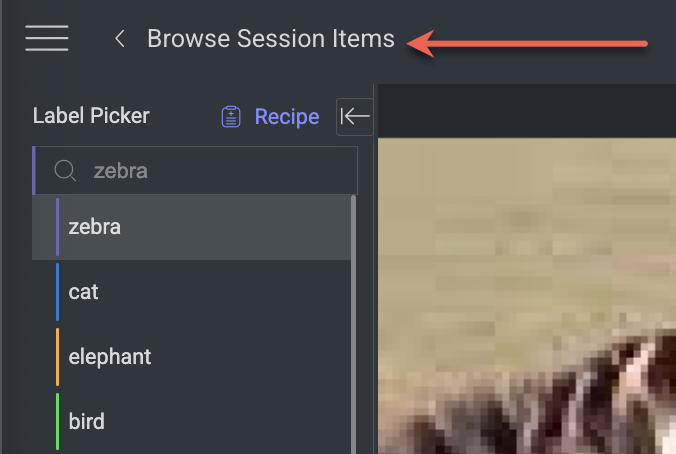
Browse Session Items
When Bulk Classification mode is disabled in the recipe:
Double-clicking an assignment under Labeling → Assignments → Assignment will display the Browse Session Items option. This view allows you to see only the incomplete items within the assignment.
Browse Assigned Items
When Bulk Classification mode is disabled in the recipe:
Clicking the Browser icon under the Assignment tab will display all items.
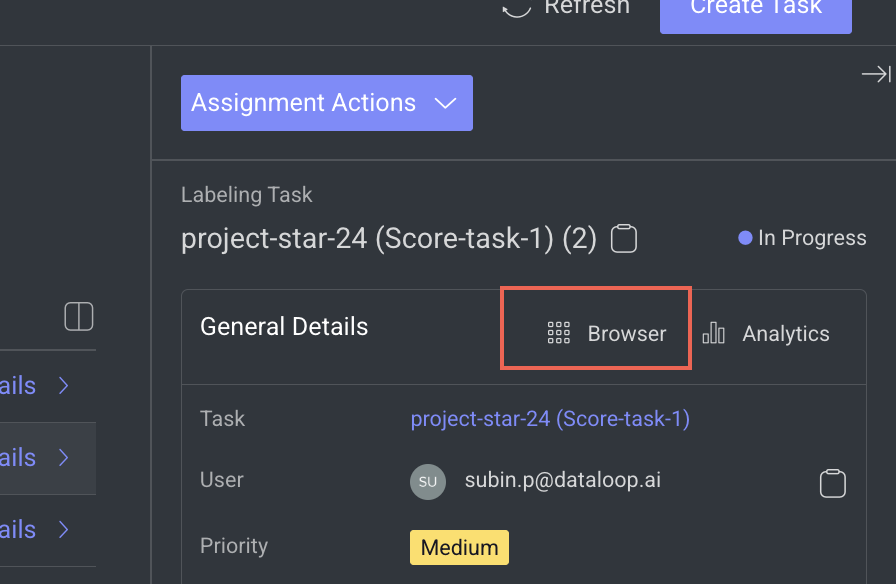
Opening any item from this view will reveal the Browse Assigned Items panel, which allows you to navigate through all items assigned to the current user.
