The Assignments feature is the mechanism that connects datasets to annotators in a structured way. Instead of every annotator seeing the full dataset, project managers can break the data into smaller, trackable units of work and assign them to specific team members.
When annotators log into the DDOE platform, they first land on the Assignment Page, which lists all assignments in their project along with details like project name, status, and due dates.
From this page, annotators double-click an assignment to begin working.
This opens the Annotation Studio, where the system automatically loads the next item they need to annotate (image, video, text, audio, etc.).
Inside the Annotation Studio, annotators have access to:
Tools suited to the data type (e.g., bounding boxes, polygons, transcription tools).
Project guidelines and instructions for consistent labeling.
Navigation controls to move between items.
Quality indicators such as validation checks or reviewer feedback (if enabled).
This workflow ensures smooth task progression, avoids overlap or skipped items, and keeps annotators focused and productive.
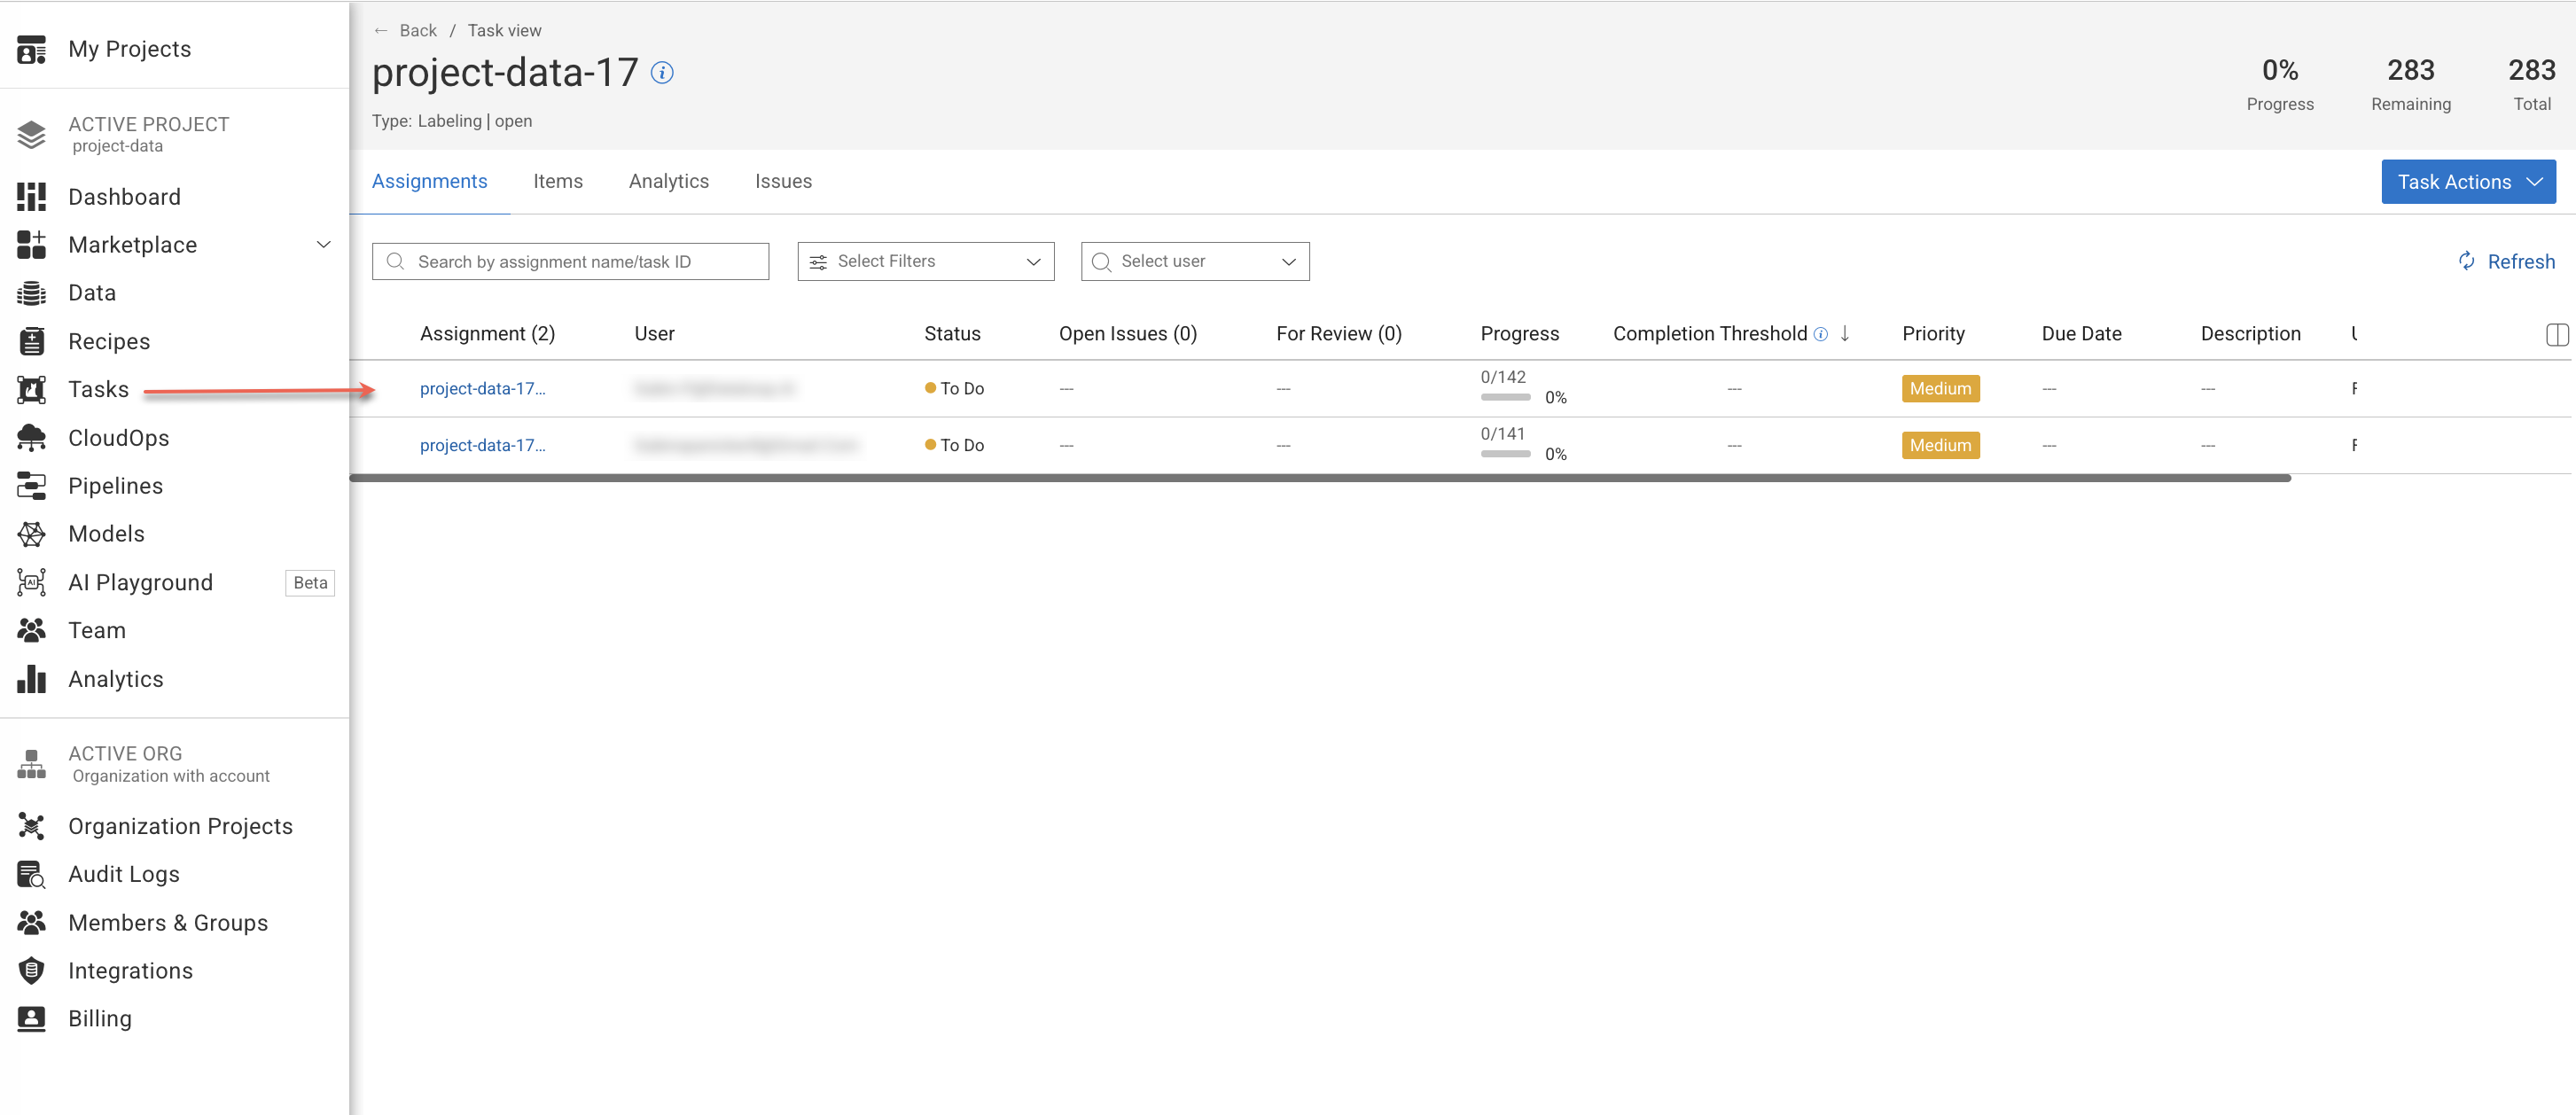
Assignments Table
The Assignments tab displays a table listing all assignments, with detailed information in each column. Clicking on an assignment's name directs you to its corresponding item's page. When filtered by username, the selection persists even after reloading or refreshing the platform.
Assignments: This displays the name of the assignments. Click to open:
The Assignment Browser, if the
bulk classification modeis enabled in the recipe.Otherwise, use the Assignment actions -> Open Assignment Browser option. Use the Copy Assignment ID icon next to the assignment name to copy the Assignment ID.
The annotation studio, if the
bulk classification modeis NOT enabled in the recipe.
Users: This displays the avatar of the assignment's users.
Status: This displays the status of the assignments.
Open Issues: This displays the number of items with annotations that have open issues.
For Review: This displays the number of items with annotations that have issues corrected for review.
Progress: This displays the item's completion status.
Completed Threshold:
Priority: This displays the assignments' with a High, Medium, or Low priority.
Due Date: This displays the due date of the assignment.
Description: The description provided for the selected assignment's task. To add a description, click on the Edit icon. You can also use SDK to add or edit description.
Created At: This displays the assignment creation date, for example, Sep, 15 2023.
Updated At: This displays the assignment update date, for example, Sep, 15 2023.
You can customize the default columns and display additional fields by clicking Show/Hide Columns.
Search & Filter Assignments
Search for tasks by assignment name, or task ID.
Apply filters to narrow tasks by criteria such as assignment status, task type, priority, or annotation status.
Filter tasks by assignment owner.
Assignment Actions
You can perform the following actions on an assignment.
Reassign Items
When a task is active, changes in the workforce can occur. Use this option to reassign an assignment from one annotator to another.
Open the Tasks page from the left-side menu.
Click on the task from the task list.
Locate and hover over the assignment where you want to reassign the assignment.
Click the three-dots and select Reassign from the list.
Redistribute Assignments
To remove a specific assignment and have its items distributed among active assignees.
Open the Tasks page from the left-side menu.
Click on the task from the task list.
Locate and hover over the assignment where you want to redistribute items.
Click the three-dots and select Redistribute from the list.
Clear Batch Items
This allows you to clear the assignment batch of the tasks which are pulling tasks.
Open the Tasks page from the left-side menu.
Click on the task from the task list.
Locate and hover over the assignment where you want to clear the batch items.
Click the three-dots and select Clear Batch from the list. A confirmation message
Assignment batch is being cleared, please wait for confirmation.is displayed.
Load Batch Items
This allows you to load the assignment batch of the tasks which are pulling tasks.
Open the Tasks page from the left-side menu.
Click on the task from the task list.
Locate and hover over the assignment where you want to load the batch items.
Click the three-dots, and select Load Batch from the list. A confirmation message
Assignment batch is being loaded, please wait for confirmation.is displayed.
View Assignment Items
Open the Tasks page from the left-side menu.
Click on the task from the task list.
Locate and hover over the assignment where you want to view the items.
Click View Items (it displays all items), or click the three-dots and select view items from the list. You choose one of the following view options from the list:
All Assignment Items
Remaining items
Done (Completed)
The Assignment View/Browser is displayed with items as per your selection.
View Assignment Analytics
Open the Tasks page from the left-side menu.
Click on the task from the task list.
Locate and hover over the assignment where you want to view the analytical data of the assignment.
Click the three-dots and select View Analytics from the list. The Analytics page is displayed with the data of the selected assignment.
View Assignment Items Metadata
This provides you the metadata information of the selected assignment. You have the option to copy the metadata, but editing it is not possible.
Open the Tasks page from the left-side menu.
Click on the task from the task list.
Locate and hover over the assignment where you want to view the metadata information of the assignment.
Click the three-dots and select Show Metadata from the list.
For example,
{
  "system": {
    "datasetId": "64a671e0d854daf23d6ed2b9",
    "taskId": "65091cc7d93bfc635d4f1878",
    "active": true
  },
  "datasetId": "64a671e0d854daf23d6ed2b9"
}
Time Tracking and Measurement
The Stopwatch feature allows annotators to accurately track the time spent on items within their assignments. This ensures that UI time measurements are consistent with Analytics, supporting both performance monitoring and customer reporting needs.
Time tracking is already captured in the user’s context; however, this feature introduces a clear, visible timer within the assignment interface. For each item, the timer is displayed independently of prior items and begins counting immediately when the annotator enters the item.
To enable, go to the recipes → Advanced Settings → Timing & Bonuses
Time Tracking: It allows you to show a stopwatch on the annotation studio when you work on a task where the recipe has enabled time tracking feature. It helps to count the UI time consumed by the annotator on the particular item’s.
Enable Time Measurement: This is mainly used when you want to control and incentivize annotation performance. It lets you define limits, bonuses, and timing-related values in your recipe, so annotation tasks can be monitored and rewarded fairly.
![]()
When Enabled
A stopwatch will automatically appear in the Annotation Studio for annotators when the recipe setting is enabled.
The timer starts only once the item is fully loaded.
It is displayed in all studio types where the setting is active.
Visible only to annotators, formatted as hh:mm:ss.
Pause Conditions
The timer automatically pauses under the following conditions:
The user navigates outside the studio or moves to another item in the assignment.
The annotator clicks the “Pause” button:
The studio will be blocked while paused.
Analytics counting will pause as well.
Paused state will not be preserved if navigating away; resuming will start automatically.
When a status is assigned to the item within the assignment context (item status change will also trigger an analytics activity event).
If the annotator’s browser window is closed or becomes inactive.
Resume Conditions
The timer resumes in the following cases:
The annotator clicks “Continue” in the paused state dialog.
The annotator reopens the item in the context of their assignment.
A status that was previously applied to the item is removed.