Overview
In DDOE, a Recipe is the core configuration that defines how annotation, evaluation, or review tasks are performed. It establishes the workflow, tools, labels, and interface required to process a specific data type.
Recipes serve as a blueprint for:
How annotators or reviewers interact with the data
Which tools and labels are available
How outputs are structured and validated
How consistency and quality are maintained across tasks
By standardizing labeling workflows, Recipes help improve annotation quality and accelerate AI and machine learning development. The type of Recipe you create depends on the task context (annotation or evaluation) and the data modality, such as image, video, text, audio, or multimodal data.
Ontology
Ontology contains the labels (classes) and attributes used in the project. The dataset ontology is the building block of a model and helps define the information applied to data to represent the knowledge models that are then trained to inference.
Labels (like classes) are the names used for classifying annotations.
Attributes allow additional independent degrees of freedom to define labels.
Project Recipe
A Project Recipe is a centralized configuration that defines the labels, attributes, and annotation schema used within a project. It serves as the single source of truth for how data should be labeled, categorized, and structured across all annotation workflows. Project Recipes support all data types and machine learning (ML) tasks, providing a standardized annotation framework throughout the project lifecycle.
The Project Recipe helps standardize the annotation process by ensuring that all users and custom recipes follow the same set of labeling rules and project ontology.
Purpose
The Project Recipe is used to:
Define and manage generic labels that can be reused across the project.
Establish the project's ontology, including labels, attributes, relationships, and classifications.
Ensure consistency in data annotation across teams and workflows.
Provide a shared configuration that can be referenced by custom recipes.
Simplify the maintenance and updating of annotation schemas.
Key Characteristics
Project-Level Configuration: The Project Recipe is defined at the project level and applies across all associated datasets and tasks.
Project Recipe is created when:
On project creation
For the existing projects: On the first project recipe edit, or on a new dataset creation.
Once created, a Project Recipe (Classic ML) named recipe is listed on top of the recipe list.
Controlled Modification: Only users with the Project Developer / Owner role can modify the Project Recipe, including:
Adding or updating labels
Defining attributes
Updating annotation schema
But, cannot edit the Name.
Deletion Behavior: The Project Recipe can only be deleted when the entire project is deleted.
Default Assignment to Datasets: By default:
All new datasets are automatically linked to the Project Recipe.
This applies when no other recipe is explicitly selected during dataset creation
Generic and Flexible: The Project Recipe is not tied to a specific data type, making it reusable across different use cases.
Supports importing:
Labels
Attributes
Ontology structures
Custom Recipes
Unique recipes are custom recipes created by project owners or developers, typically during dataset creation or when defining specific annotation requirements.
Recipe and Dataset Association
Every Dataset is linked to the Project Recipe by default, If not created or linked to an existing recipe.
During dataset creation, users can:
Create a new Recipe (with the same name as the dataset), or
Link an existing Recipe to the new dataset.
This linkage ensures that the dataset has predefined labeling instructions from the outset.
Recipe and Task Configuration
Annotation and QA tasks derive their configuration from the linked Recipe.
By default, a task uses the recipe associated with the dataset from which its items originate.
However, users can override the default recipe during task creation or editing:
This enables the same data item to be annotated or reviewed under multiple recipes, each with distinct taxonomies or label structures.
Useful for multi-purpose evaluations, A/B workflows, or cross-domain annotation strategies.
Working with Recipes via SDK
DDOE’s SDK allows developers to programmatically create, manage, and associate recipes within their pipelines.
You can define ontologies, attributes, tools, and task instructions via code.
Useful for automating dataset onboarding or syncing recipe configurations across projects.
To learn more, visit the Developers Guide on Recipes.
Recipe Types by Data and Task
The type of recipe you create depends on the context of the task (annotation vs. evaluation) and the data modality (image, video, text, audio, etc.).
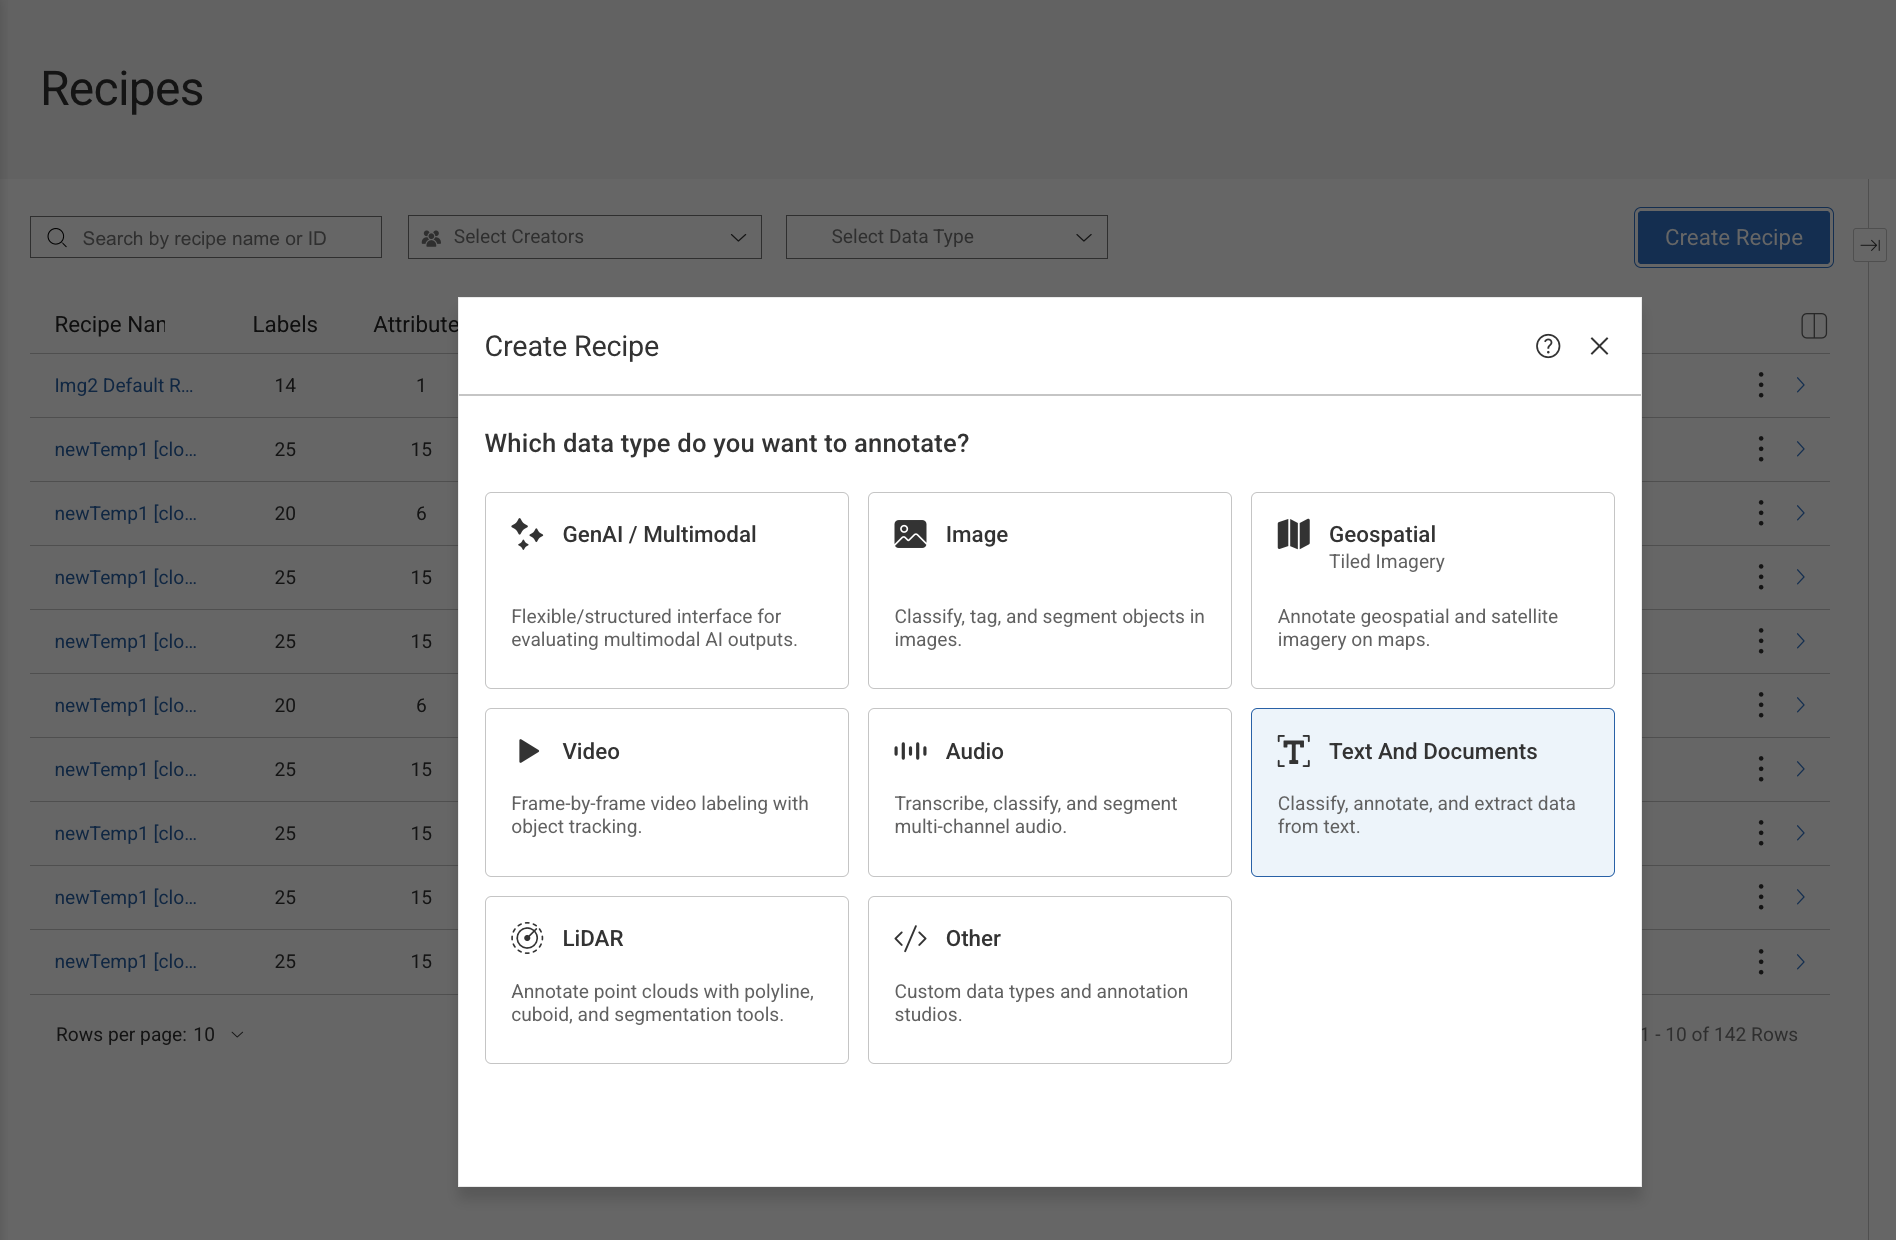
1. GenAI / Multimodal
This recipe type provides a flexible or structured interface for evaluating outputs generated by Generative AI models. It supports single or multiple modalities such as text, images, audio, video, or combinations of these within a single task. Instead of labeling raw data, users assess model-generated responses against defined criteria, enabling consistent and scalable human feedback.
Create GenAI / Multimodal Recipes
2. Image
The Image recipe is designed for labeling and annotating still images used in computer vision tasks. It provides intuitive visual tools that allow annotators to accurately identify objects, regions, or attributes within an image.
3. Geospatial (Tiled Imagery)
This recipe is tailored for geospatial datasets where images are too large to be handled as single files and are instead rendered as map tiles. It enables location-aware annotation with precise geographic context, allowing users to zoom, pan, and annotate accurately across vast areas.
4. Video
The Video recipe supports annotation of data where time and motion are critical components. It allows annotators to work frame by frame while maintaining continuity across the video timeline.
5. Audio
The Audio recipe is designed for working with sound-based data, enabling precise annotation along a time axis. Users can label, segment, and transcribe audio with fine-grained control over timestamps.
6. Text and Documents
This recipe enables annotation and extraction tasks for textual data, ranging from simple text classification to complex document parsing. It supports both raw text and formatted documents, including those processed with OCR.
Users can define structured outputs to convert unstructured text into machine-readable data.
Typical tasks include:
Text classification and categorization
Entity and span annotation (NER)
Structured data extraction from documents
It is commonly used for NLP models, document AI, and enterprise automation workflows.
Create Text and Document Recipes
7. LiDAR
The LiDAR recipe is designed for three-dimensional data captured by sensors such as LiDAR scanners. It provides specialized tools that allow annotators to label objects in 3D space with high spatial accuracy.
8. Other
The Other recipe category is intended for use cases that do not fit into standard data modalities. It allows teams to build custom annotation studios and workflows tailored to specialized or experimental data formats.
This flexibility makes it possible to support proprietary data types, emerging modalities, or highly customized task requirements without being constrained by predefined templates.
Create General (Other) Recipes
Access Recipes
To open the recipe page for a specific Dataset, use one of the following options:
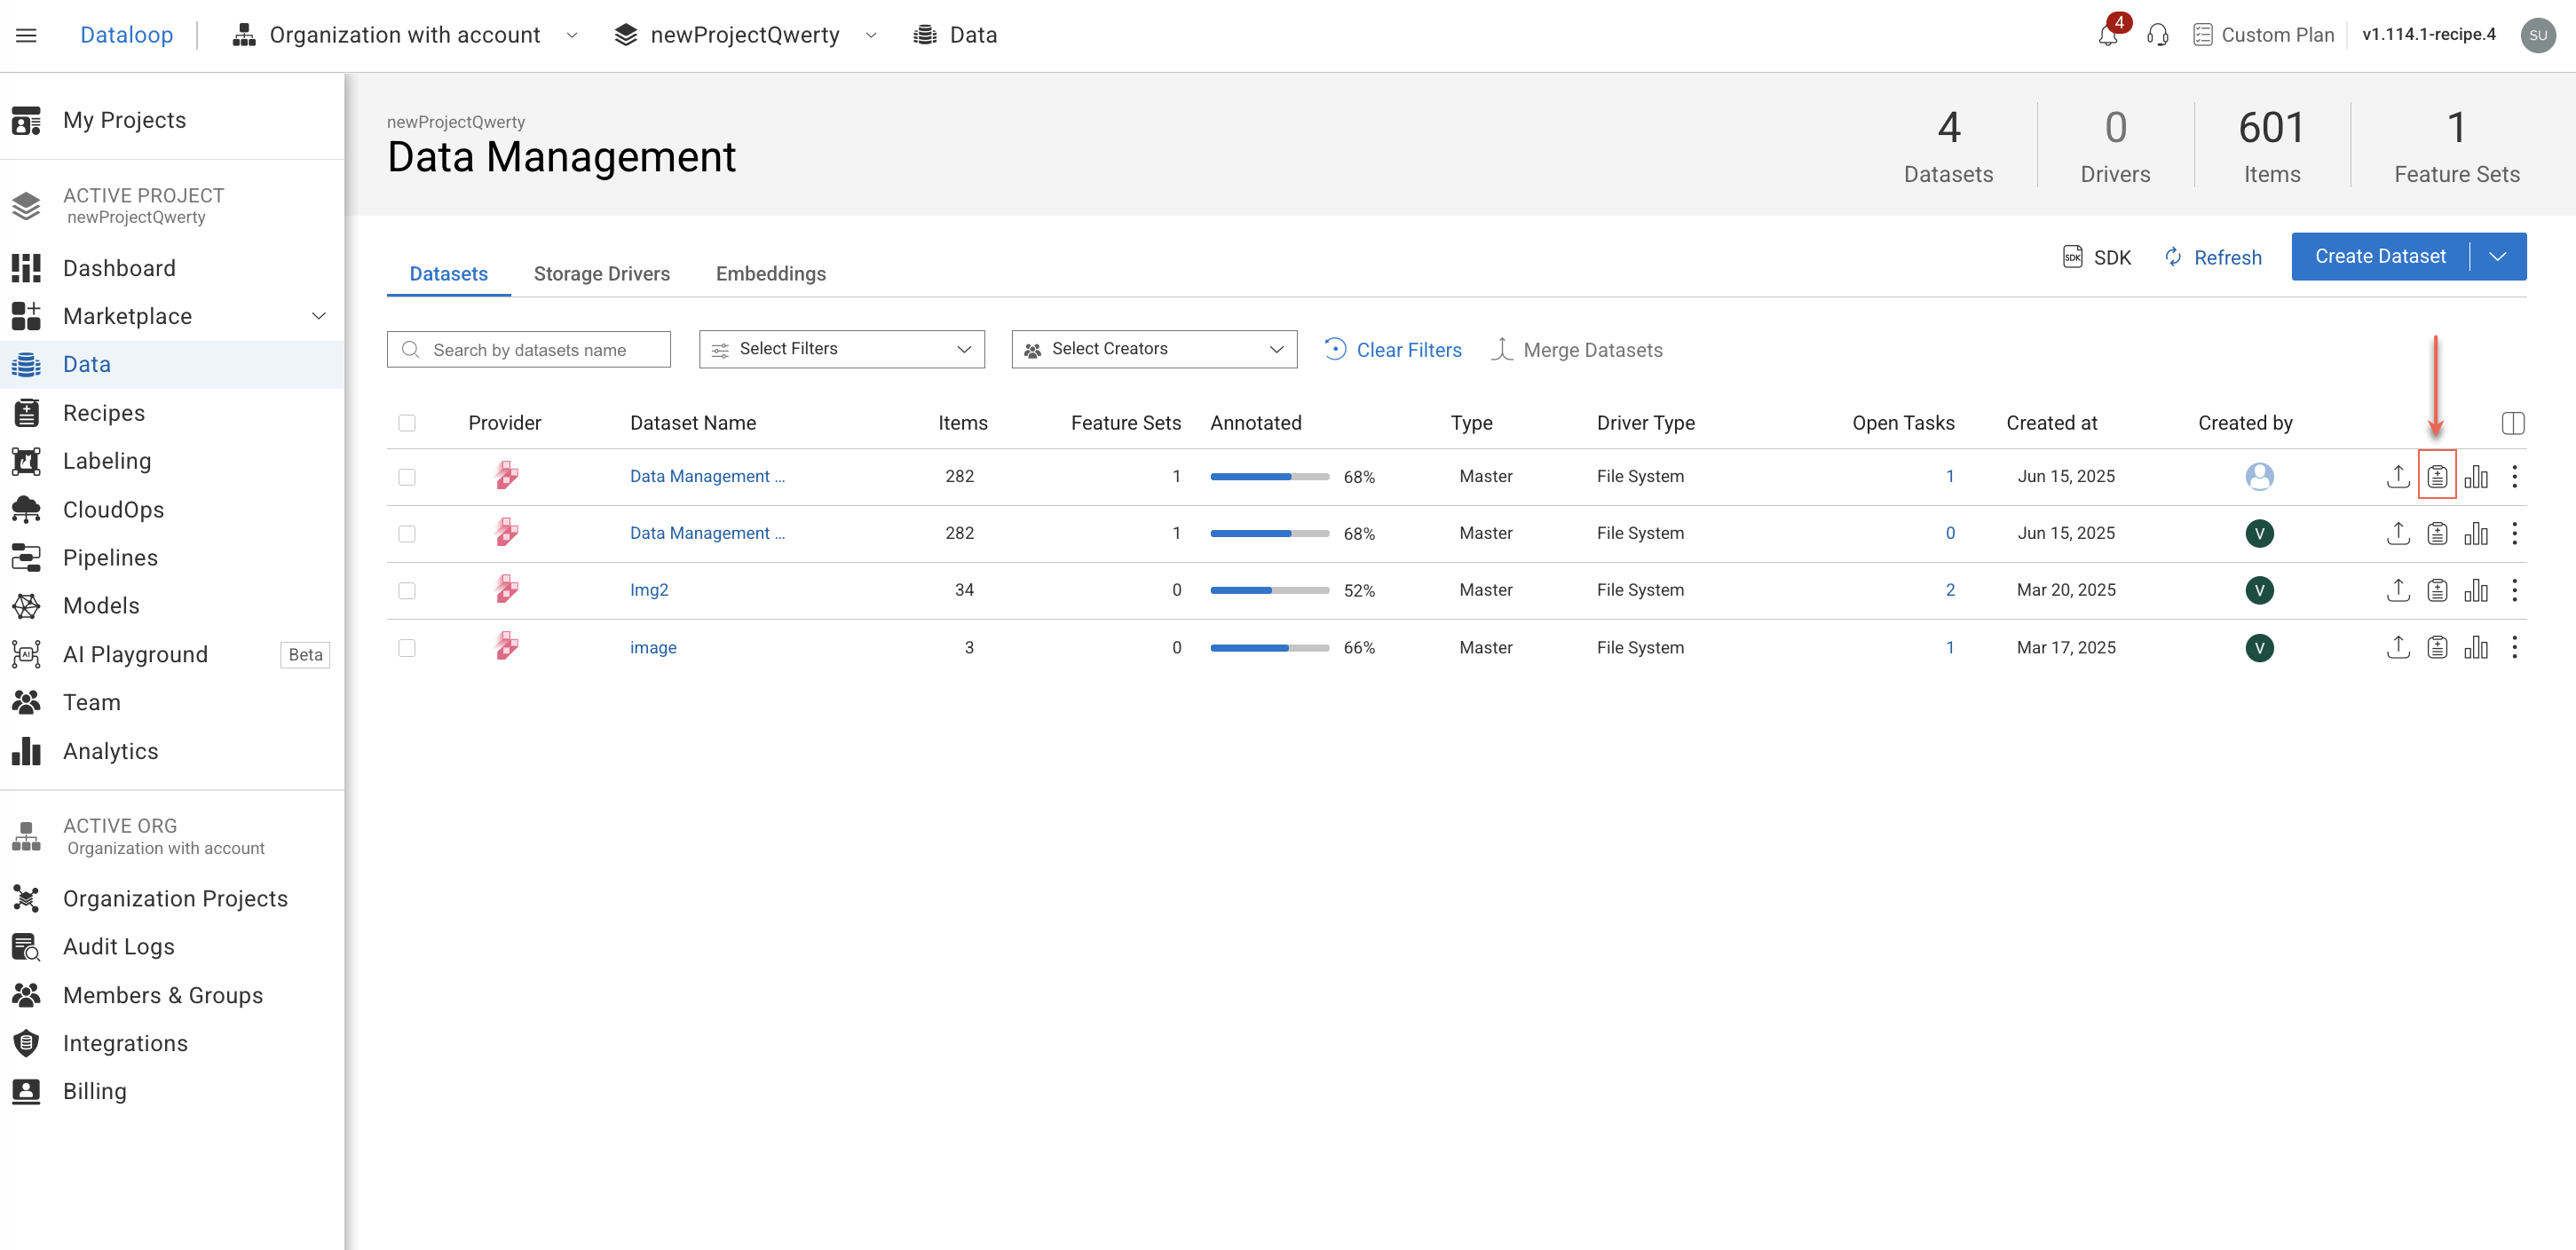
From the Dashboard → Data Management table:
Find the Dataset from the list.
Click on the Recipe icon to view recipe details.
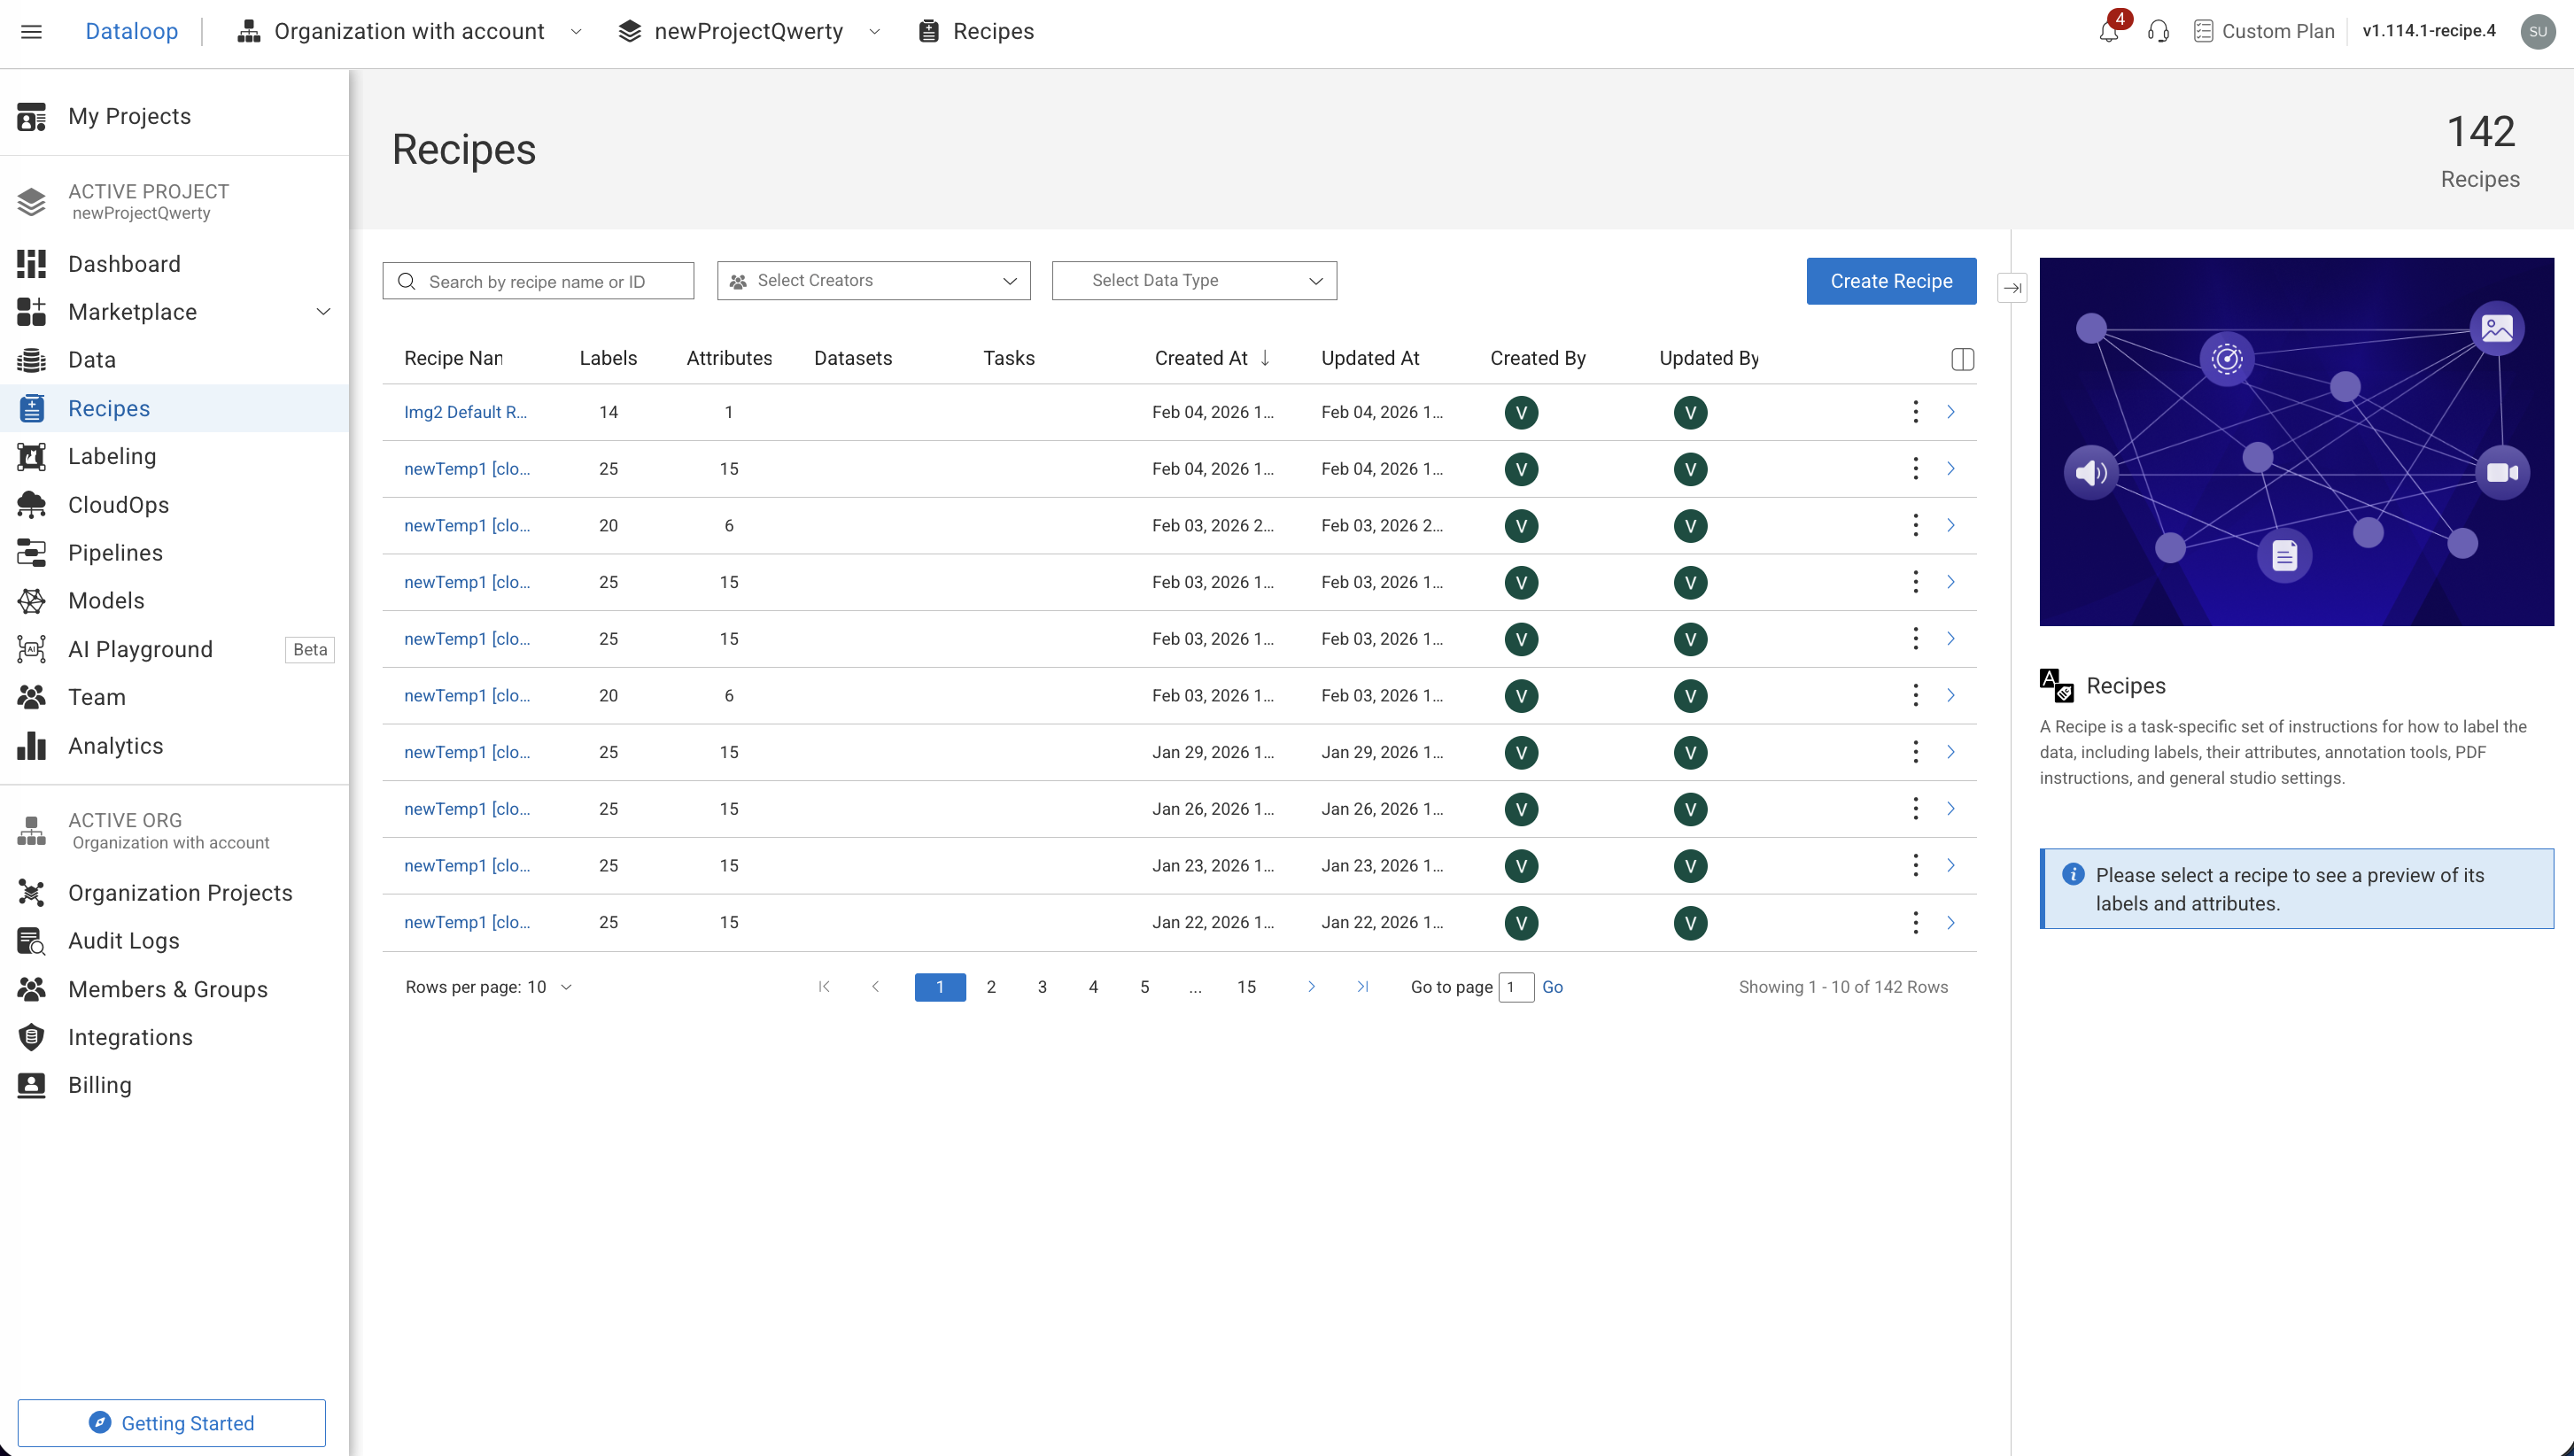
From the Recipes menu:
Click on the Recipes from the lift-side menu.
Locate/search for the recipe from the list.
Click on the recipe.
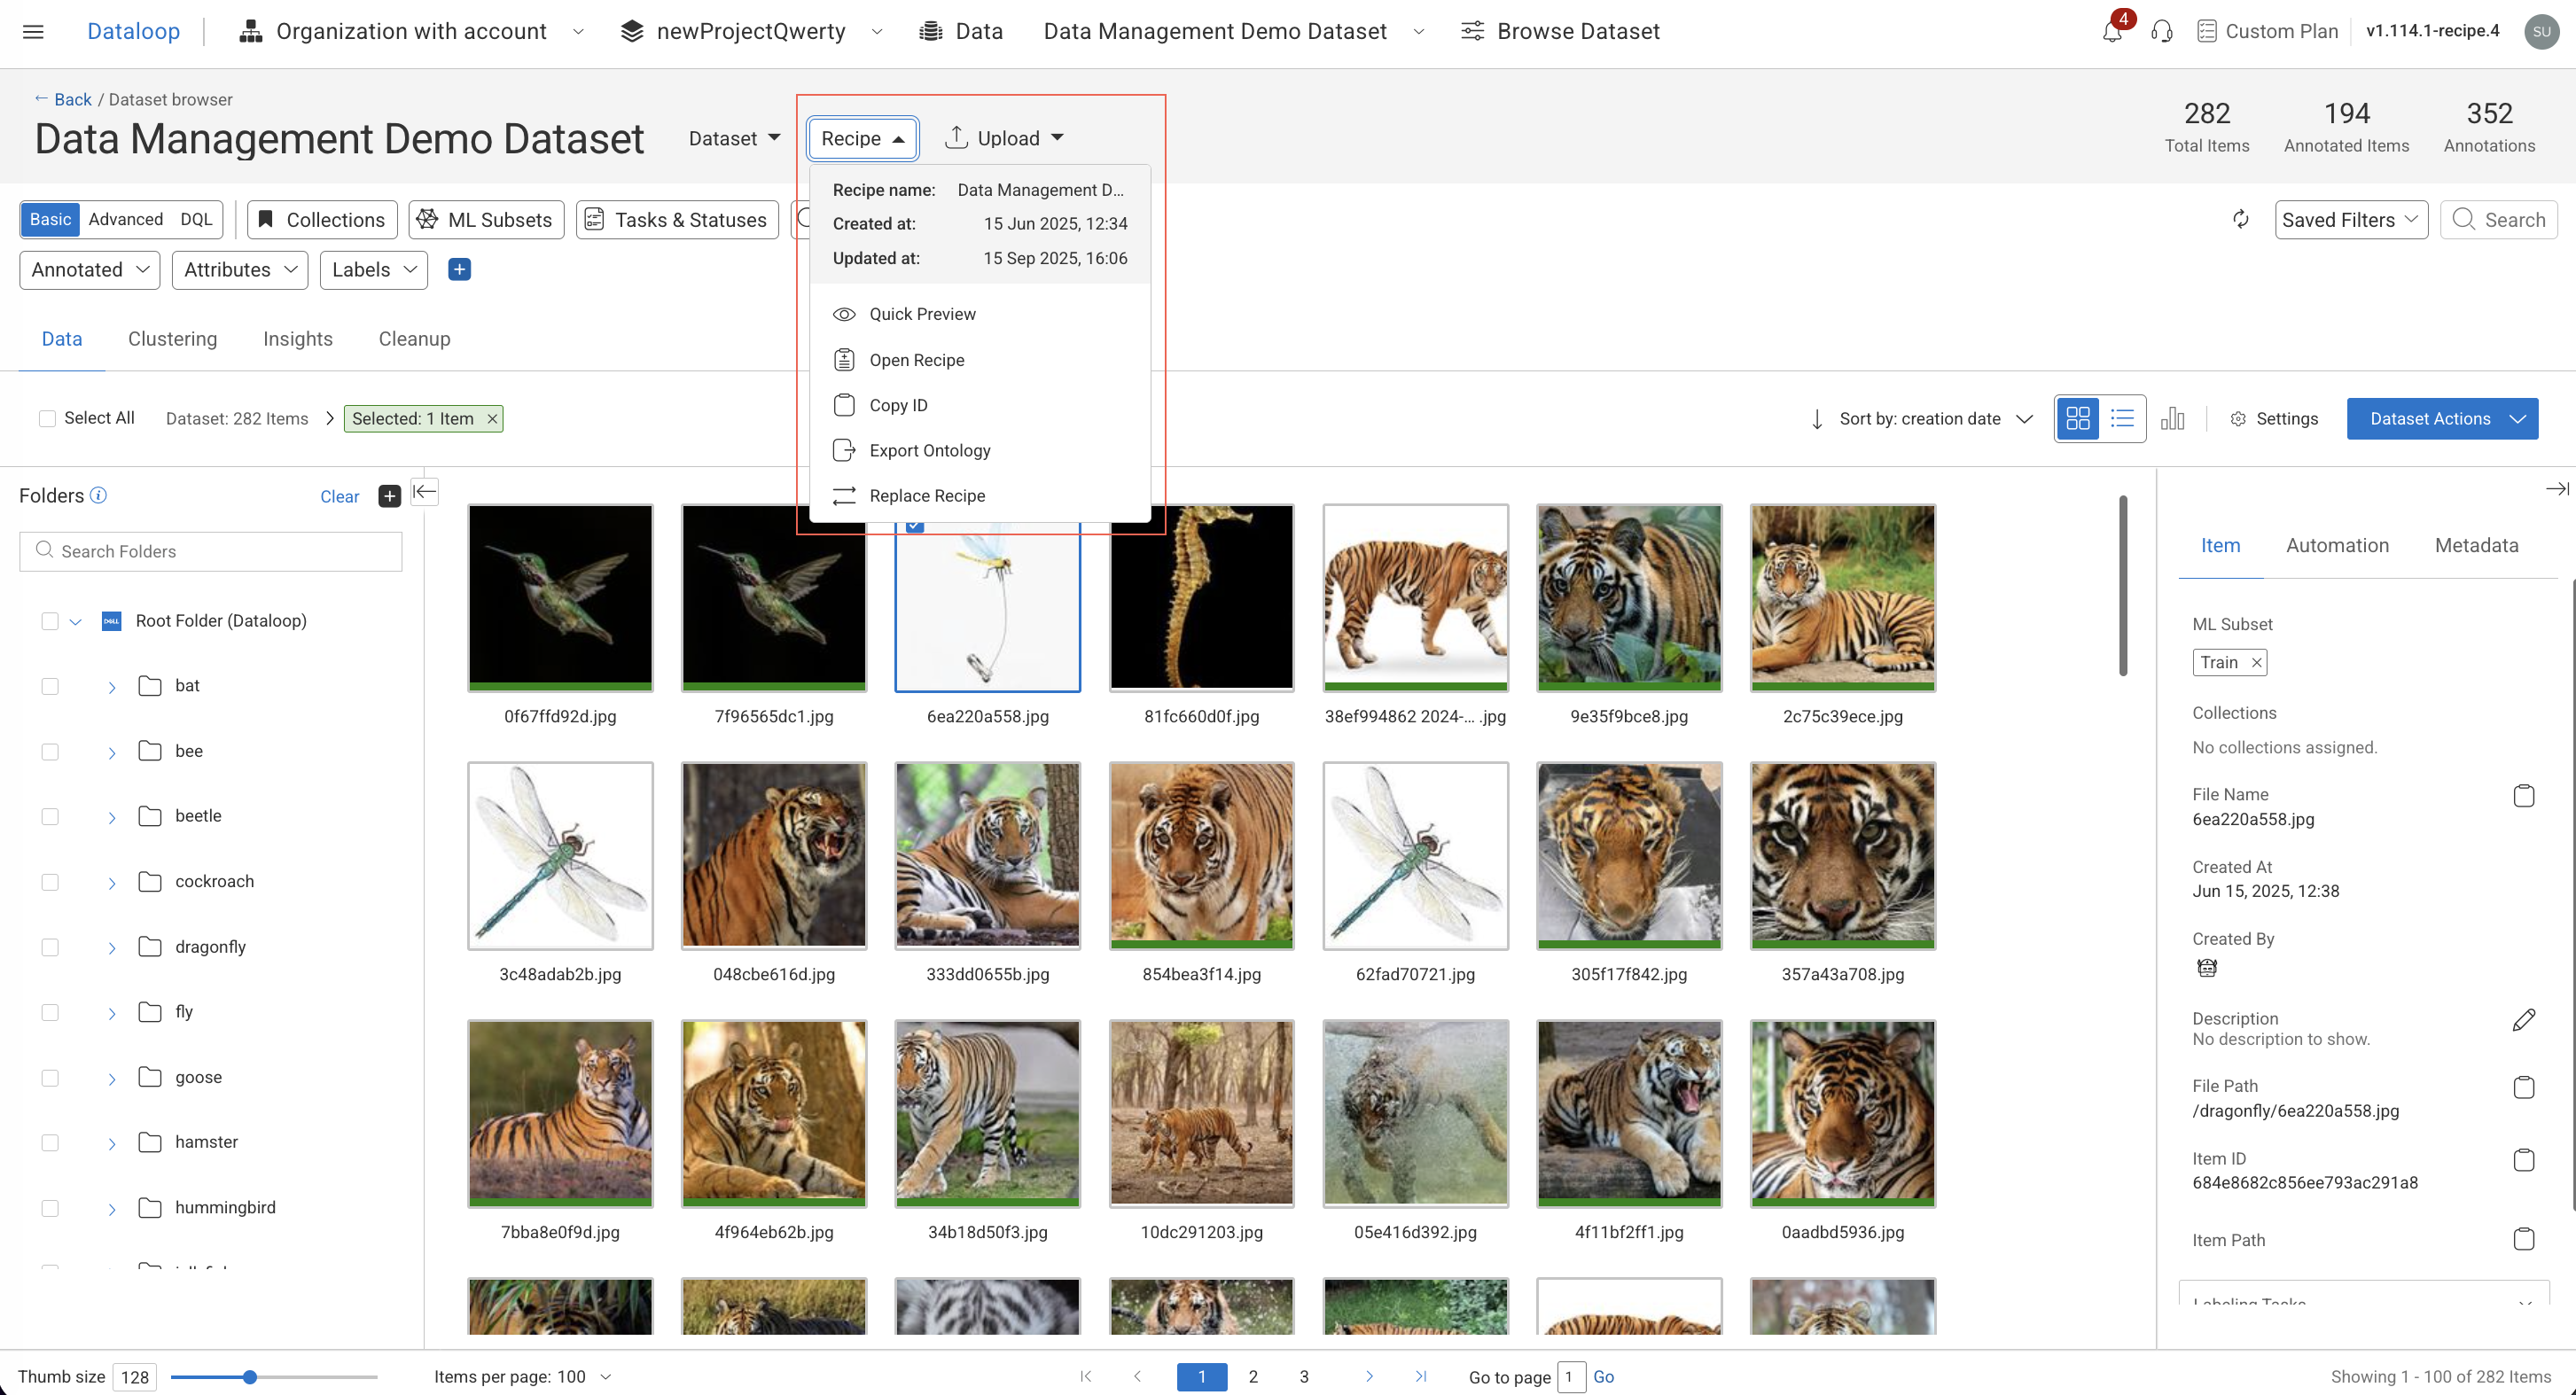
From the Dataset Browser:
Open the Dataset Browser.
In the right-side panel of Dataset Details, click on the recipe link from the Recipe field.
From Annotation Studios:
Click on the Recipe link above the label-picker section.
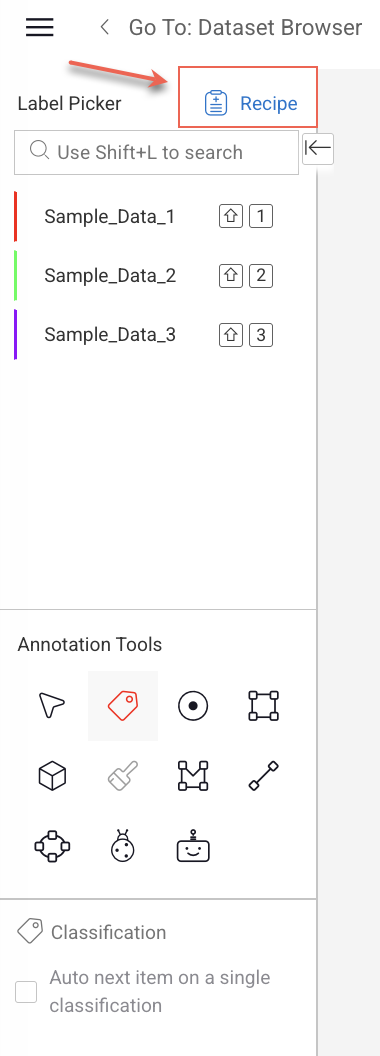
Permission
Only Annotation Manager or above can access from Annotation Studios.
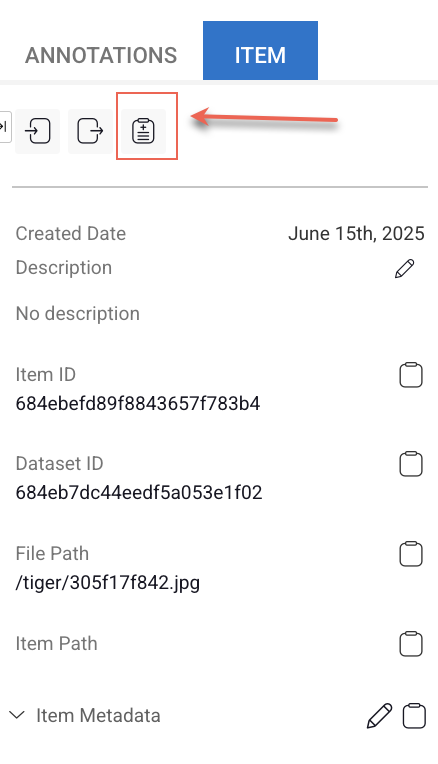
Or, select the Item tab from the right-side panel.
Click on the Recipe icon in the Item-Info tab,
View Preview of a Recipe
Click on the Recipes from the lift-side menu.
Locate or search for the desired recipe in the list.
Select the recipe. A preview of the selected recipe will appear in the right-side panel, displaying its labels and attributes.
This page helps you to edit, export ontology, clone recipes, etc. used across your datasets and annotation projects.
Labels
Labels are descriptive identifiers used to categorize or classify data elements—such as “Dog,” “Building,” or “Stop Sign.” They provide structured meaning to raw data (e.g., images, videos, or text), enabling its effective use in machine learning and AI workflows.
Attributes
An attribute of a label is a descriptive property or characteristic that provides additional information about an annotated object. Attributes help make annotations richer and more detailed, enabling more precise data for machine learning models.
Labeling Tools
Labeling tools help you annotate items according to your project’s requirements. DDOE’s recipes provide a variety of tools tailored to different data types — such as images, audio, video, and text, allowing you to choose the most suitable option for your task.
When you create a label in your recipe, all tools are selected by default. You can customize this selection to match your needs. Once specific tools are chosen, they will be available in the Annotation Studio exactly as configured in the recipe.
Instructions
Annotation and QA instructions are PDF guides displayed in Annotation Studios. Annotation instructions tell annotators how to label; QA instructions define how reviewers validate results—both ensure consistency.
Advanced Settings
Advanced Settings in DDOE’s Recipe page provide users with powerful configuration tools to customize labeling workflows. It includes modules for labeling tools, visual extensions like pose-tool templates, and options to define rules and relationships tailored to specific data types. The scope also available Global All, For Classic Studios and other Studios, Annotation Verifications, etc.
Define Project Recipe
Define labels, colors, thumbnails, tools, and attributes for your project. The Project Recipe serves as the default annotation schema and is automatically applied across all datasets and tasks within the project, ensuring consistency in labeling and annotation workflows.
.png)
Click on the Recipes from the lift-side menu.
Locate the Project Recipe in the list.
Click on the Project Recipe. The recipe is opened and start defining the following:
Click Save.
Label Import and Recipe Compatibility Behavior
Label Import Improvements
When importing labels from a Project Recipe, ontology file, or labels file:
New labels are added to the recipe.
Existing labels are updated instead of being duplicated.
Labels inherit the latest attributes and supported tools from the imported source.
A confirmation message is shown if existing labels will be updated.
Tool Compatibility
Labels always use tools that are supported by the current recipe.
If a recipe's ML task changes (for example, from Classification to Segmentation), labels automatically receive appropriate tools.
The updated tool is shown immediately in the UI.
Smarter Label Filtering
When importing from a Project Recipe:
Only labels compatible with the current recipe are shown by default.
A message indicates that some labels are hidden.
Users can choose to display and import all labels.
Latest Project Recipe Always Used
The import dialog always loads the latest version of the Project Recipe.
Any recent changes to the Project Recipe are immediately available for import.
Save Behavior
Imported changes are not saved automatically.
Labels, tools, and attributes are updated in the editor only.
Changes are applied to the backend only after clicking Save.
User Notifications
Confirmation dialog when existing labels will be updated.
Success message showing:
Number of new labels added
Number of existing labels updated
No confirmation is required when importing only new labels.
Edit Recipes
Edit Recipes to update recipe settings, labels, attributes, tools, and configurations.
Click on the Recipes from the lift-side menu.
Locate or search for the desired recipe in the list.
Click on the ⋮ Three Dots and select Edit Recipe from the list.
Make the available changes accordingly. For example:
Recipe Name
Data Type from the header or from the Advanced Settings.
Adding or editing labels and attributes
Tools and Instructions
Advanced Setting details
Click Save.
Important
For GenAI/Multimodal and Prompt recipes, data type cannot be changed.
For Generic recipes, you may change the data type, ML task, studio, tools, and settings; however, labels and attributes remain unchanged.
For Image, Geospatial (GIS), Video, Audio, Text & Documents, and LiDAR recipes, you can change the data type and ML task.
For Custom recipes, you can change the data type to any other data type.
Only settings and tools relevant to the selected studio will be carried over to the new recipe, along with all existing labels and attributes.
Copy Recipe ID
Click on the Recipes from the lift-side menu.
Locate or search for the desired recipe in the list.
Click on the ⋮ Three Dots and select Copy Recipe ID from the list. The recipe ID will be copied.
Delete Recipes
Click on the Recipes from the lift-side menu.
Locate or search for the desired recipe in the list.
Click on the ⋮ Three Dots and select Delete Recipe from the list.
Click Delete to confirm. Deleting a recipe from a dataset will also remove it from any other datasets where it has been set as the active recipe.
Switch (or Change) the Recipe of a Dataset
To change the recipe linked from one dataset to another:
Click on the Data from the lift-side menu.
Locate or search for the desired dataset in the list.
Click on the 3-dots action button of a dataset entry (from either the project overview or the Datasets page).
Select Switch Recipe.
Select a different recipe from the list and approve.
Recipe Actions
The Recipe Actions menu provides quick access to recipe management operations, allowing users to modify, identify, remove, or reassign recipes as needed. These actions help maintain and manage recipe configurations across projects and datasets, ensuring that annotation workflows, labels, attributes, and settings remain aligned with project requirements.
.png)
Import Project Recipe
To use the ontology and labels available in the project recipe, start importing them to your recipe and give less effort to customize.
Click Recipes from the left-side menu.
Search and open the recipe from the list.
Click Recipe Actions → Import → Project Recipe. A popup page is displayed.
Select the labels to be imported from the list. If there is no labels available, request your project developer/owner to add them.
Once selected, click Import.
Import Labels File
Import Ontology
An ontology in data labeling defines a structured framework for organizing and describing all entities, classes, and objects that annotators identify within a dataset. It establishes a hierarchical structure of labels (classes and subclasses), along with their attributes and permissible values, ensuring consistency and clarity throughout the annotation process.
For example, an ontology might include a main class “Fruit” with subclasses such as “Apple” and “Orange.” Similarly, for plant data, it could define an attribute like “Eatable” with values on a defined scale (e.g., Yes, No, Partially).
Click Recipes from the left-side menu.
Search and open the recipe from the list.
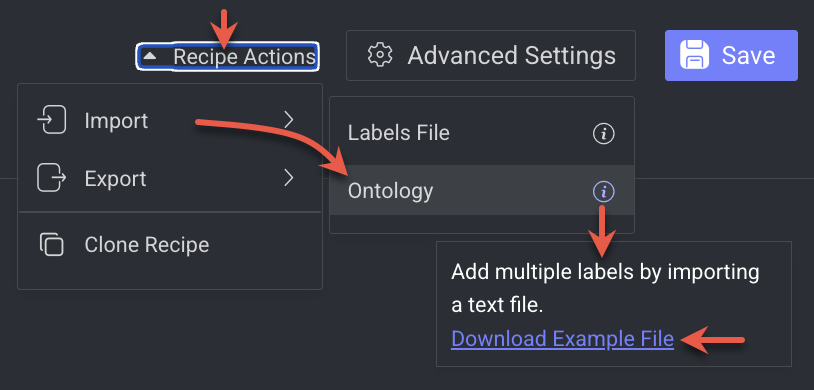
Click Recipe Actions → Import.
Hover over Ontology Info icon.
Click on the Download Example File. A
.jsonfile will be downloaded.Create your ontology list according to this format.
Upload Ontology File:
Click Recipe Actions → Import → Ontology.
Select the
.jsonfile and click Open. The ontology from the JSON file will be added to your recipe and will replace any existing labels.
Import Behavior
When importing from the Project Recipe, the selected labels and their associated configurations are copied into the target recipe.
Imported labels automatically include the same tools and attributes defined for them in the Project Recipe.
Only tools that are compatible with the target recipe's data type are imported. For example, LiDAR tools will not be imported into an Image recipe.
Users can modify the imported tools and attributes after the import is complete.
Child labels cannot be imported independently. If a child label is selected, its parent label is automatically included in the import.
Importing labels does not modify the Project Recipe.
The Project Recipe remains unchanged and continues to serve as the source configuration for future imports.
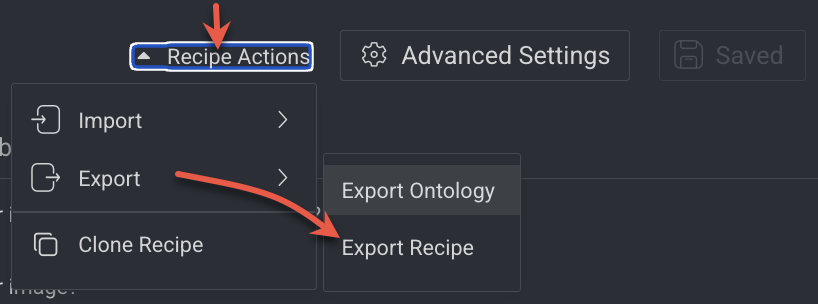
Export Ontology
Click Recipes from the left-side menu.
Search and open the recipe from the list.
Click Recipe Actions → Export → Export Ontology.

Click Save and Export if there is any update to be saved. Otherwise, a
.jsonfile with the name format<your-recipe-name>-ontology.jsonwill be downloaded. An example format is shown below:
{
  "id": "677bd5ee386ce472f2bd615d",     // Unique ontology ID
  "creator": "youremail@dataloop.ai",     // Creator's email (who defined this ontology)
  "title": "Ontology name", // Ontology name/title
  "roots": [                            // Root-level labels (top-level classes in ontology)
    {
      "value": {
        "tag": "zebra",                 // Internal tag name
        "displayLabel": "zebra",        // Displayed label in UI
        "color": "#6e69b6",             // Color assigned to this class
        "attributes": [],               // List of attributes (empty means none defined)
        "displayData": {}               // Extra display configuration (empty here)
      },
      "children": [],                   // Sub-classes or nested labels (empty here)
      "identifier": "zebra"             // Unique identifier for the label
    },
...
    {
      "value": {
        "tag": "tiger",
        "displayLabel": "tiger",
        "color": "#693f0b",
        "attributes": [],
        "displayData": {}
      },
      "children": [],
      "identifier": "tiger"
    },
    {
      "value": {
        "tag": "mouse",
        "displayLabel": "mouse",
        "color": "#6343ca",
        "attributes": [],
        "displayData": {}
      },
      "children": [],
      "identifier": "mouse"
    }
  ],
  "metadata": {                          // Metadata section for ontology
    "system": {
      "projectIds": ["85899006-7814-467c-abab-655d21b553d4"], // Associated project IDs
      "system": false                   // Indicates whether this is a system ontology
    },
    "attributes": []                     // Global ontology-level attributes (none defined)
  }
}
Export Recipe
Click Recipes from the left-side menu.
Search and open the recipe from the list.
Click Recipe Actions → Export → Export Recipe.
Click Save and Export if there is any update to be saved. Otherwise, a
.jsonfile with the name format<your-recipe-name>.jsonwill be downloaded. An example format is shown below:
For example:
{
  "id": "677bd5ee386ce49e92bd615e",        // Unique Recipe ID
  "title": "Recipe Name",                  // Name of the recipe
  "projectIds": ["85899006-7814-467c-abab-655d21b553d4"], // Associated project(s) using this recipe
  "creator": "youremail@dataloop.ai",      // Creator's email (who made the recipe)
  "ontologyIds": ["677bd5ee386ce472f2bd615d"], // Linked ontology IDs (defines labels/classes)
  "uiSettings": {                          // User Interface configuration for labeling
    "fastClassificationBar": true,         // Show fast classification bar
    "requireObjectId": true,               // Force annotators to set object IDs
    "requireParenting": true,              // Require hierarchical (parent-child) labeling
    "ocrMode": false,                      // Enable OCR (Optical Character Recognition) mode
    "showText": false,                     // Display text annotations
    "freeText": true,                      // Allow free-text input
    ...
    "allowDisplayTextBlocksHorizontally": false, // Restrict text blocks to vertical display
    "disableQaTaskAnnotationTools": false, // If true, disables annotation tools for QA tasks
    "enableBulkClassificationMode": false, // Enable/disable bulk classification
    "audioSpeakerNameByAnnotation": false  // Require speaker name per audio annotation
  },
  "metadata": {                            // System metadata
    "system": {
      "collectionTemplates": [],           // Predefined collection templates (if any)
      "script": {
        "entryPoints": {                   // Script entry points (custom logic)
          "main": { "_instructions": [] }
        }
      }
    }
  },
  "createdAt": "2025-01-06T13:09:02.000Z", // Recipe creation date (ISO 8601)
  "updatedAt": "2025-09-12T08:41:12.658Z", // Last update timestamp
  "instructions": []                       // Instruction set (empty in this case)
}
Clone Recipes
Option A: From inside a Recipe:
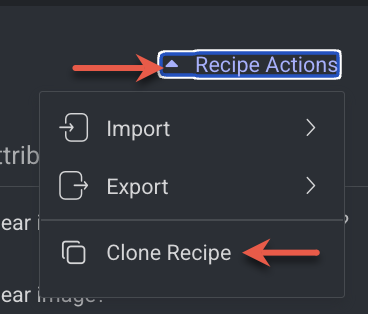
Click Recipes from the left-side menu.
Search and open the recipe from the list.
Click Recipe Actions → Clone Recipe. A Customize Clone popup window is displayed.
Select the list of labels and attributes to be included in the cloned recipe.
Click Clone Recipe. A successful message is displayed. To view it, click on the Show Recipe.
Option B: From the Recipes list:
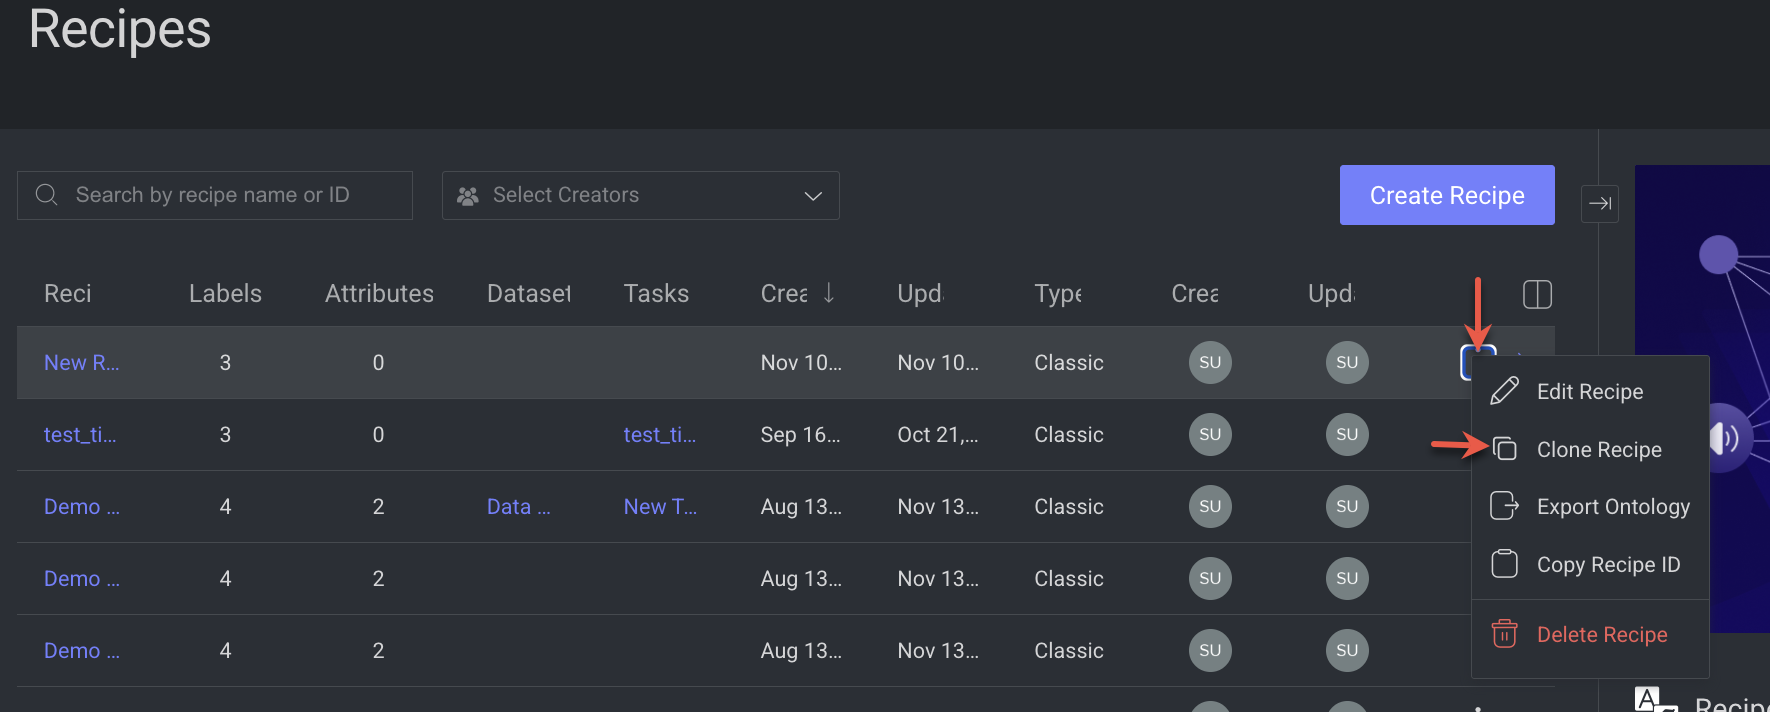
Click on the Recipes from the lift-side menu.
Locate or search for the desired recipe in the list.
Click on the ⋮ Three Dots and select Clone Recipe from the list. A Customize Clone popup window is displayed.
Select the list of labels and attributes to be included in the cloned recipe.
Click Clone Recipe. The cloned recipe will be created and listed. A
[Clone]prefix will be added to the cloned recipe’s name.
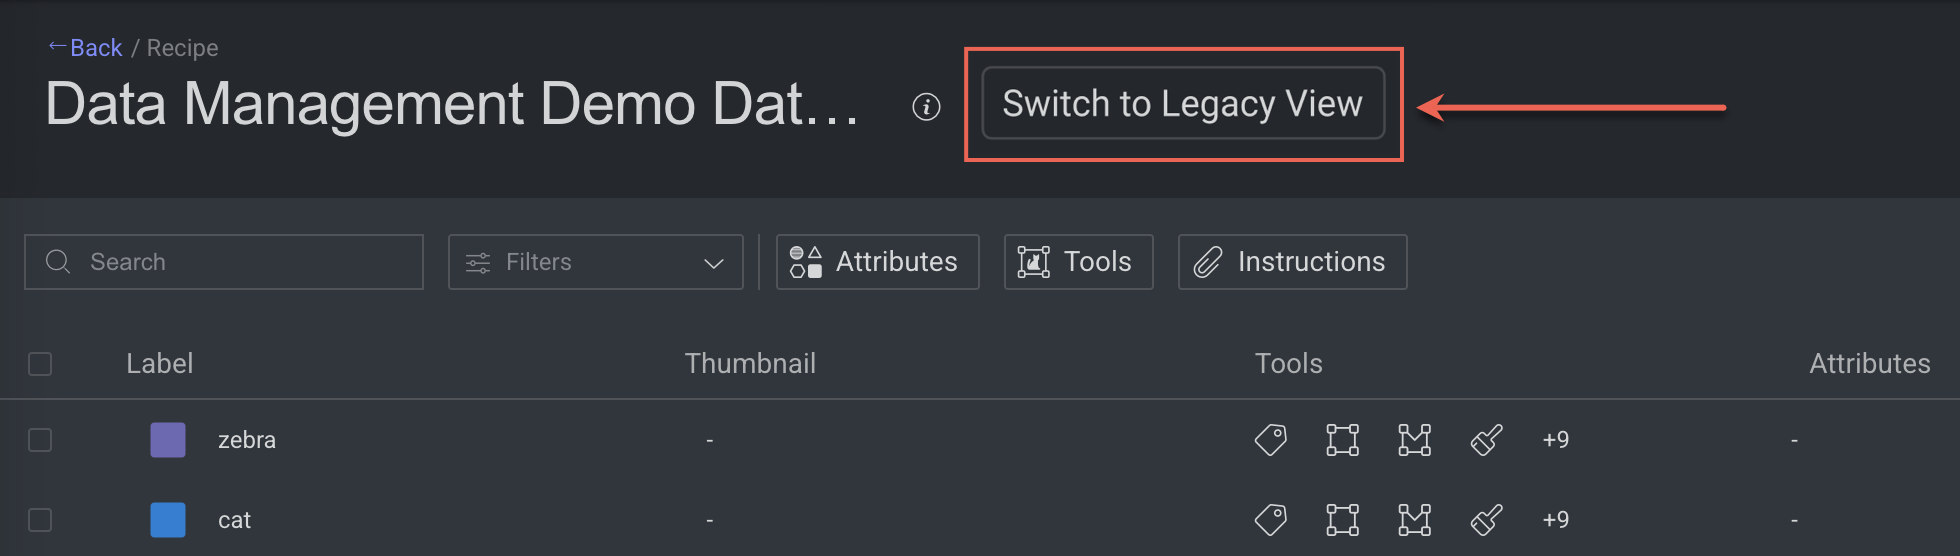
Switch to Legacy View
Users working with the new recipe can access the previous version (Legacy View) by selecting Switch to Legacy View.