DDOE allows you to create tasks based on different task types, such as Labeling, QA, Consensus, Quality, Honeypot, and Pipeline-generated tasks.
Create Labeling Tasks
A Labeling Task in DDOE is a defined unit of work that assigns a specific set of data items—such as images, videos, audio, or documents—to one or more annotators for labeling.
To create a labeling task, follow the steps below:
Information
Once each step is completed, it will appear in green with a checkmark next to it on the step list. A red exclamation mark is displayed if it is incomplete.
Open the Human Tasks from the left-side menu.
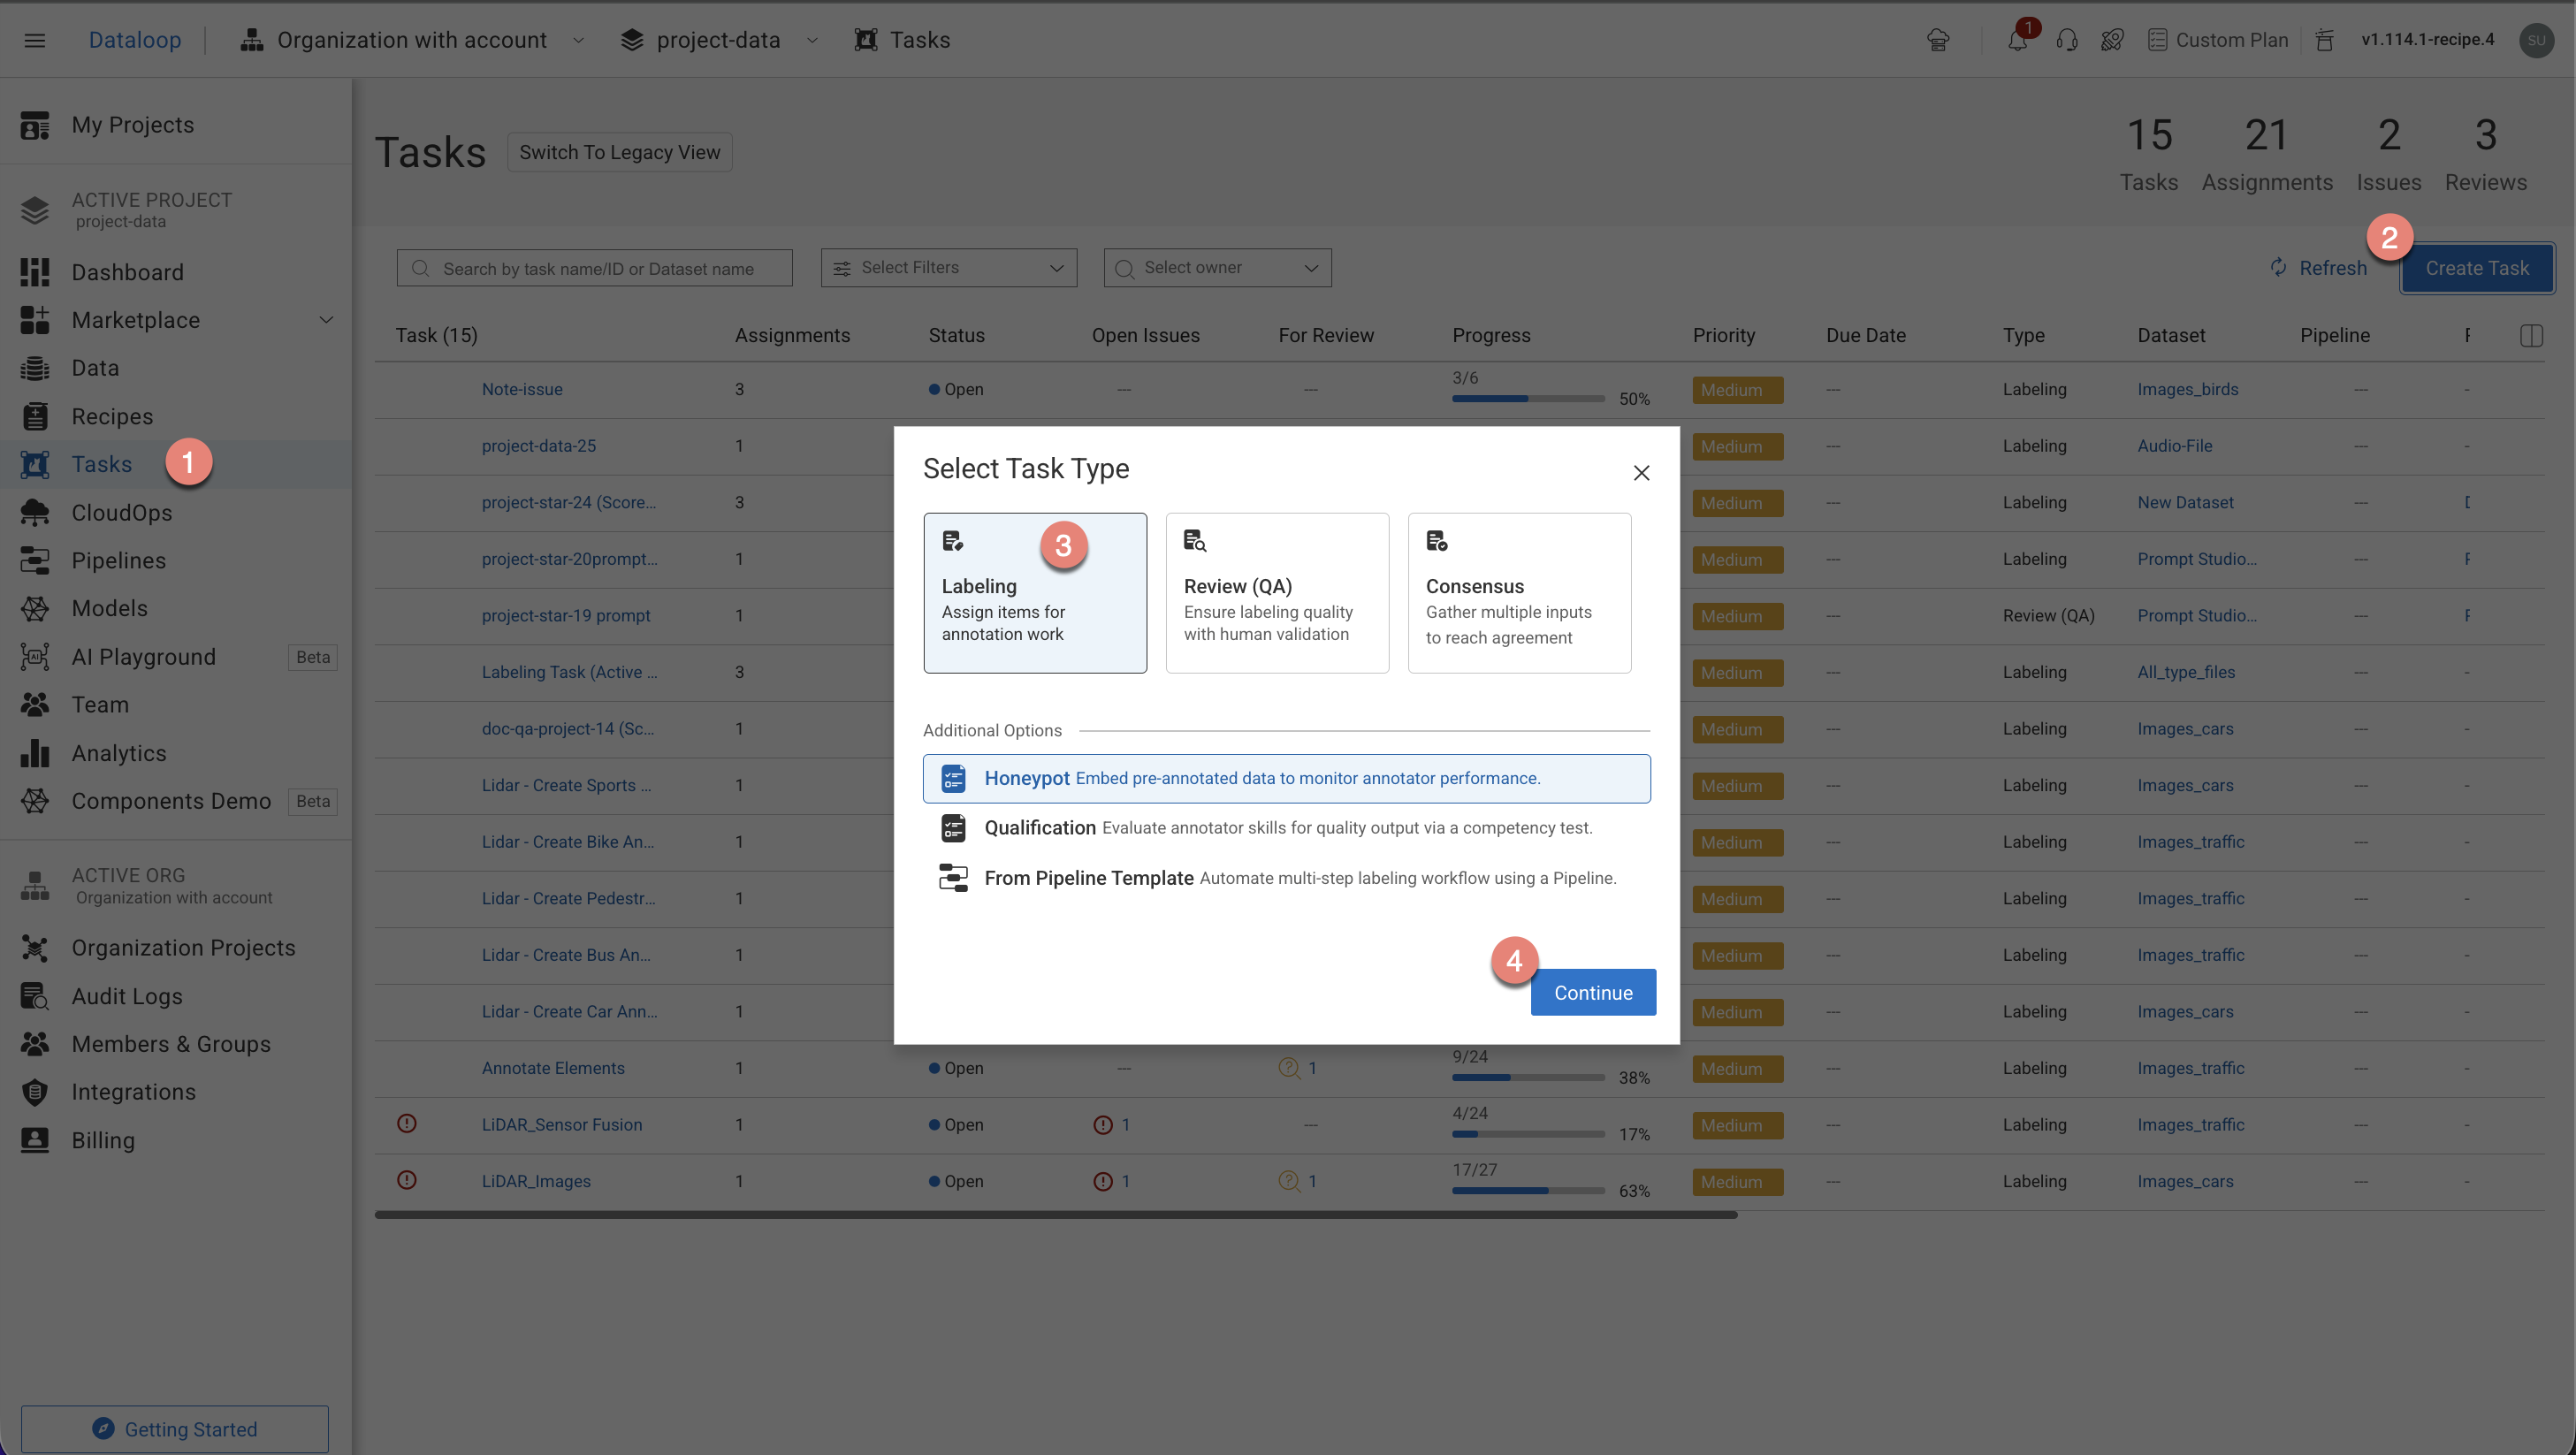
Click Create Task. The task type section popup is displayed.
Select the Labeling from the popup.
Click Continue. Complete the following sections to complete the task creation.
1. General
In the General section, enter or select the required details:
.png)
Task Name: Enter a name for your new task. By default, the project name + (total number of tasks + 1) is displayed.
For example, if the project name is abc and the total number of tasks you have already is 5, then the new task name is abc-6.Owner: By default, the current user's email ID is displayed. Click on it to select a different owner from the list.
Priority: Select a priority from the list. By default, Medium is selected.
Completion Due Date (Optional): Select a task due date from the calendar. If a date is chosen, you will have the option to lock the task once the due date has passed.
Lock Task After Due Date: When enabled, all assignments in this task will be locked for editing after the due date passes. Read here to unlock the task.
Click Next: Data Source.
2. Data source
In the Data Source section, enter or select the required details:
Select Dataset: By default, the selected dataset name is displayed, click on it to select a different dataset. The Dataset field is disabled, if you select any particular item(s) in the Dataset.
Note:
You cannot create a task with a dataset that contains items 80,000 or above. To use this dataset, sampling must be done or replaced with another dataset. You can view the number of total items on the top-right side of the page.
Filters (Optional) : Refine data selection by selecting specific folders, using DQL filters, or sub-sampling (randomly and equally distributed). The Folder or DQL field is Active only if you do not select any items in the Dataset.
Folders: Select a folder from the dataset, if available.
Selected Filters / Saved DQL Query: Select a filter or saved DQL query from the list, if available.
Data Sampling: Enter the Percentage or Number of Items for the task. Data sampling does not give an exact number of items.
Percentage: The option selects the items randomly. For example, if the percentage is 100% for four items, then 75% is for three items (It can be 1/4, 3/4, or 4/4) from the selected dataset. *
Number of Items: The allows you to select the items sequentially from the start of the dataset, not randomly.
Collections: Choose a collection from the list to filter and display items within the selected collection.
(Optional) WebM Conversion: By default, Enforce WEBM conversion of video items for frame-accurate annotations is selected.
Click Next: Recipe and Instructions.
3. Recipe and Instructions
In the Recipe and Instructions section, enter or select a recipe according to your task and data type. The number of Labels and Attributes is displayed on the top-right side of the page:
Recipe: Select a recipe from the list. A preview of the recipe is displayed on the right-side panel.
If there is no recipe, select the Project Recipe, or click Set Recipe to create an unique recipe for your task. Annotation Managers can select the Project Recipe and view its details through Quick Preview; however, they do not have permission to open or modify the Project Recipe.
(Optional) Click on the recipe drop-down, and click on the three dots of a recipe to view more actions like clone recipe, open the recipe in a new tab, etc.
(Optional) Click on the three dots from the right-side Recipe Preview for more actions like clone recipe, open the recipe in the editor, export ontology, etc.
Instructions (.pdf): The labeling instruction document is displayed, if available. Go to the Recipe section to upload a PDF instruction. You can select the page range accordingly.
Click Next: Statuses. The Statuses section is displayed.
4. Statuses
In the Statuses section, enter or select the required details
By default, the Completed status is selected. Click Add New Status to add a new status.
Click Next: Assignments.
5. Assignments
In the Assignments section, enter or select the required details:
Impact on Quality Tasks and Assignees
Switching the allocation method from Distribution to Pulling will disable all Quality tasks (such as consensus, honeypot, and qualification). Additionally, any existing task assignees will be cleared. You'll be prompted with confirmation dialogs to review and approve these changes before they take effect.
Allocation Method: Select one of the following allocation methods:
Pulling: The pulling distribution method means that annotators only pull a batch of items at a time and the maximum number of items in an assignment. You can make changes in the following fields if required: Pulling batch size (items) and Max items in an assignment.
Distribution: The distribution allocation method means that the items will be distributed in advance among users, equally or based on a custom percentage. The Auto Distribution option distributes the task equally among the users. By default, it is checked.
Available Users: Search for or select users from the list, and click on the Forward arrow icon to add to the
Assigned userslist.Assigned Users:
Search for or view the assigned users from the list. The allocation percentage is equally distributed if you select
Auto Distribution.Select and click the Backward arrow icon to remove them from the Assigned Distribution list.
Inactive users
Inactive users are grayed out and disabled for redistribution, and available for reassignment.
Click Create Task. The newly created labeling task will be available in the tasks list.